Birthday Wishes from the Cutest Dragon
Hi All –
Hope you had a wonderful, long, relaxing Memorial Day weekend! I had a few extra days off from work so I was able to get crafty in between my relaxing and hanging with my husband and finally getting to see the latest Avengers movie.
Today I wanted to share a card with you that I made for my nephew, Easton’s birthday which was yesterday. We celebrated with him today at a local amusement park so I was able to create this cute card for him over the weekend.
For the card I used the Blow Me Away Stamp set from Sugar Pea Designs. I was smitten with this stamp set from the first time I saw it. The dragon is so terribly cute and it comes with an assortment of other stamps and sentiments. Several of the stamps can be used in a mask format to have him holding the various items depending on what theme you’re trying to achieve.
Because I knew I was creating a birthday card I wanted to use the little piece of cake that came with the stamp set. I created a mask by stamping the dragon on a piece of Post-It note paper and then carefully cutting him out. I positioned my Post-It with my cut out dragon onto a piece of Neenah Solar White cardstock. Then I inked up the little cake stamp and stamped him over my mask (the claw of the dragon) and onto the Neenah cardstock. Below is a picture of what my dragon looked like on the Post-It note. As you can see, I stamped him so that his back was on the part where the sticky line is on the back side of the paper for positioning purposes. I only cut out half of his body which was all I needed to make the mask work.
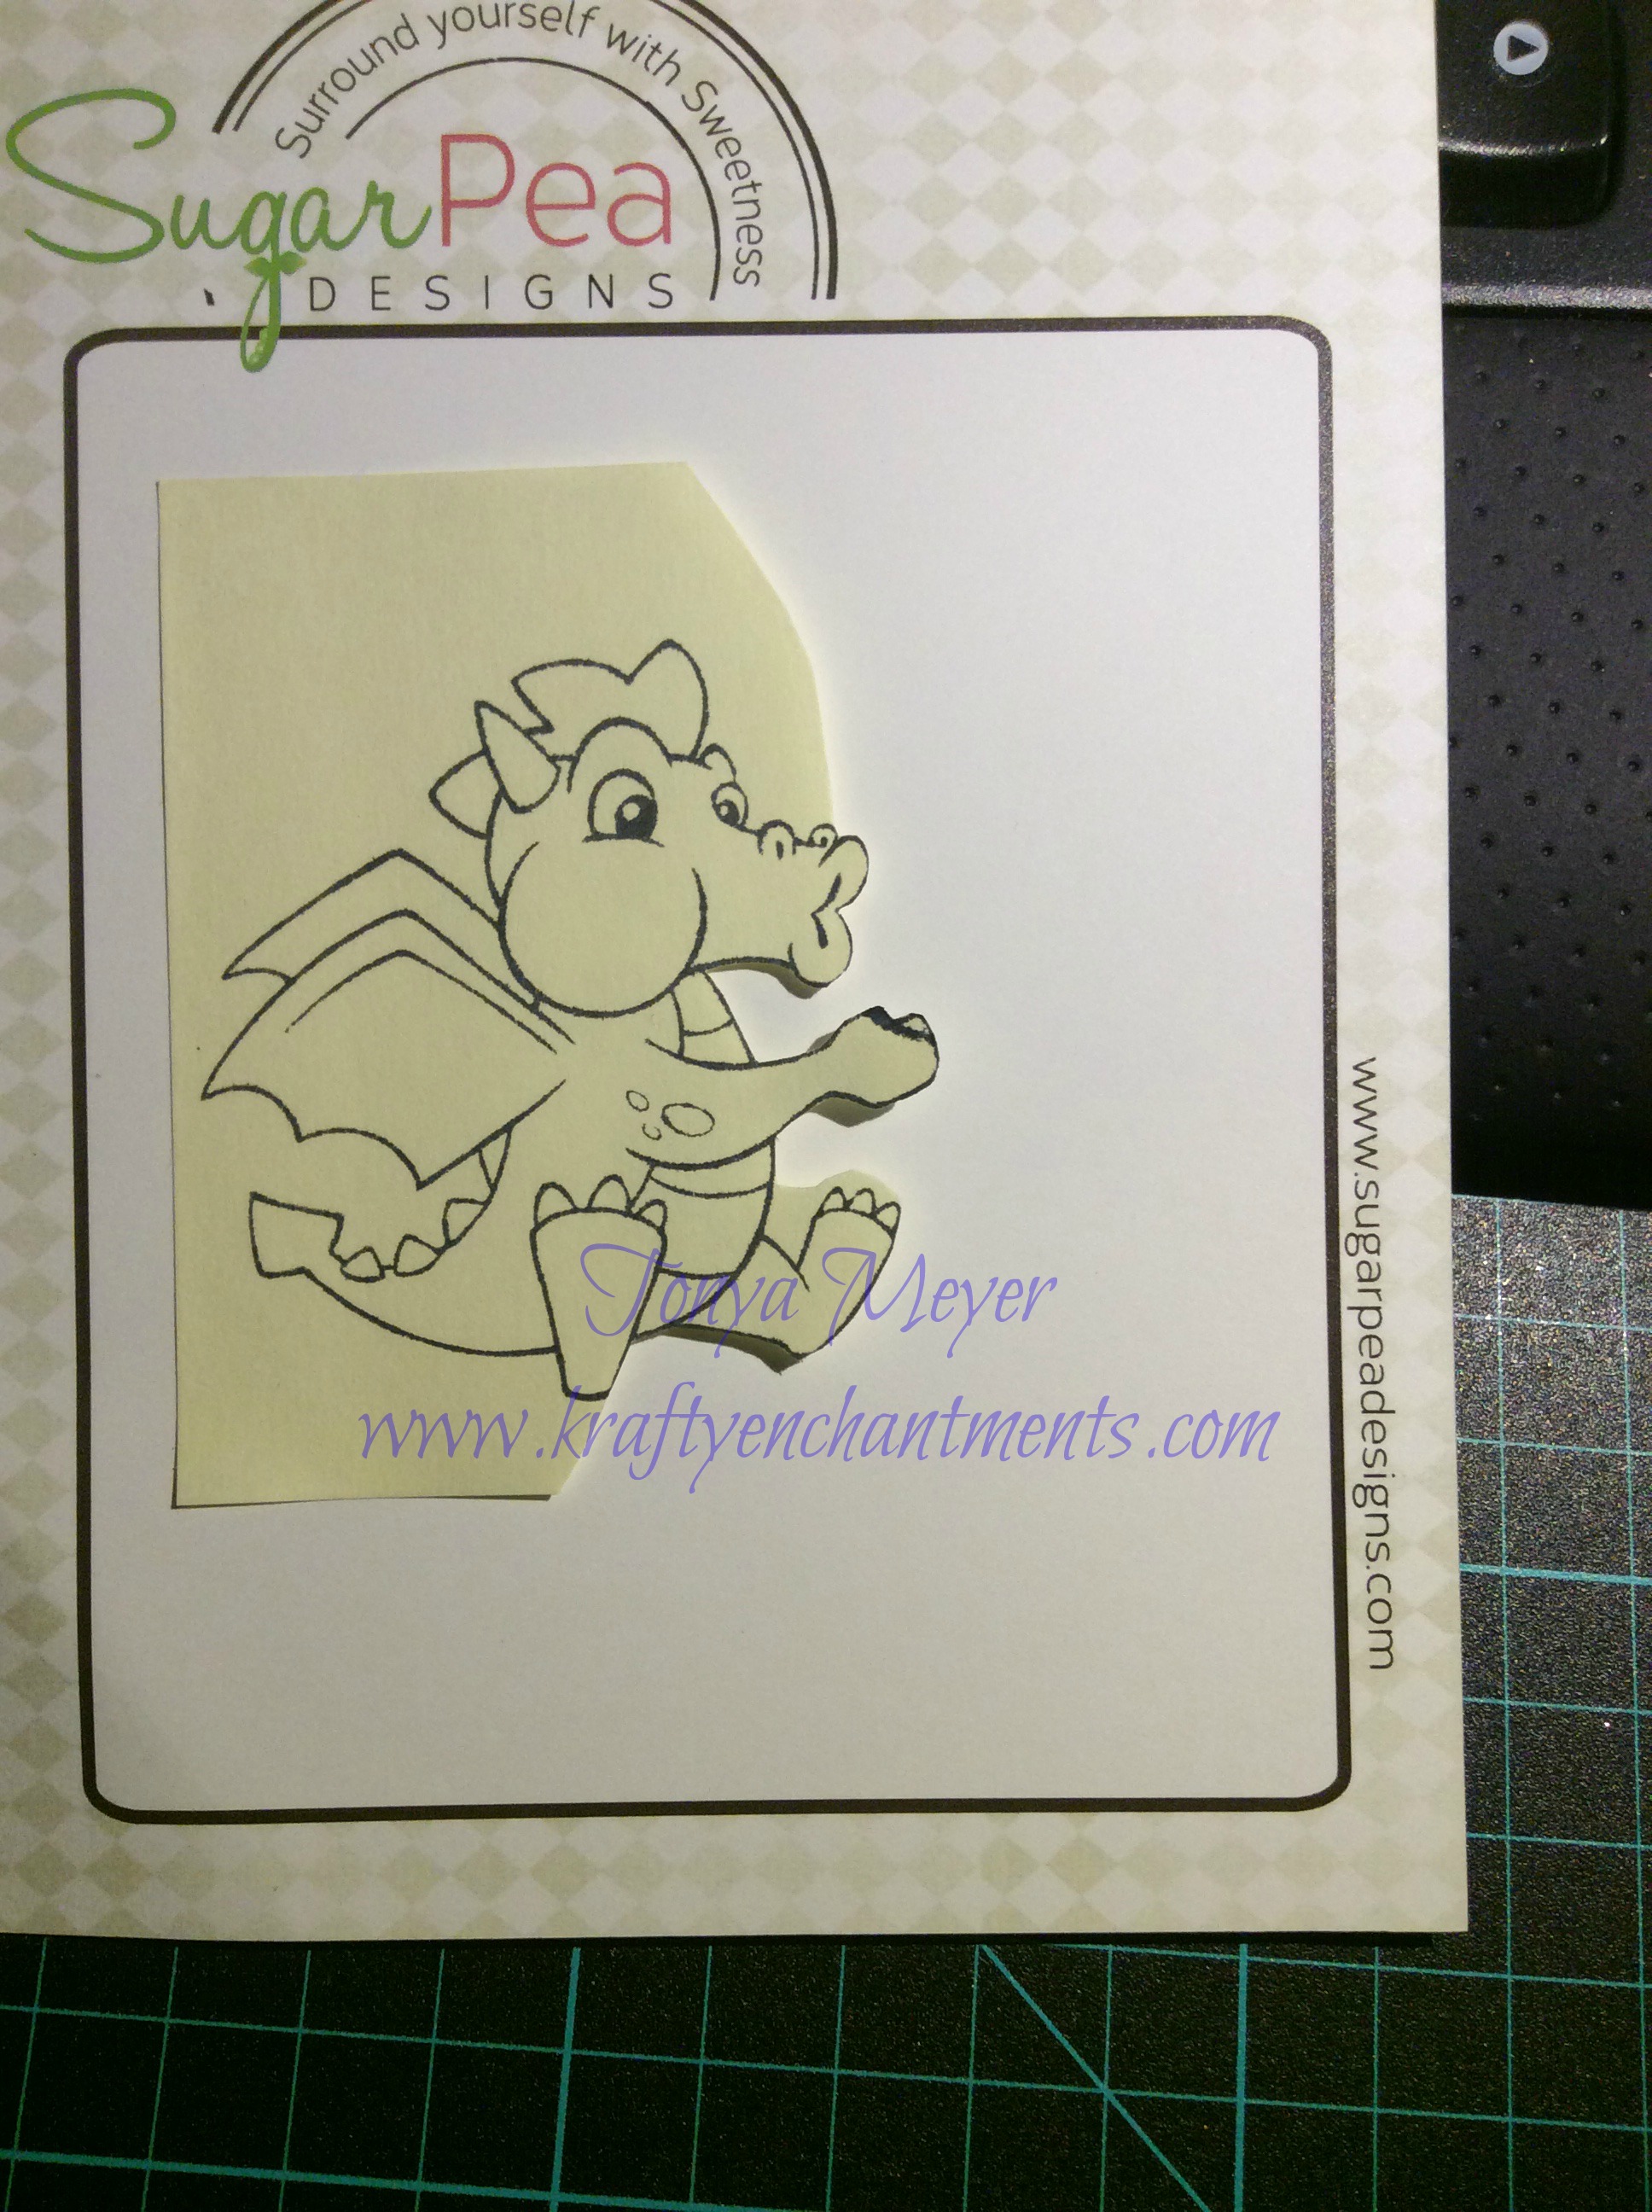
Mask created of dragon from Blow Me Away stamp set
Once my piece of cake was stamped, I inked up the dragon and positioned him where his claw would be holding the cake image. Obviously using clear stamp blocks makes this process much easier as you can see where your stamping the image. Then voila – you have a dragon holding a piece of birthday cake ready to color. I kept the mask that I made of the dragon as it can be reused in the future for other things.
Next I was on to coloring. Since I was making this card for my nephew I wanted it to have a boy theme and boy colors. I’m a girlie-girl so I’d probably normally color it in purple and teal so it would be bright and pretty. Obviously boys aren’t into bright and pretty but I still wanted it to be cheery. I actually referred to the colors that one of the design team members for Sugar Pea Designs used. I really liked the orange and green colors that were used by Kim O’Connell but because she didn’t list what colors she used I wasn’t sure where to start. I found a nifty chart online called the Copic Color Matching Chart. This chart basically allows you to color swatches of color from your Copic markers and then use a hole punch on the little round circle in the swatch so that you can hold it up to a picture/photograph to get a fairly close color match. I printed a picture of the orange and green dragon and colored a few random swatches of color in no particular order and found some that were fairly close to use for my image. You can see my samples below trying to get a close match to the green and orange colors.
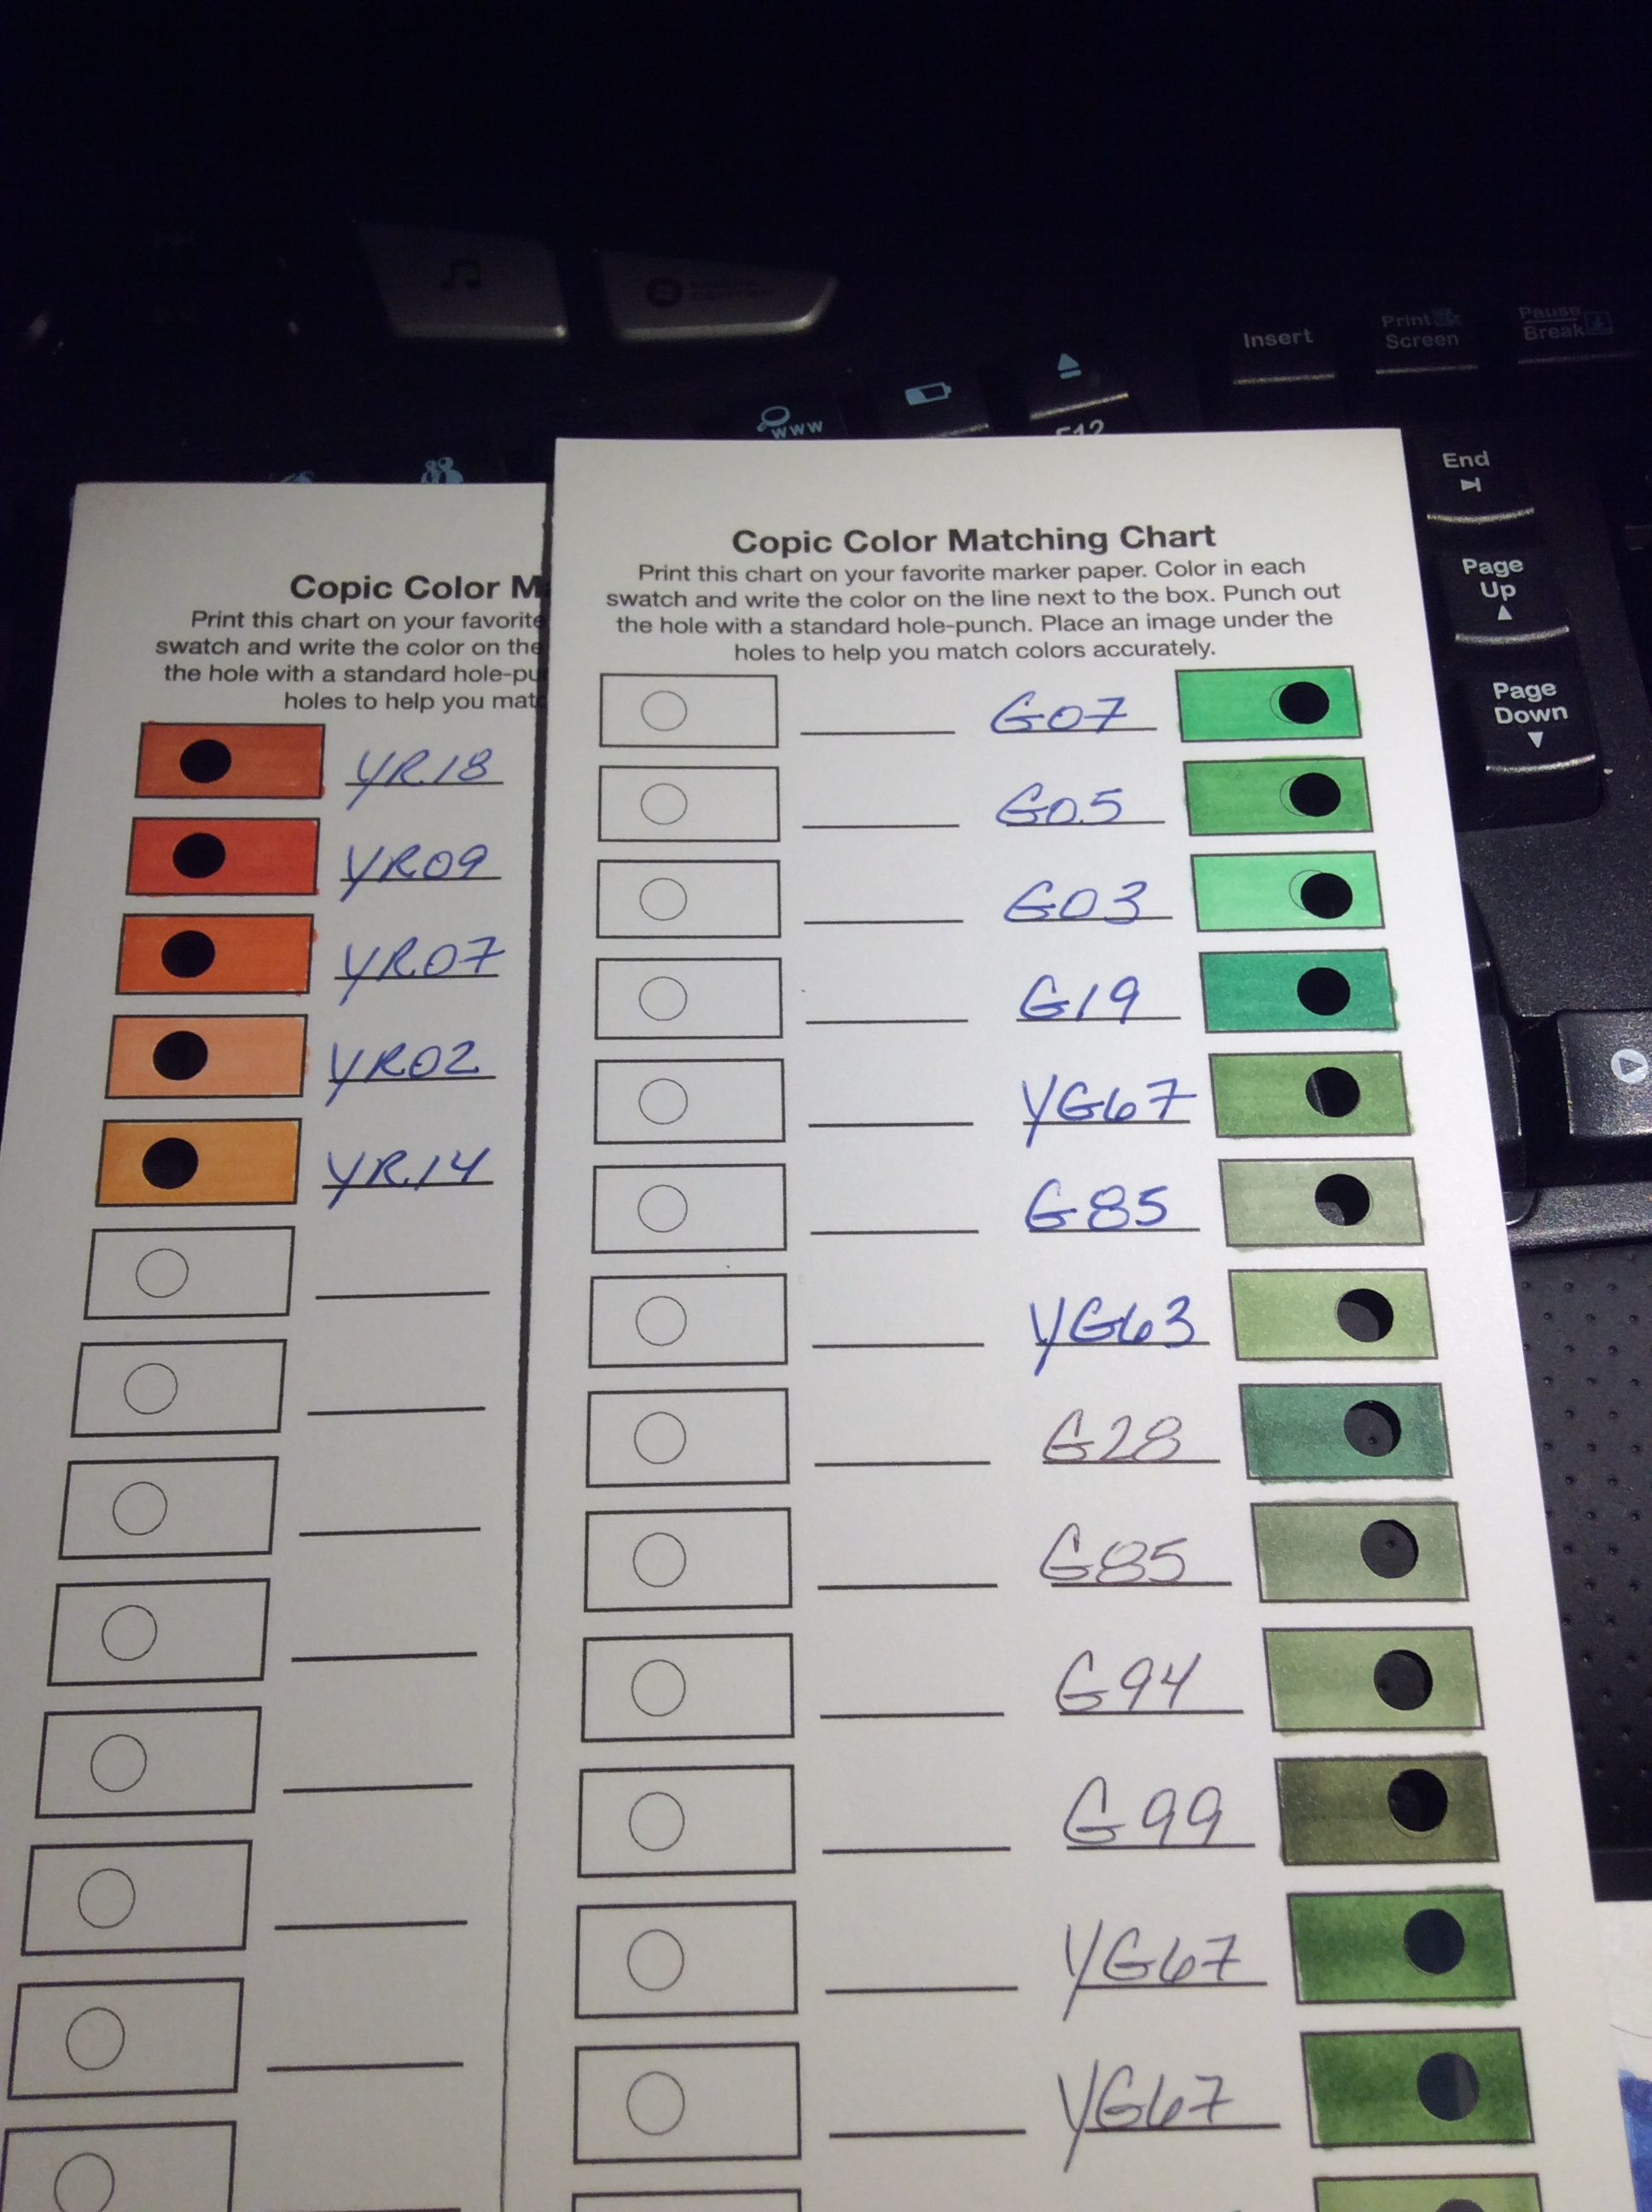
Copic Color Matching Chart – eek I have some duplicate greens I discovered!!
This color matching chart was very handy so I do believe I will be creating a full set with all my Copics in order to be used as a reference in the future. It could very easily be used for any other markers like Spectrum Noir, Tombo or even Tim Holtz Distress Markers as well. I think it could even be used with water color markers if you could print it to water color paper.
To create his sort of scaly look I added some random dots using the colorless blender and then added back in some dots of the various colors of green I used for his skin.
After my dragon was colored, I fussy cut it out and ending up adding a clay green color to the white space of my image to make it blend better with my paper selections for my card design. Then I added a layer of clear wink of stella to the green portions of his body to make him look shimmery. I took a close up shot of that with my flash on so you could see how cool he looked.

Close up of colorless blender detail and shimmer from the Wink of Stella
To build my card I cut a piece of kraft cardstock, slightly wider than A2 size because the width of the die cut front. I used the Die-namics Happy die which measures 1 3/8 tall by 5 ¾ wide to create the die cut word HAPPY on the front of the card. Then I cut a piece of polka-dot paper I had from a Michaels 6 x 6 paper pack to be the same size as my card front and glued it in place. I used the Bo Bunny sentiments stamp sent to add the words Happy Birthday along the bottom edge of the card.
I placed my colored dragon above my die cut word happy and used some dimensional foam to make him pop off the card. Next I stamped the words Make a Wish from the Blow Me Away stamp set next to him.
For the inside of the card I again used the Ready, Set, Blow sentiment from the Blow Me Away stamp set and restamped the little piece of cake on the inside.
Here’s a look at the finished card.
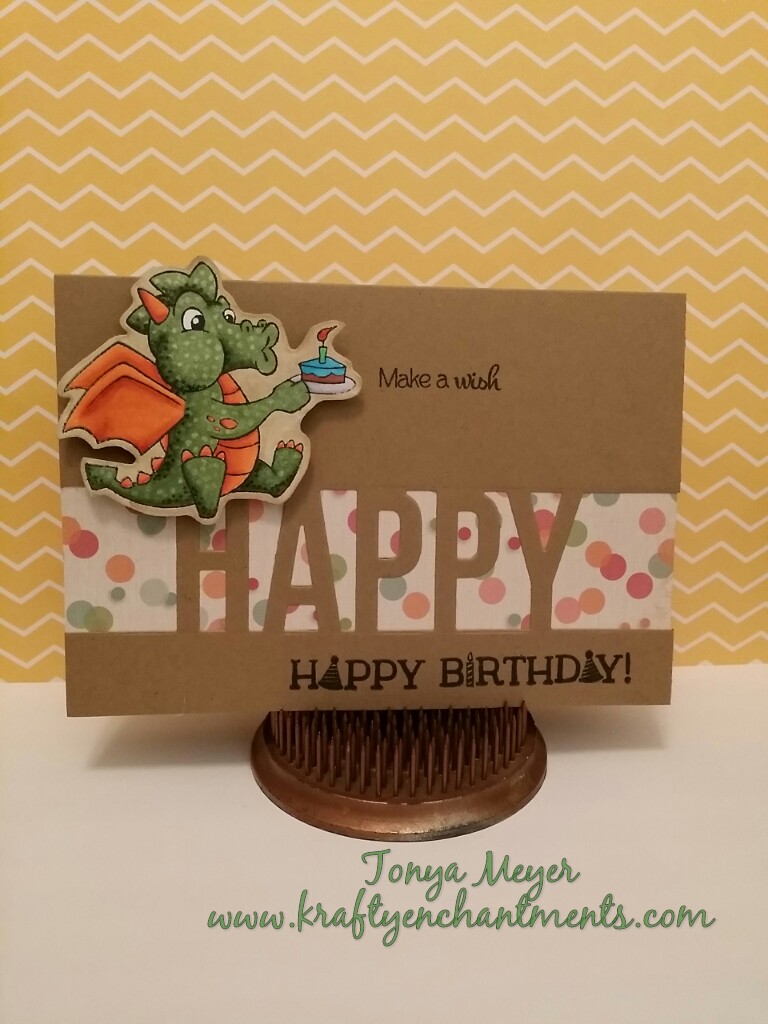
Finished card
I’m pleased as punch with the outcome of this cute card and I’ll be going back to my dragon again for other card creations.
Hopefully you enjoyed this card creation!
This week I plan to begin my final class work for my Kit and Clowder skin & hair class. Seeing the final project I have a challenge ahead of me so I anticipate that it may take me a couple of tries to get the final project colored well enough to successfully finish my class. We’ll see.
I’m also beginning another brief online class this week over at Online Card Classes called Mask-erade, which is all about teaching various methods of masking techniques. These are similar to the masking I used to create the dragon holding the cake for today’s card. I’m looking forward to learning some new ways of creating masks that I can use to expand my card creations.
Additionally, I’m working on a geeky cute, sassy project for my husband that I should be able to share with you later this week. That also features a recent stamp and die release from Sweet Pea Designs.
Have a wonderful week and do something krafty!

