Beauty of Nature
Hello, my crafty friends and welcome back!
I am still in Spring mode and very much loving the stamps and dies from the Dare 2B Artzy Countryside Floral Collection. There are so many wonderful images to color and the papers are fabulous.
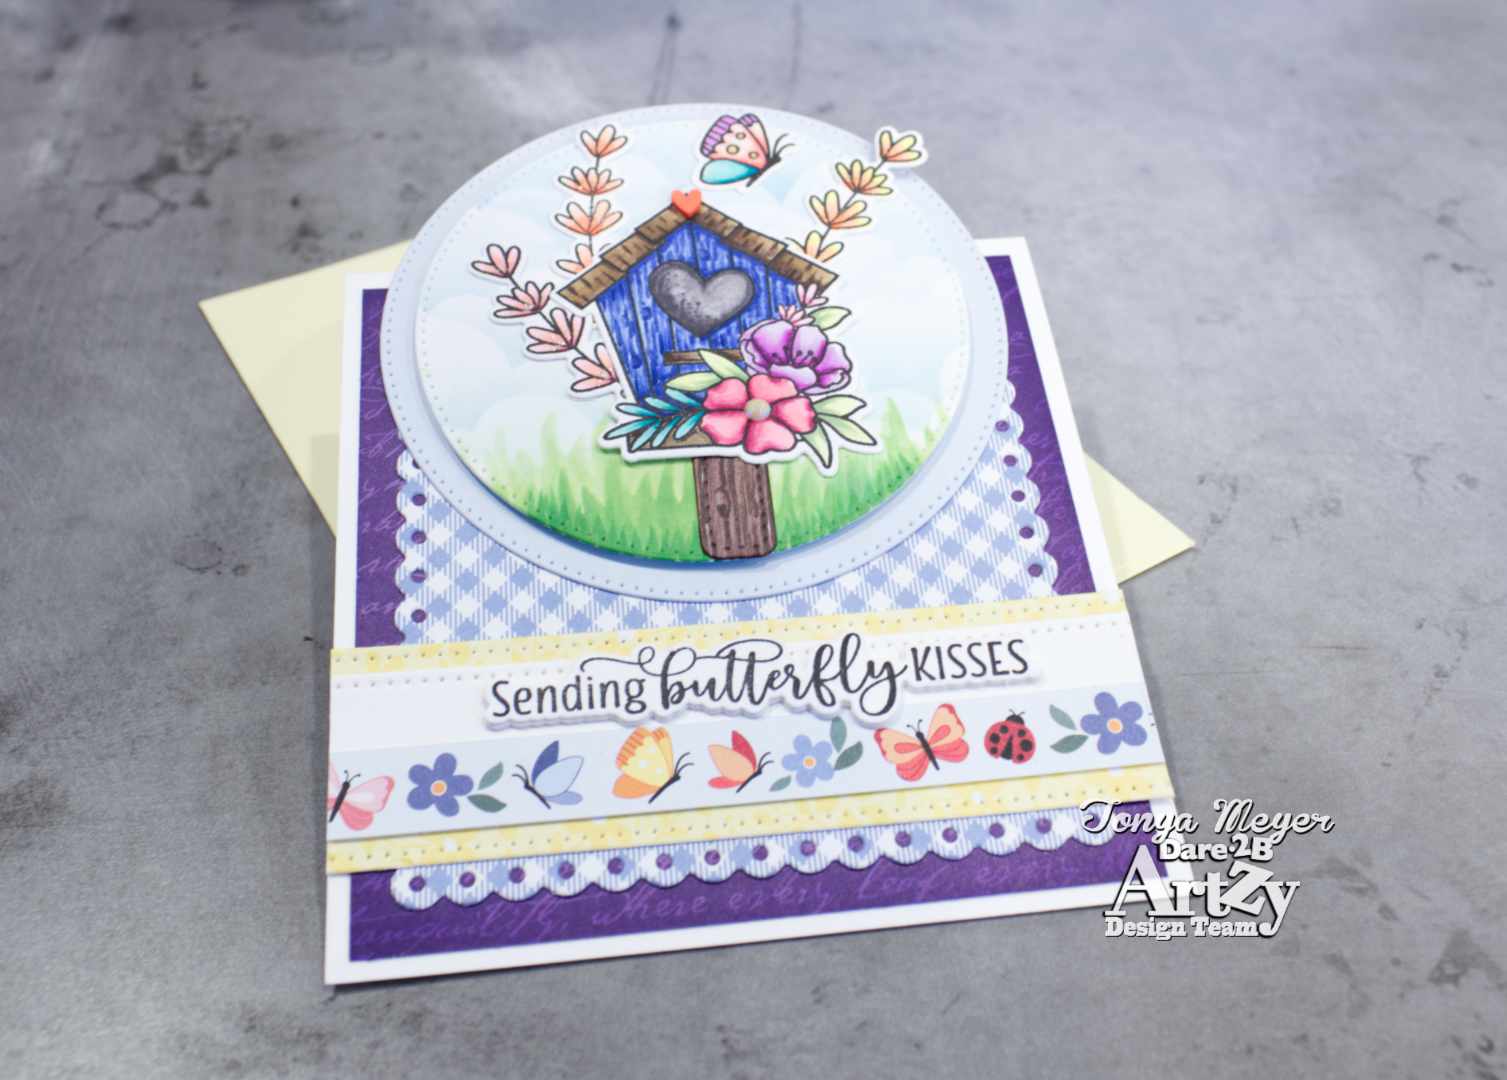
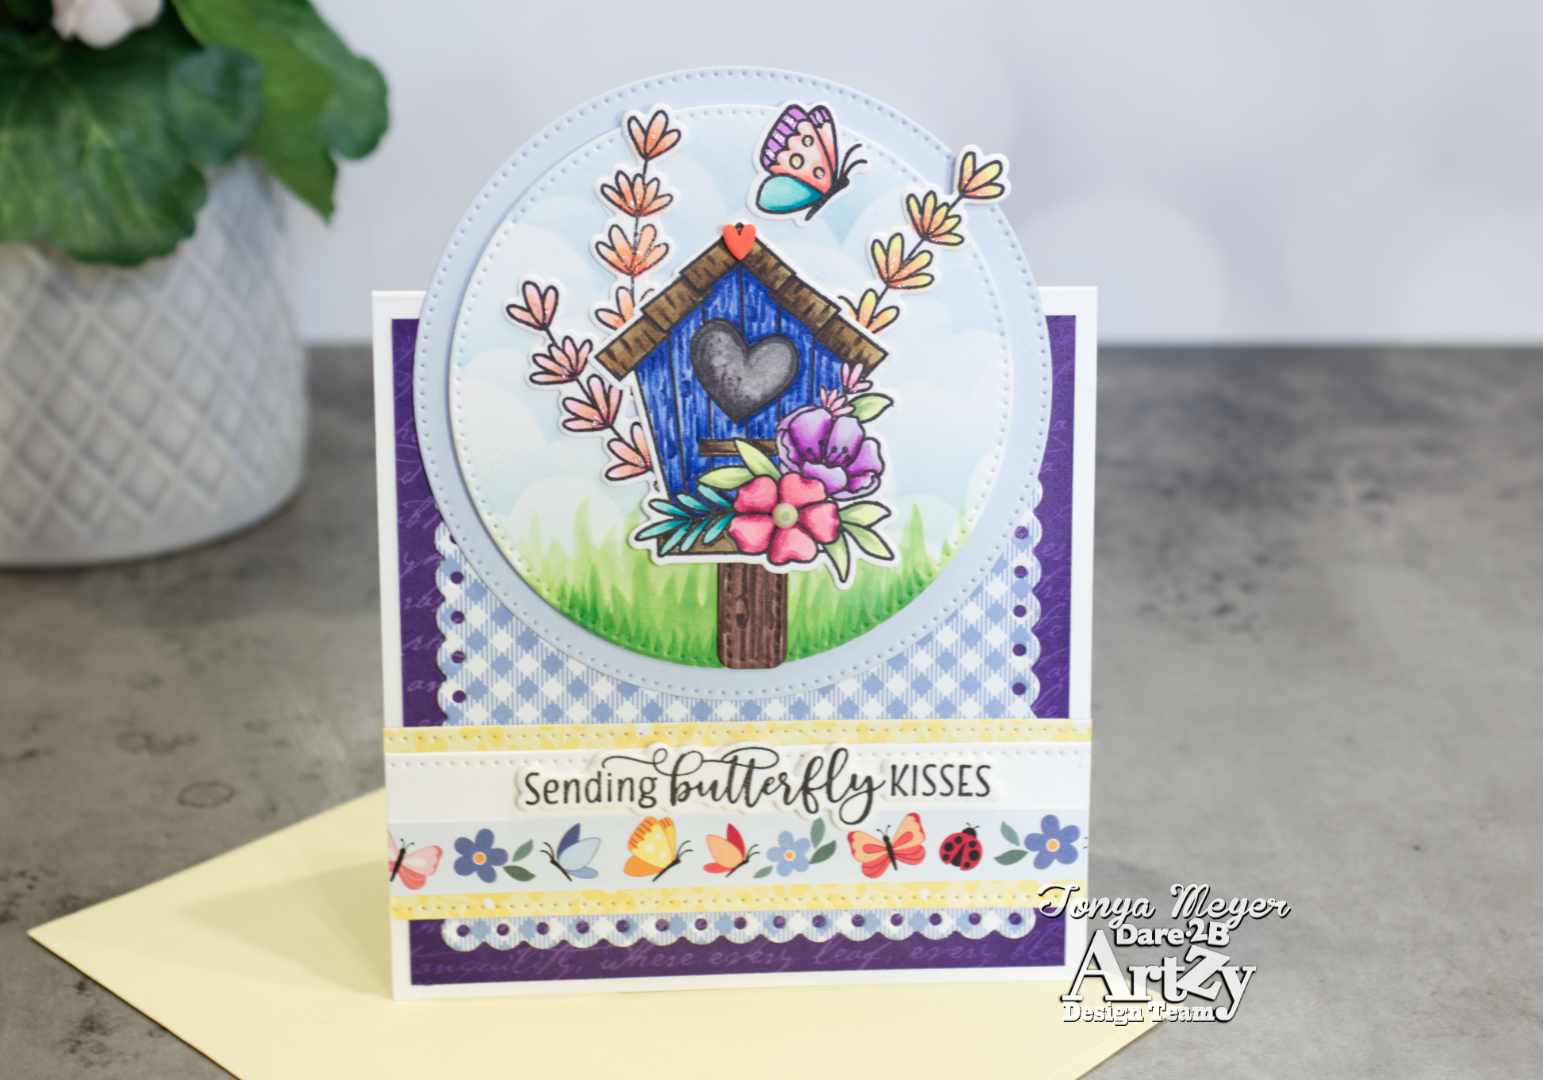
Today’s card was inspired by a card made by Crystal O. Minkler with Unity Stamps Design Team. She made an adorable card called a Tent Topper. I thought this would be fun card layout to try with the adorable birdhouse from the Beauty of Nature stamp and die set from Dare 2B Artzy.
I started by using the new Clouds and Raindrops stencil from Dare 2B Artzy. I love that this stencil has multiple options on one stencil which is so convenient. You can stencil on clouds in different shapes on 3 sides, then it has some grass on the 4th side, the center of the stencil has some raindrops, a single cloud and a nice oval circle. There are also some cloud masks that come with the stencil. Having multiple stencil options from just 1 stencil is so awesome and saves me from having to search for the stencils I need for a card project.
Using the stencil, I blended some Tumbled Glass Distress Oxide ink onto some Neenah 110lb Cardstock.
I cut the stenciled background out with a 3 ½ inch Double Dot Circle Framelet Die.
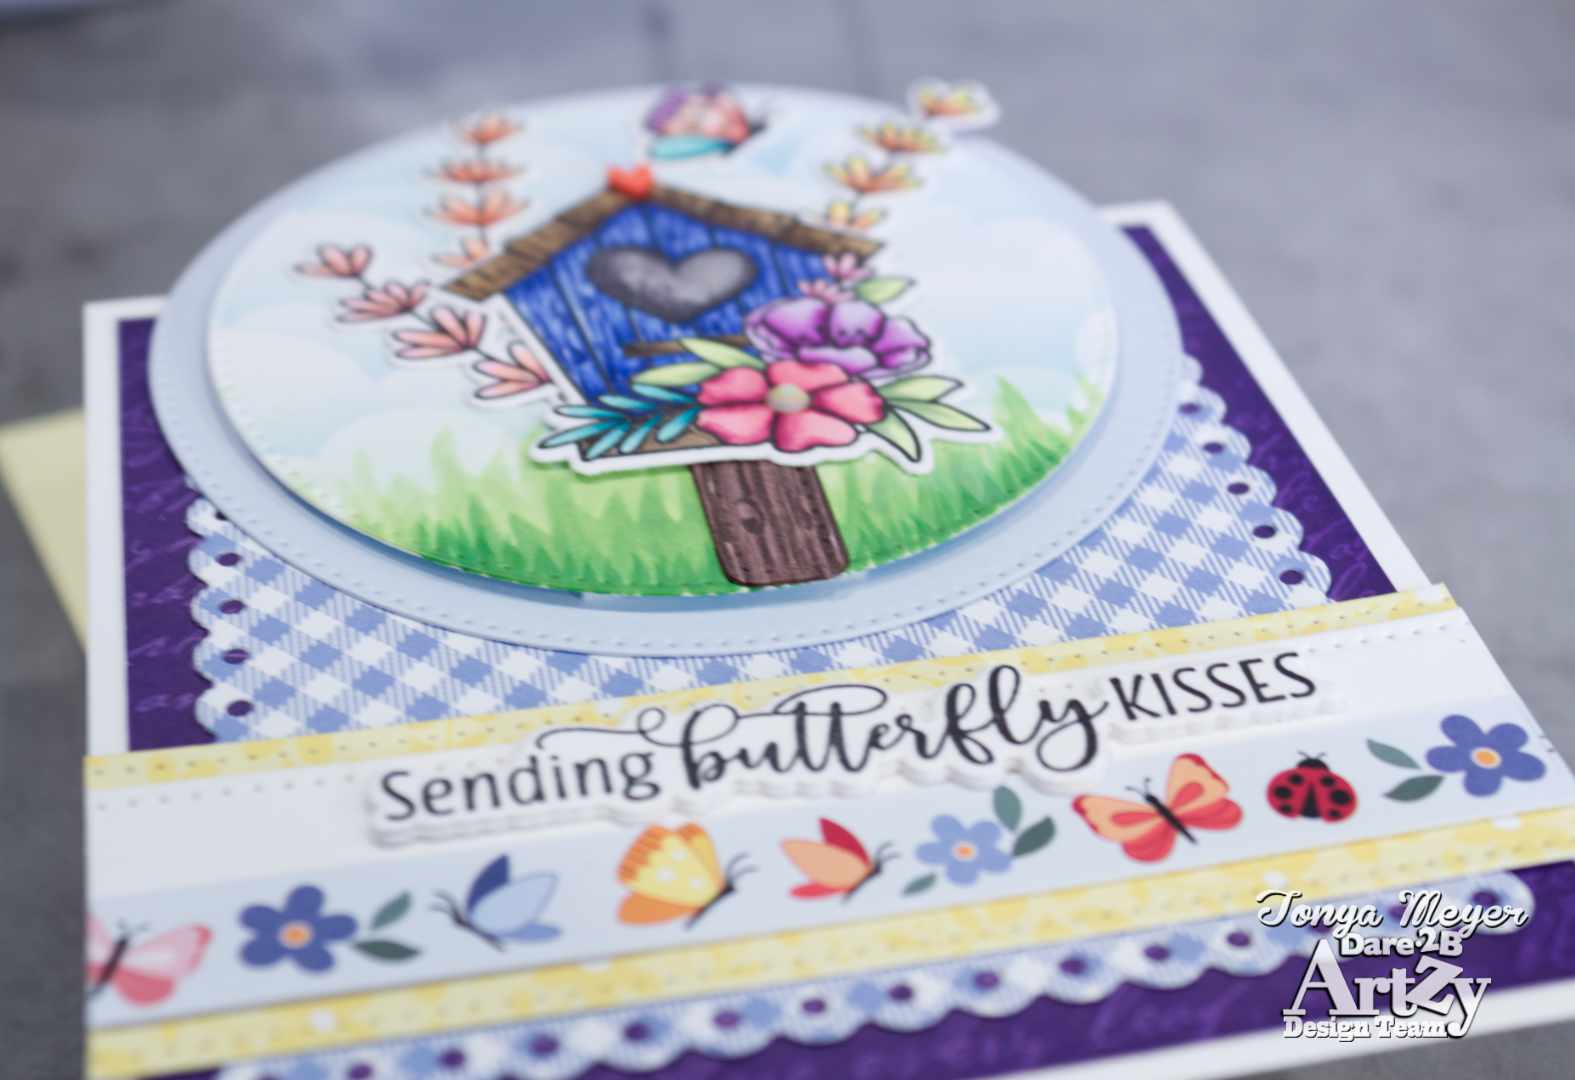
Once the stenciled background was cut out, I used the 4th side of the stencil to add some grass to the bottom of the circle. Once I had a couple of layers of stenciled grass, I used an alcohol marker to draw in a few more whisps of grass in the foreground to give it a bit of depth.
Next, I stamped the birdhouse, three flower sprigs and the butterfly. I colored all the images with my Sketchmarker Brush Pro markers and die cut the images using the coordinating dies. I added some wood texture to the birdhouse and added some little notches on the roof to give it a bit of added texture and interest. I tried to keep my flower colors bright so that they would stand out.
To create the pole to mount the birdhouse on, I used a piece of scrap cardstock, and I used a small square die to trace around with a pencil. This would just give me a space to color in as a guideline. Using several colors of brown markers, I began to color in the square adding lines and knots like you would find in a piece of wood. Once I was happy with the way it looked, I used the smallest die from the Mini Borders Die and cut out a section that I had colored.
I placed my colored images onto the circle background and figured out the layout and tucked the extra floral sprigs behind the birdhouse. Once I was happy, I used some liquid glue to adhere everything into place.
I cut a second Double Dot Circle Die using some pale blue cardstock from my stash that measured 3 ¾ inches and layered my birdhouse scene on top of it with Score Tape.
For my card base, I cut a 110lb piece of cardstock that was 4 ¼ x 8 ½ inches long and scored it on the long edge at 4 ¼ inches to create a square card.
I cut a piece of the Picnic in the Park paper to 4 1/8 and ink blended on some Dare 2B Artzy Wild Orchid ink to darken the edges of the paper. I added that to my card base with some Score-tape.
Next, I used the Scalloped Square from the Gift Bag & Box die and cut it from some of the Secret Garden paper. I just love the gingham in this paper collection, it’s so fun! I layered the fun scalloped piece over the purple from the Picnic in the Park.
Using the largest rectangle from the Slim Mini Wavy Layers die, I cut a piece of the yellow cardstock from the Wildflowers in Bloom paper. I had to run the die through a second time by sliding the die downward on my original cut piece of paper and aligning the dots into the previously cut dots until you feel the die sort of click into place on the paper. This allows me to cut the strip down to 1 ¼ inch wide since I don’t have a die that is that width. I cut a second strip using the same method from some plain white cardstock to be just under an inch wide. I adhered the two strips together with some liquid glue. Then I added the trim piece from the Secret Garden paper pack that has all the pretty butterflies, flowers and a ladybug. I added that piece to the bottom of the white layer.

I stamped the sentiment, Sending Butterfly Kisses with Dare 2B Artzy Totally Black ink and die cut it with the coordinating die. I cut two additional layers to add more dimension to the sentiment without using dimensional foam.
I added the sentiment to the layered strips near the bottom of the card base.
I trimmed the layers of cardstock with the sentiment to be flush with my card panel since there was a bit of an overhang.
To ensure my card will fit into a 4 ½ x 5 ½ inch envelope, I cut a piece of cardstock and layered it behind my panel to eyeball the placement of the scene before gluing the bottom 2/3 of the circles to the front of the card panel.
For some finishing touches, I added some Gelly Roll Stardust pen to the flowers, I added a yellow gem to the center of the large pink flower and a little red clay heart on the peak of the roof of the birdhouse.
Thank you for stopping by today! For your convenience, I have provided links to all of the products used in today’s card down below.
Have a wonderful, crafty day!
Hugs,
Tonya
https://linkdeli.com/widget.js?id=f5e8378456858c916708

