Christmas cards in a Flash
Hello and welcome back! Hope everyone had a wonderful, relaxing Thanksgiving! I had a nice extended vacation so it was nice to relax with my husband and my mom.
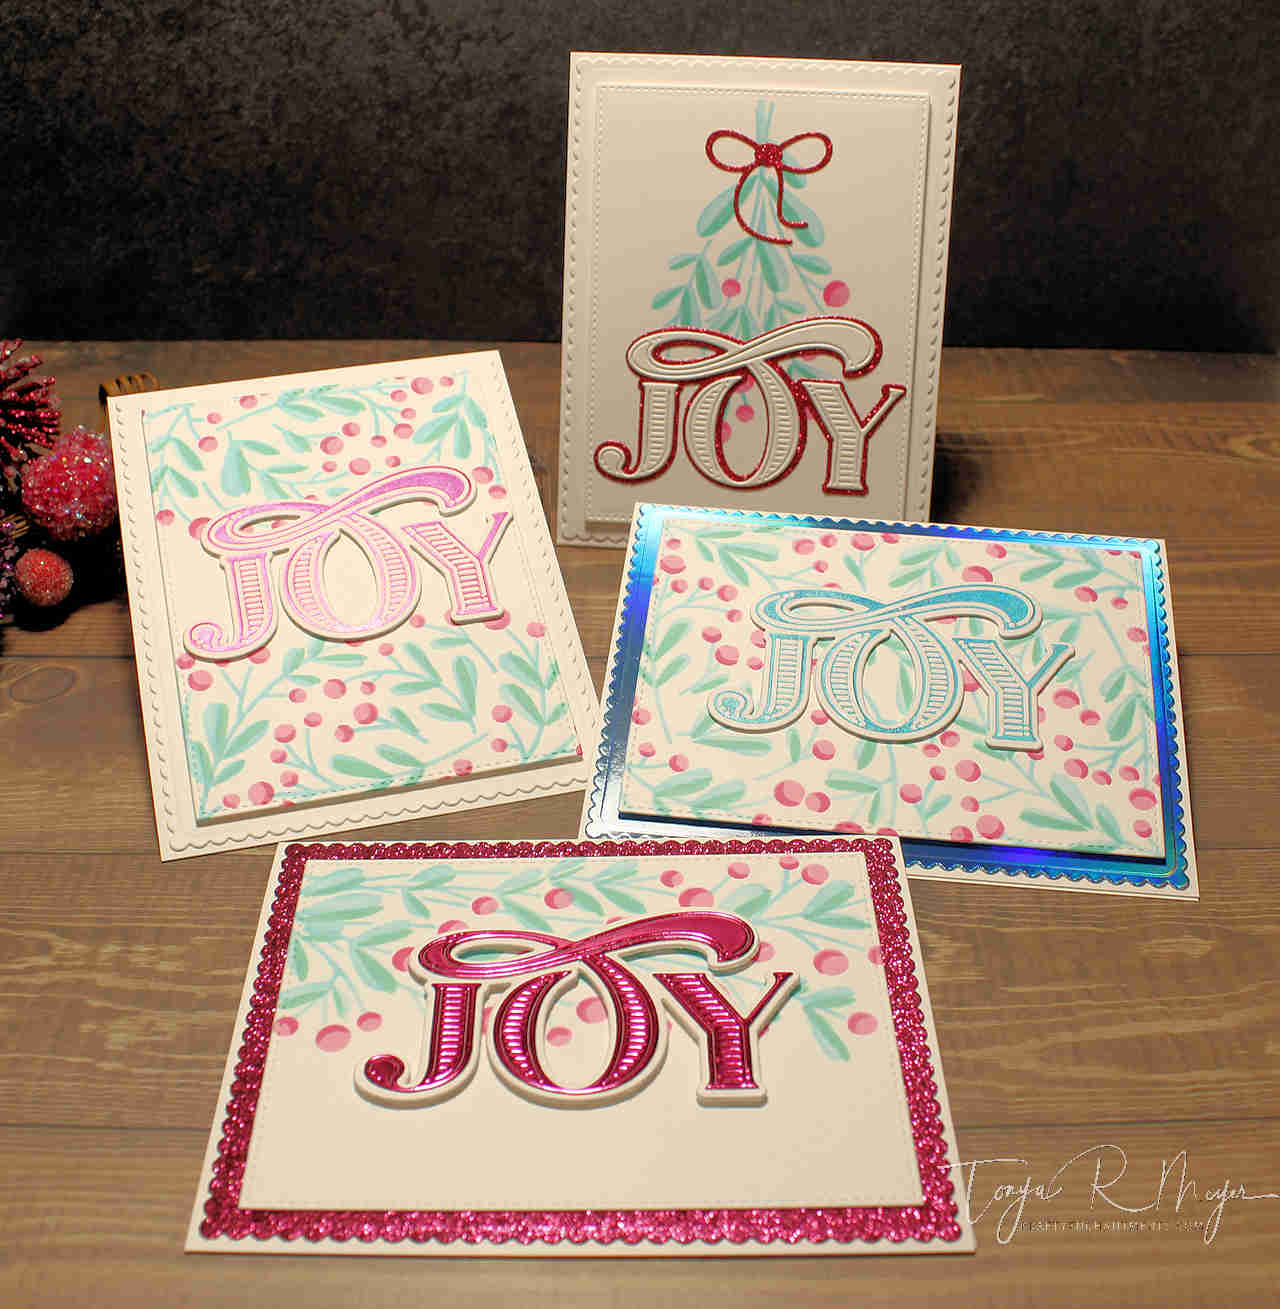
I’m back today with a stencil set that will have you mass producing your Christmas cards in all of the colors! I’m playing with the Taylored Expressions Create-in-Quads Layering Stencil – Mistletoe. This is a large 8 ½ x 11 stencil set that has 4 sheets of stencils that allows you to create these awesome layered backgrounds. When you cut these down, it gives you 4 different A2 sized card bases. This is such an awesome stencil set; I can’t say enough good things about it. How awesome is it to be able to mass produce your Christmas cards so quickly and easily.
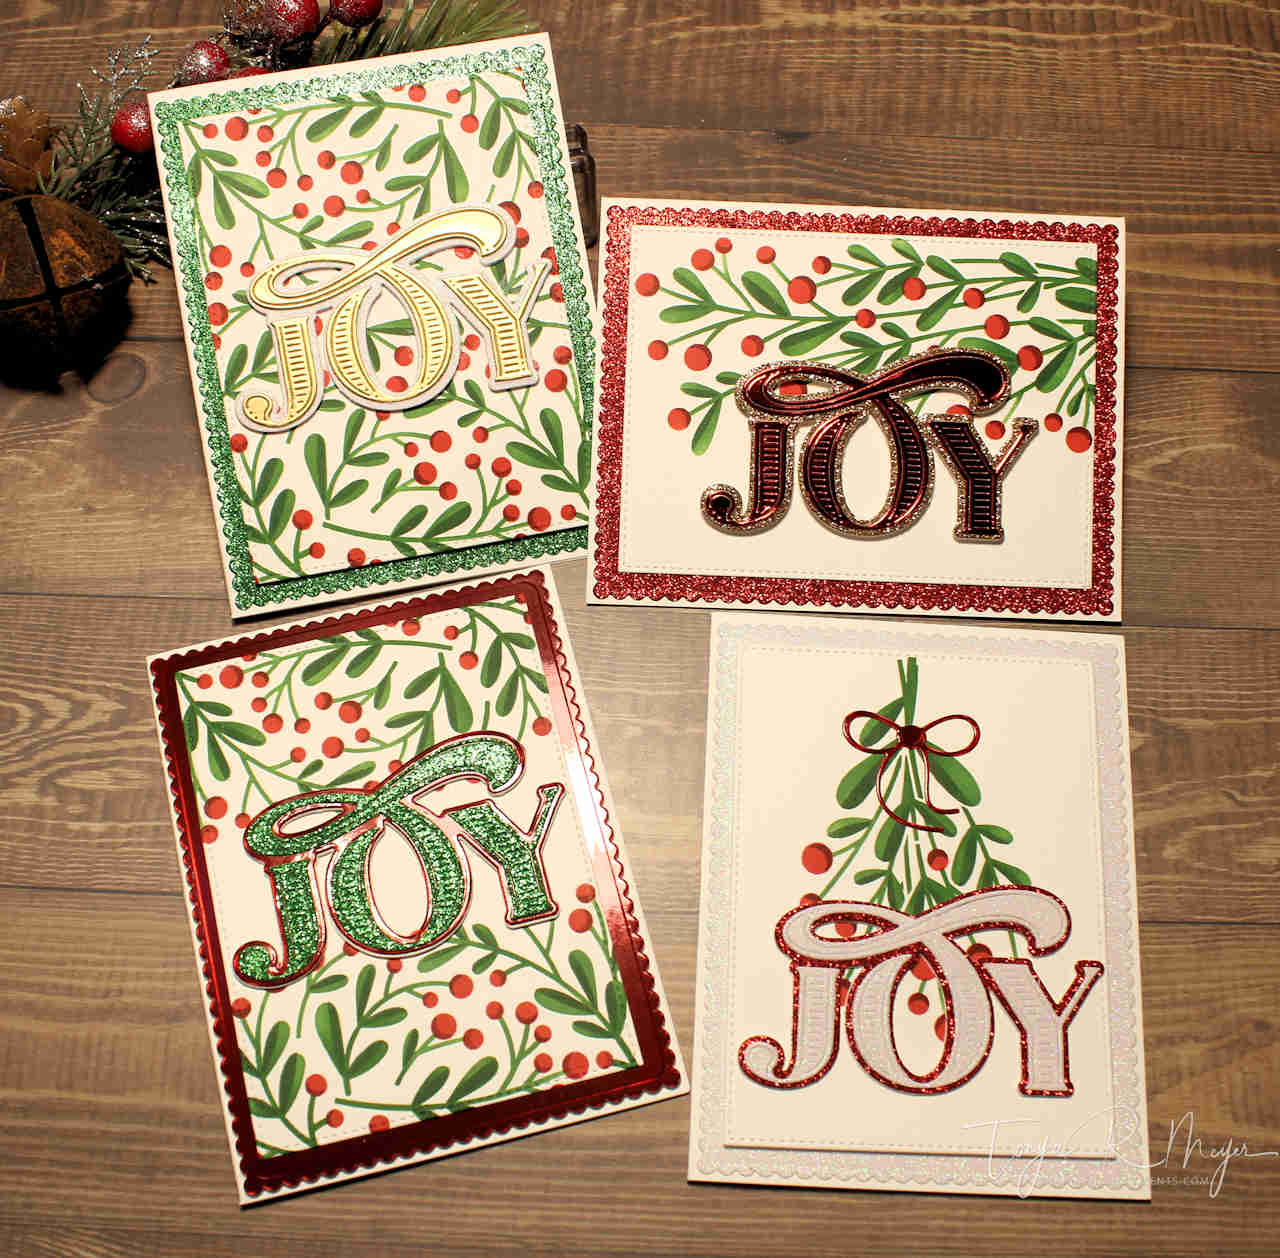
When I started playing with this stencil, I ended up creating two sets of four cards and they came together so easily.
For my first set, I used a piece of Neenah 110lb Solar White cardstock and added that to my Waffle Flower Water Media mat. The mat is 9 x 12 and worked perfectly for holding everything in place while I ink blended onto my cardstock. I believe you could also use the new Waffle Flower Stencil Mat which is also 9 x 12 and that would work as well. It’s a great tool to have for ink blending since you can butt your paper and stencil right into the corner and you don’t have to worry about it slipping around on the silicone mat. However, aligning the stencils is super easy with this Quads Layering Stencil as it also has registration marks cut into the stencil. There are 3 marks on each side. So when you align each layer you can ink blend over those registration marks and have a point of reference for aligning all of the stencil layers for a perfectly layered blend.
Once my cardstock was in place on my water media mat, I grabbed the first layer of the stencil. It is the layer that puts the base color for the leaves on. You can also distinguish the stencil layers by the numbers that are laser etched into the lower right corner on the front of the stencil. There is the Taylored Expressions Item number followed by a dash one for the first layer, dash two for the second layer, etc. The numbering takes the guess work out of which layer to ink up first which is so nice.
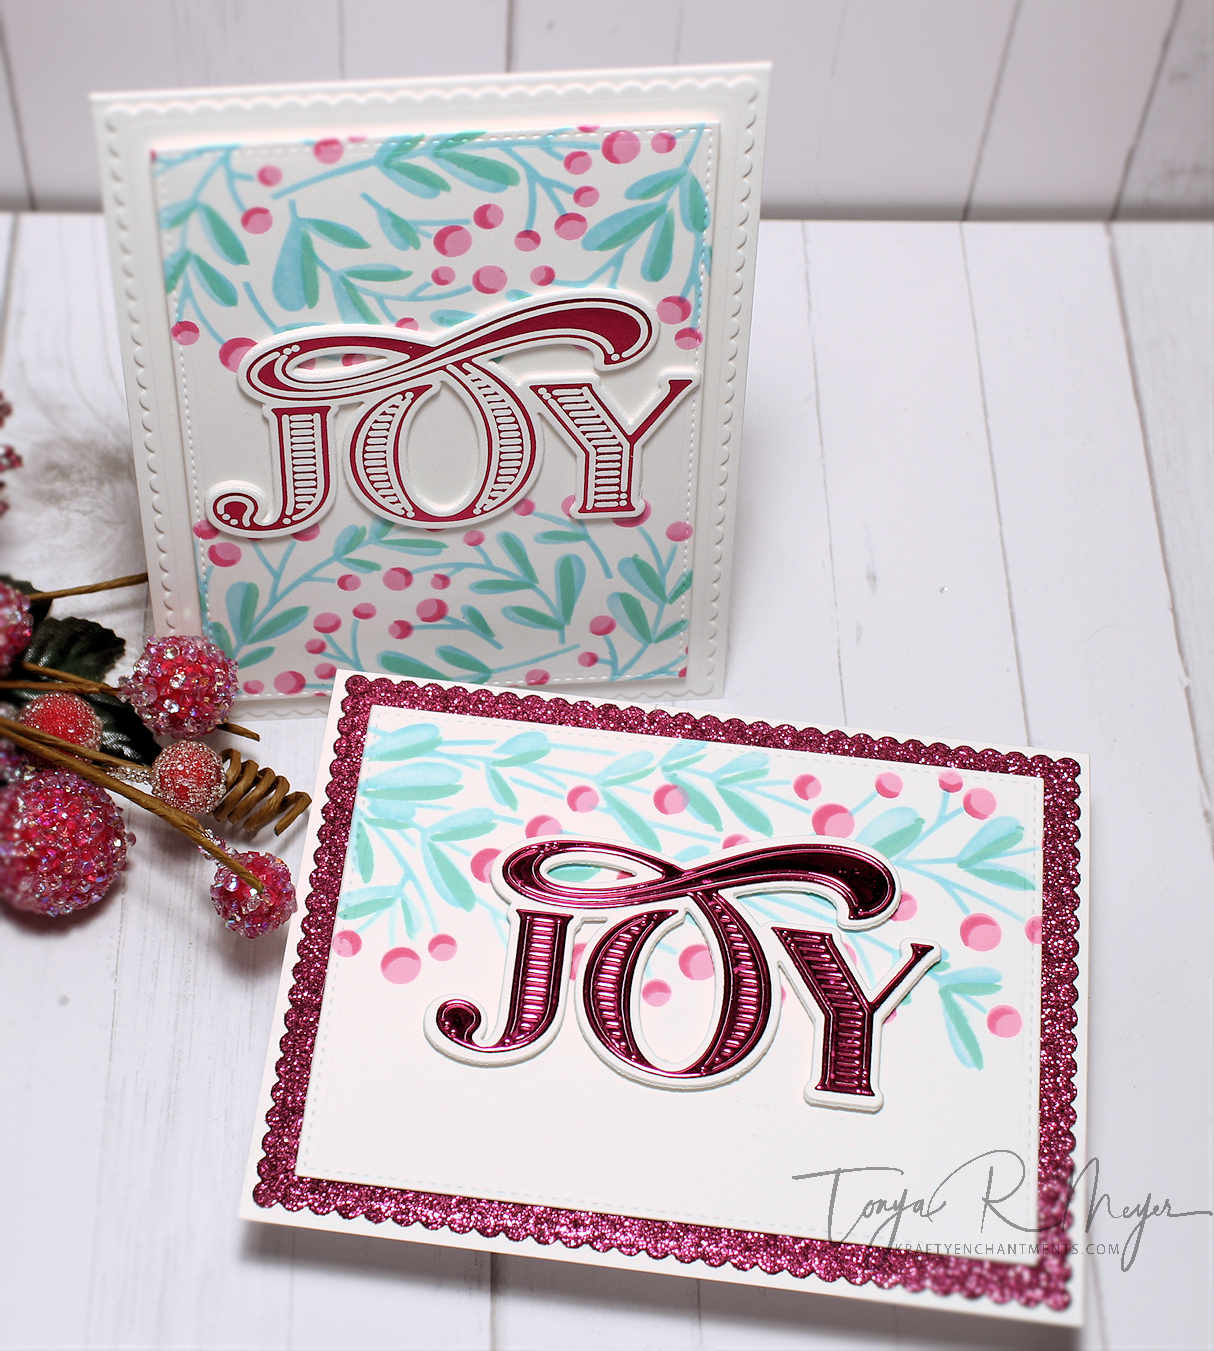
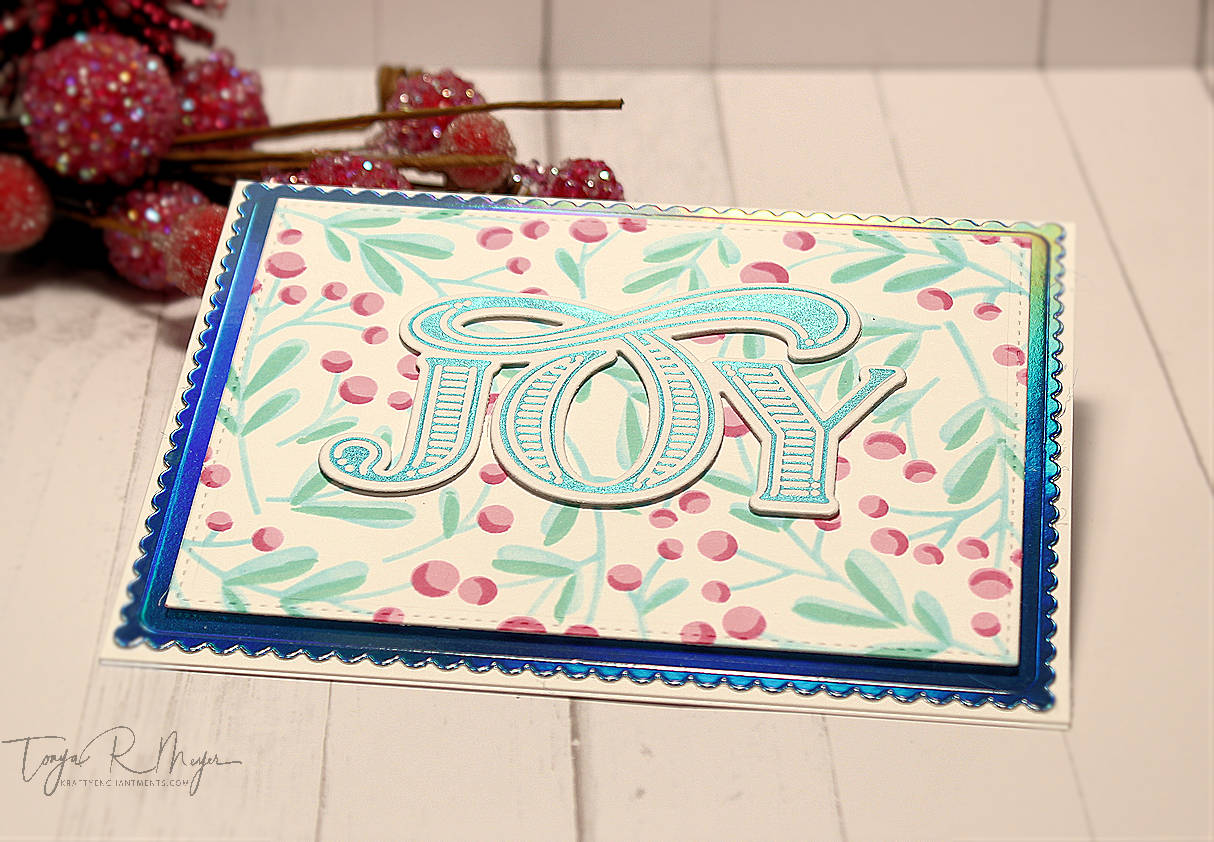
For my first set of cards, I chose to go with some very fun, bright colors. I opted to use all Distress Ink colors because I feel like they give the smoothest blends over some other brands. On the first set I used Salvaged Patina for layer one, Cracked Pistachio for layer two, Kitsch Flamingo for layer three and Picked Raspberry for the fourth and final layer. The colors I used for this set kind of felt like a Cotton Candy Holiday blend with lots of bright, pastel colors.
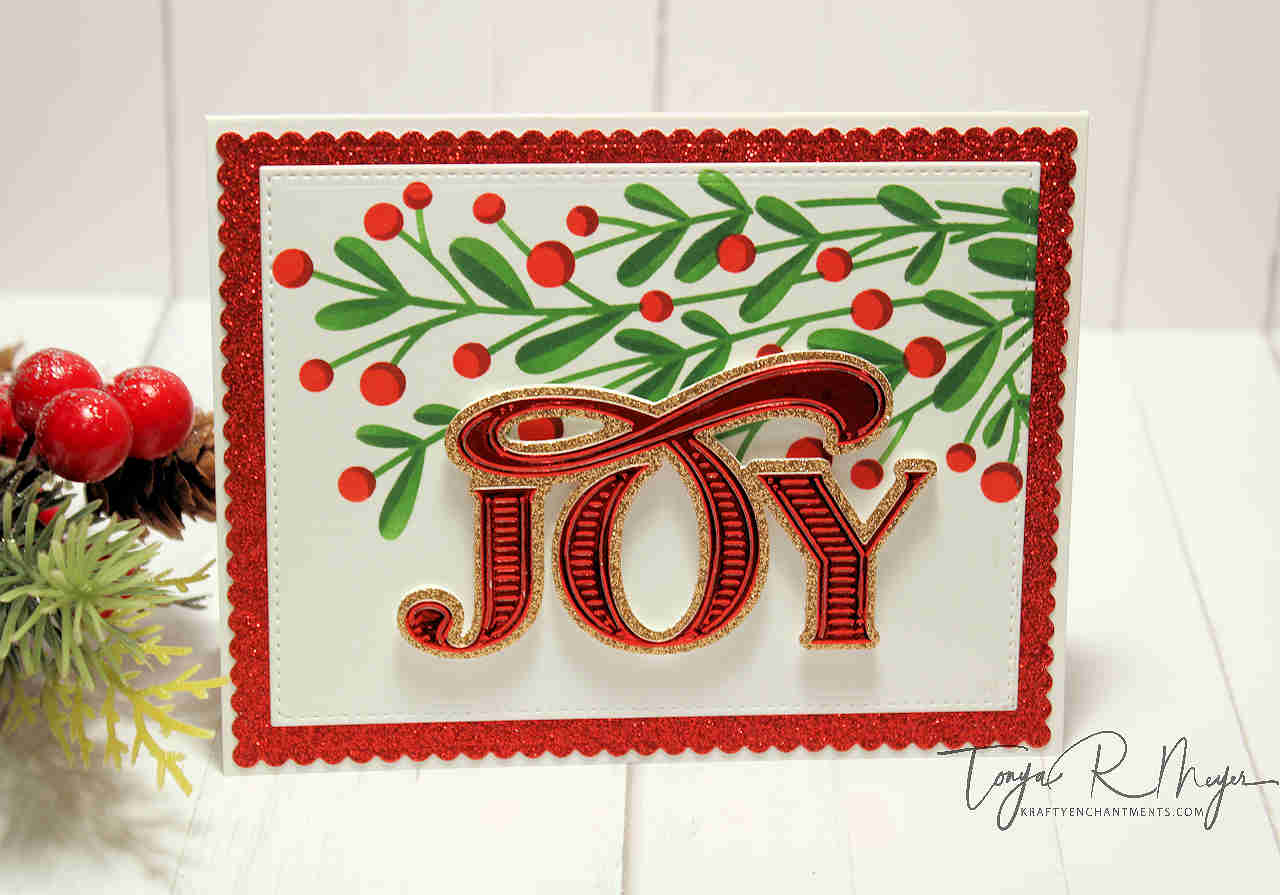
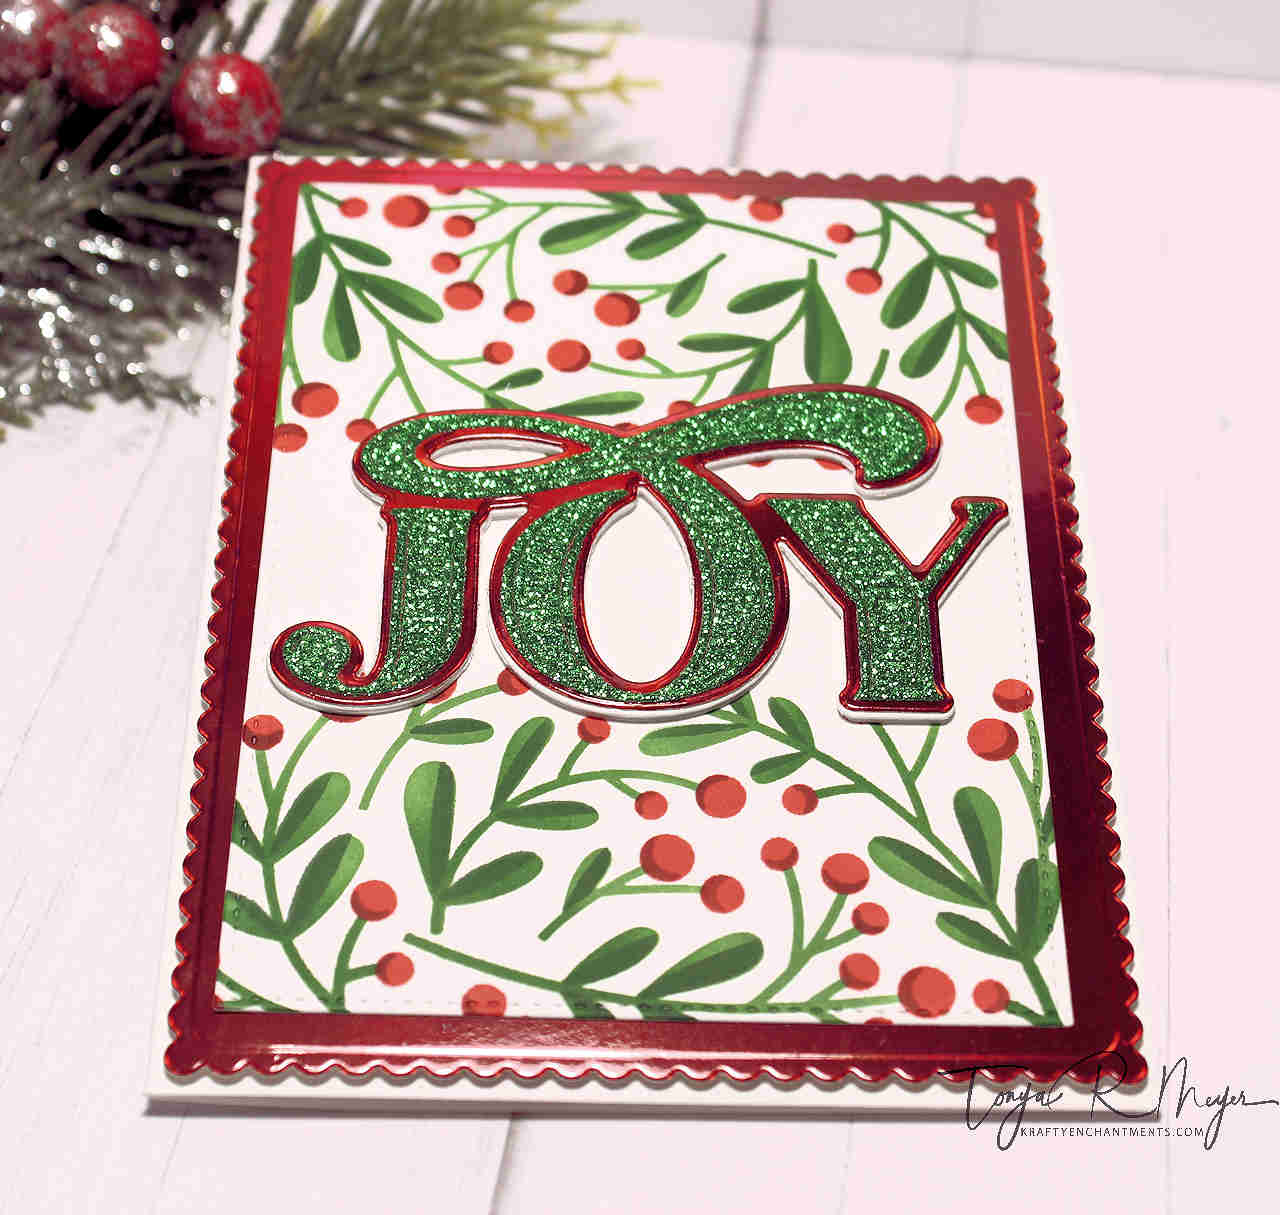
When my first set of card backgrounds were complete, I washed off all of my stencils with some warm water and started the process again using some more traditional colors. For my second set of cards, I used Mowed Lawn for layer one, Rustic Wilderness for layer two. Festive Berries for layer three and Fired Brick for my final layer. I love this traditional color combo as well, they turned out so pretty.
Next, I cut down each set of card backgrounds so that they would each measure 4 ¼ x 5 ½. This process also trims off the registration marks as well if you used them for reference in lining up your layers.
Once my panels were cut down, I started an assembly line process sort of. I cut a ton of backgrounds from some glitter and iridescent cardstock in my stash. The glitter cardstock was from a small Hobby Lobby paper pad as well as some Concord & 9th and Memory Box. For the iridescent cardstock I used Tonic Studios and Concord & 9th. I will try to link all of the brands I used below for your reference. I basically just shopped my stash since I have a ton of cardstock.
Each piece of cardstock was cut using a scalloped background die from My Favorite Things which was part of a Die-namics Blueprints set that is retired. It’s one of my favorite background dies so I still use it. I will link to some similar products below that would work for this type of card. The scalloped background measures 4 1/16 x 5 ¼. I used the coordinating stitched rectangle die to die cut my ink blended backgrounds. This cut the size down to 3 ½ x 4 ¾ which allows them to nest perfectly when layered together.
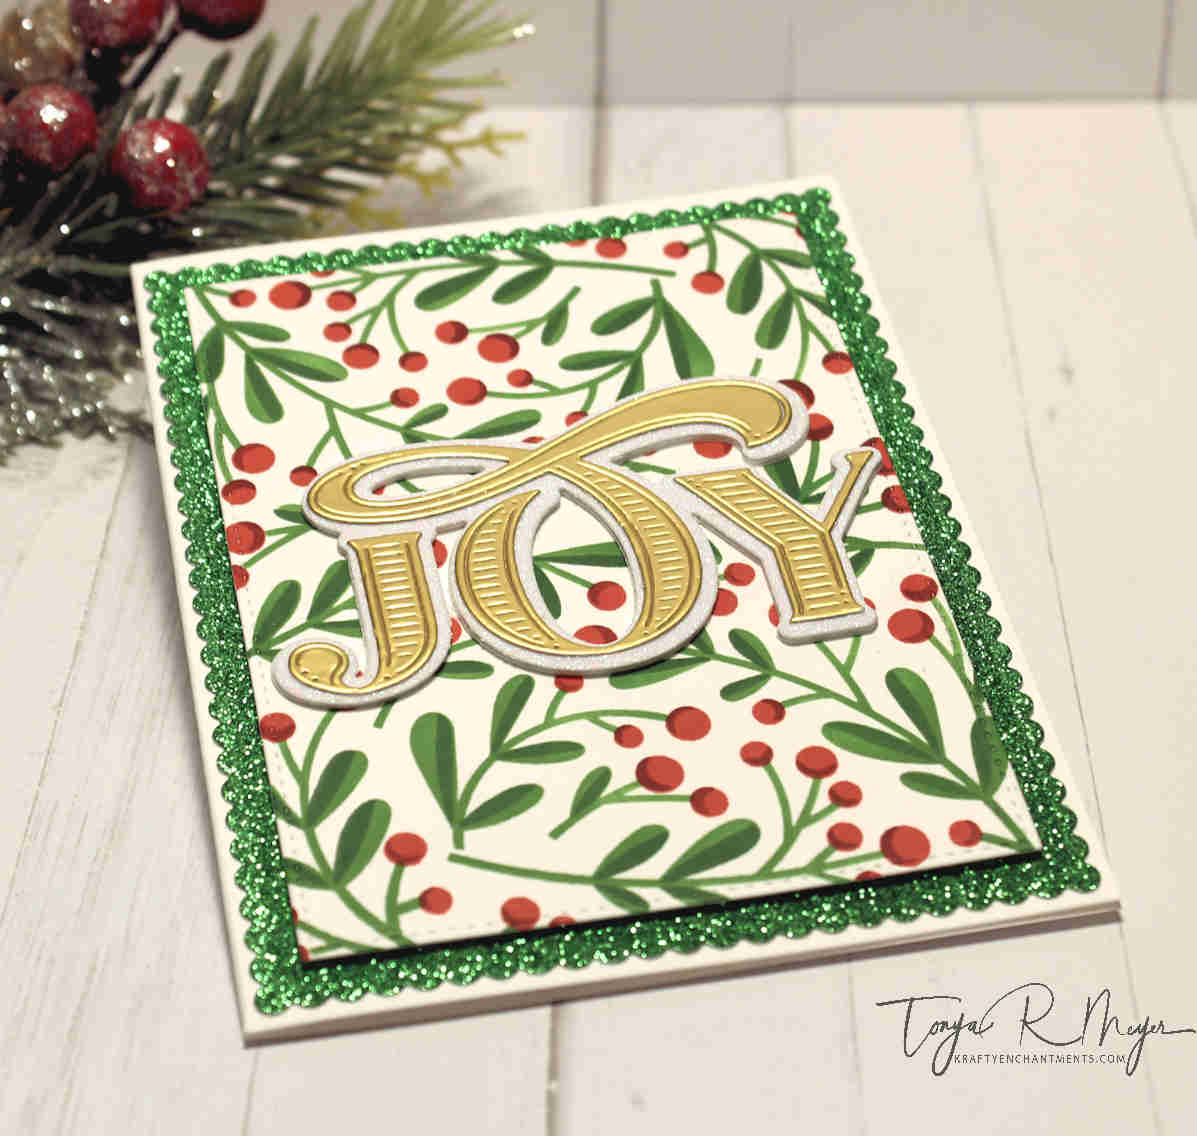
Next, I chose to use the beautiful Abundant Joy sentiment die from The Greetery. This was a new release die for 2021. The die has a shadow layer that comes with it and there is also a coordinating hot foil plate as well which I used for a couple of my cards today.
I die cut several of the Abundant Joy sentiments from the same glitter and iridescent cardstock and set them aside. Something to note, the JOY sentiment cuts the letters individually not all as one piece so you do have to adhere the letters to the shadow layer individually. I found that adhering the O first made it easier to line up the other letters.
I wanted to add some dimension to the Abundant Joy sentiment so I cut several pieces of the shadow layer to be able to build the sentiment up. On others, I did use dimensional foam.
Once everything was cut, it was just a matter of mixing and matching the different cardstocks with ink blended backgrounds and sentiments and matting everything with glue and or dimensional foam.
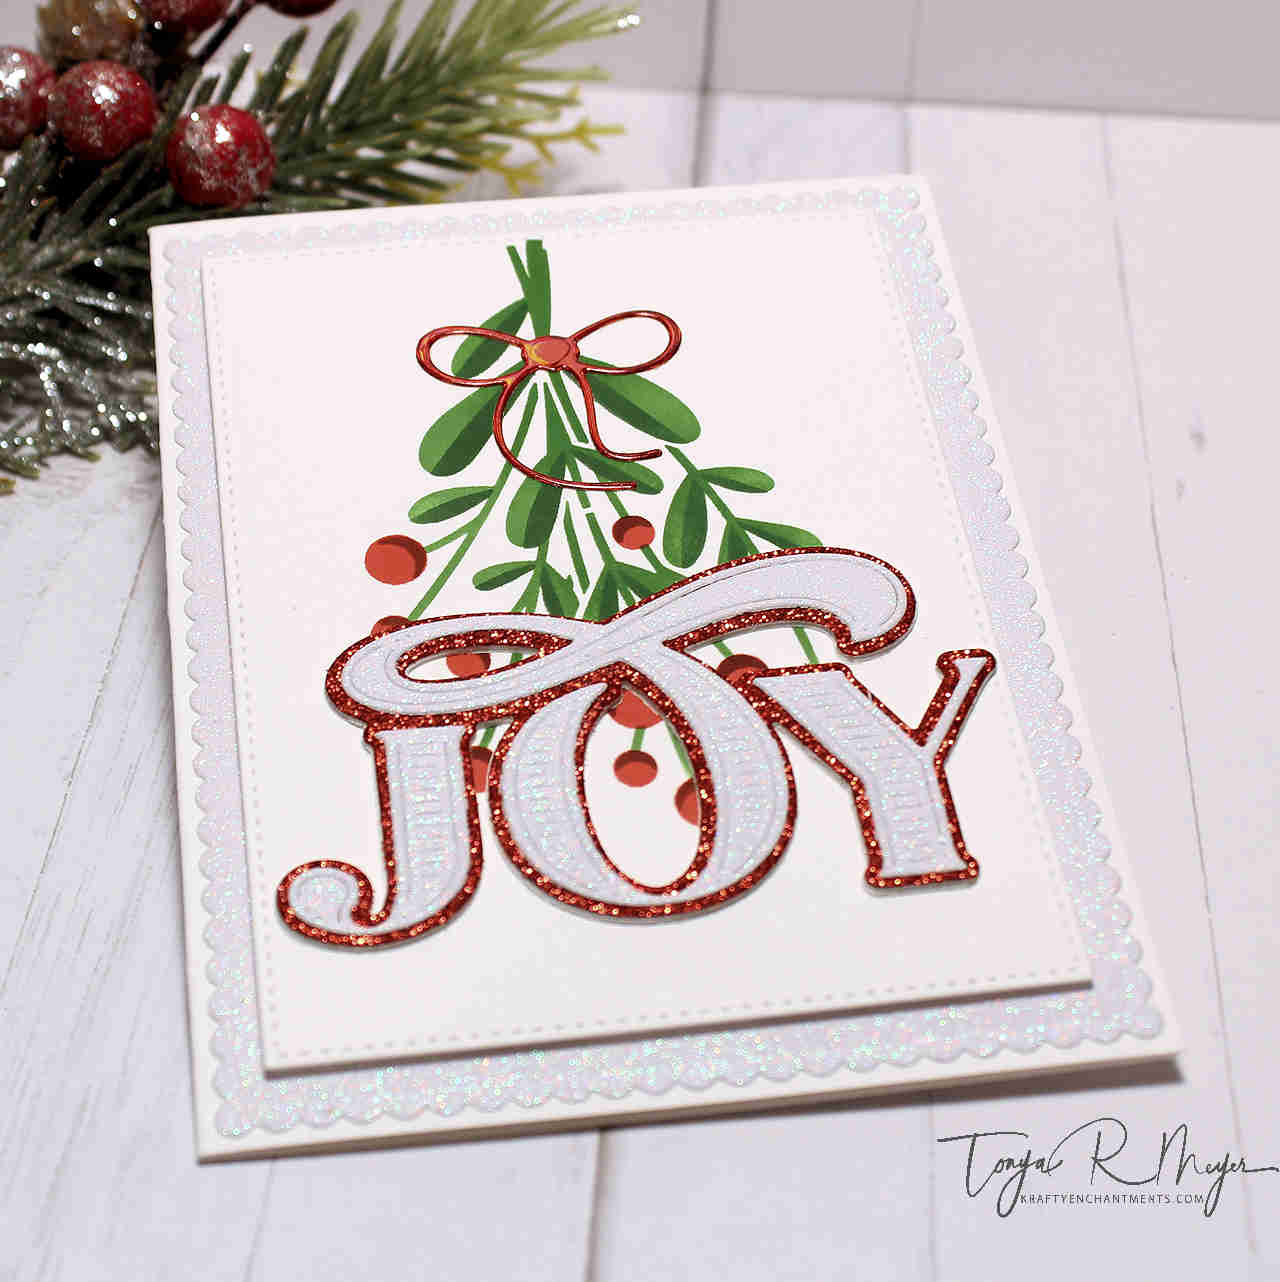
For a couple of the sentiments, I did use the Abundant Joy hot foil plate and used some iridescent hot foil from Spellbinders to create my sentiment. To cut the sentiment I just used the shadow layer from the die set. Unfortunately, I started having trouble with my Spellbinders Glimmer machine and it died on me so I wasn’t able to do more than a couple of the sentiments. I have replaced my Glimmer machine and I plan to experiment some more and use the solid plate from Pink Fresh Studio to foil the negatives.
I didn’t add any additional embellishments because I have so much sparkle and shine in my cardstock that I didn’t figured it needed any additional bling.
All of my backgrounds were added to some A2 size card bases cut from 110 lb Neenah Solar White cardstock.
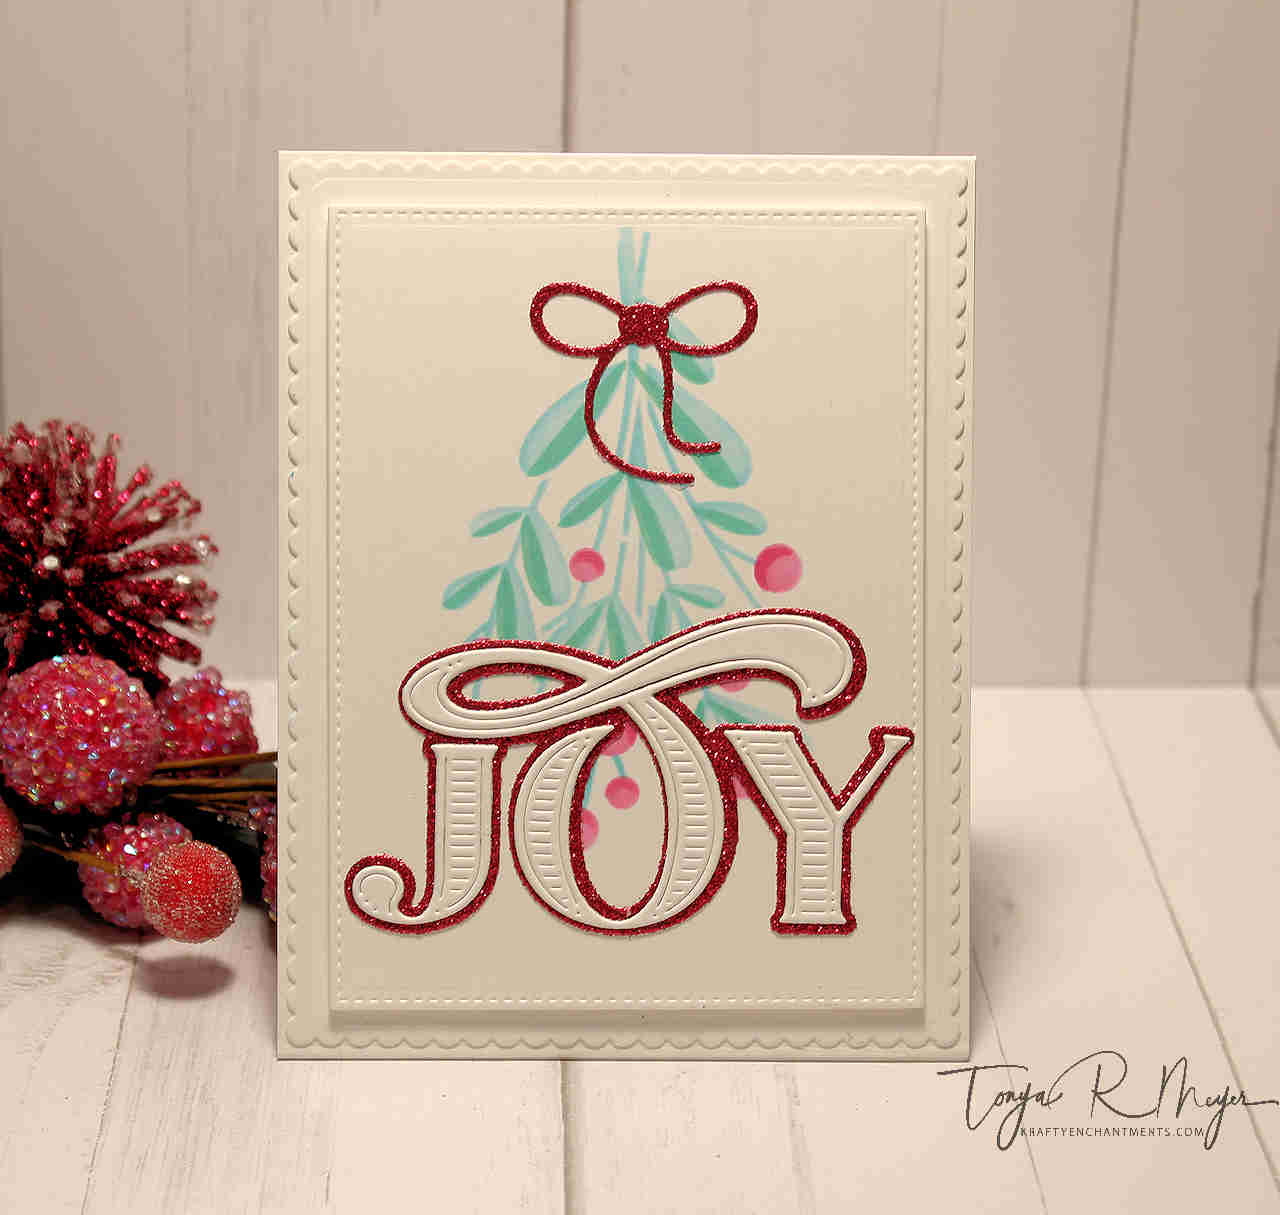
For the background that has the stenciled image that looks like a gathered bunch of mistletoe, I used a small bow die that came from the Spellbinders Large Die of the Month kit from January 2019. The kit is still available so I will link it below as well.
I think this Taylored Expressions Create-in-Quads Layering Stencil is a great value for the number of cards you can easily create with it. I love, love that it creates 4 different backgrounds. I know it’s supposed to be Mistletoe but I think you could absolutely use this stencil year round. My pastel colored cards would have looked different if I had used a Happy Birthday sentiment for example. I’ll link to a couple of other awesome Taylored Expressions stencils as well.
Thanks so much for stopping by today! I hope you’ve enjoyed my cards. Please check out my YouTube video for more on the process of making these fun Christmas cards.
All of the products I’ve used today are linked below for your convenience.
Hugs and best wishes!
Tonya
https://linkdeli.com/widget.js?id=f5e8378456858c916708
Here’s some additional Taylored Expressions Stencils that you might enjoy:
https://linkdeli.com/widget.js?id=f5e8378456858c916708


Pingback: All You Need is Love…and a Stencil | Krafty Enchantments