All You Need is Love…and a Stencil
Hello! Thanks for stopping by. I have some new cards to share today. These are my Valentines Day cards I created using the awesome new Taylored Expressions Create-in-Quads Hearts stencil. Some of you probably saw my Christmas cards that I created with another Taylored Expressions Quad Stencil called Mistletoe. I’ll link to that blog post here in case you want to get a good head start on your Christmas card you can come back and check it out: Christmas Cards in a Flash
I do have a video for today’s card and you can check that out here:
Today’s card is all about the smoopy Valentines cards. For anyone who isn’t familiar, the Create-in-Quads stencils allow you to create four A2 sized card panels with one set of layering stencils. Each quadrant on the stencil has a slightly different design giving you four different backgrounds to create all kinds of projects with.
For my cards today, I couldn’t decide on a color pallet to use so I decided to try out a used book I purchased off of Amazon called Color Inspirations by Darius A. Monsef IV. I started by choosing a base color of pink and went to that chapter in the book to look at what color combos might look good with pink. I settled on a pink, hot pink, black and red. From that I chose to use my Distress Inks and used Worn Lipstick, Picked Raspberry, Black Soot and Candied Apple.

To keep my stencils and paper from shifting I used the large Waffleflower Stencil Mat to hold everything in place. The mat measures 10 x 12 and has a lipped edge on two sides and a smooth edge on the opposing two sides. This allows you to butt up your paper into the corner with the lipped edge and then place your stencil on top. This ensures that your cardstock and stencil will always be able to be easily aligned, especially when using layering stencils.

I started by placing my 8 1/2 x 11 sheet of Neenah Classic Crest Cardstock in 110 lb weight onto my stencil mat and then added my first Create-in-Quad stencil labeled with a -1 in the lower right hand corner.
For my first layer of the stencil I blended on the Candied Apple ink making sure to get good coverage by adding a second layer. I made sure to blend over the registration squares on the stencil also. These are important for alignment.
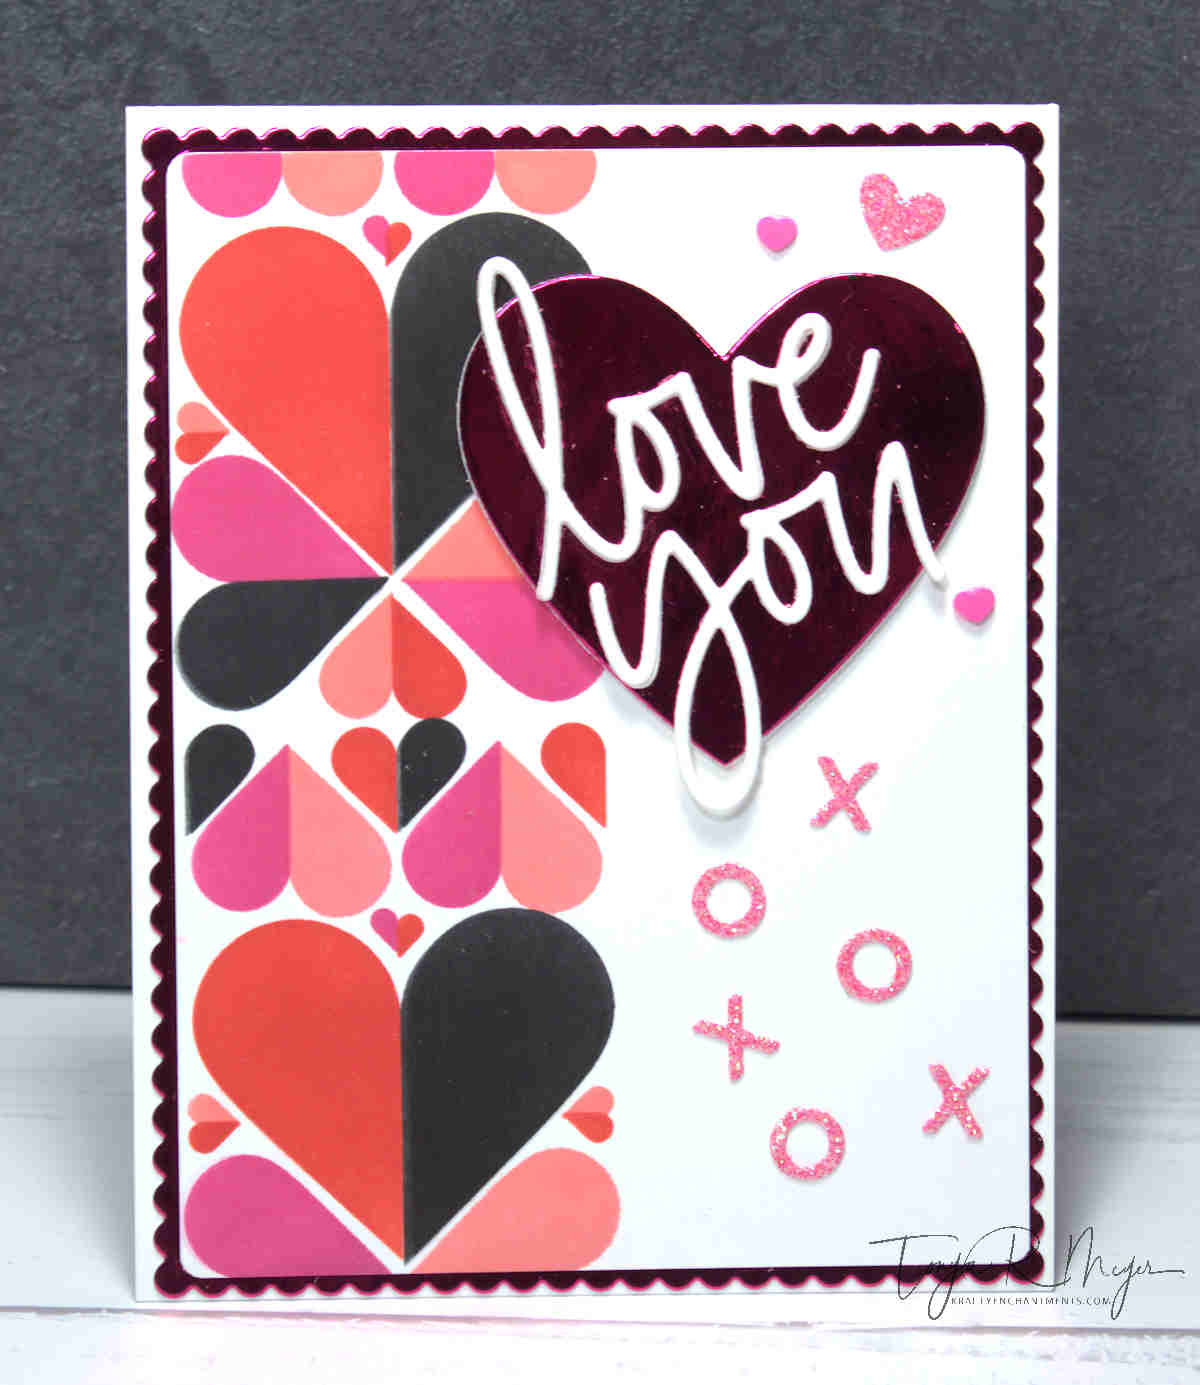
On the second layer, I used Black Soot. I had read some reviews of the Hearts stencil that people were having issues with alignment. I too noticed that there was an issue with the second layer of the stencil however that is pretty easily fixed by simply adjusting your stencil slightly so that layer two is aligned with the previous hearts and not the registration marks. I made an additional pen mark in the registration holes to monitor the alignment for the remaining two stencils.
For layer three, I used Picked Raspberry and blended over the stencil a couple of times. I had to adjust the stencil slightly with this layer as well so that it would align with the hearts and not the registration marks.
For the 4th and final layer, I blended on Worn Lipstick. When finished, I took a peek at the finished blended cardstock and then replaced it to reblend a couple of areas where the hearts weren’t aligned and touching in the center.
The slight adjustments I made really helped. There are a couple of areas that aren’t perfect, but in reality no one will really notice them once the card panel has been decorated with the die cuts from Concord & 9th.
I trimmed down the ink blended panel to have four finished panels that were just slightly smaller than A2 size.

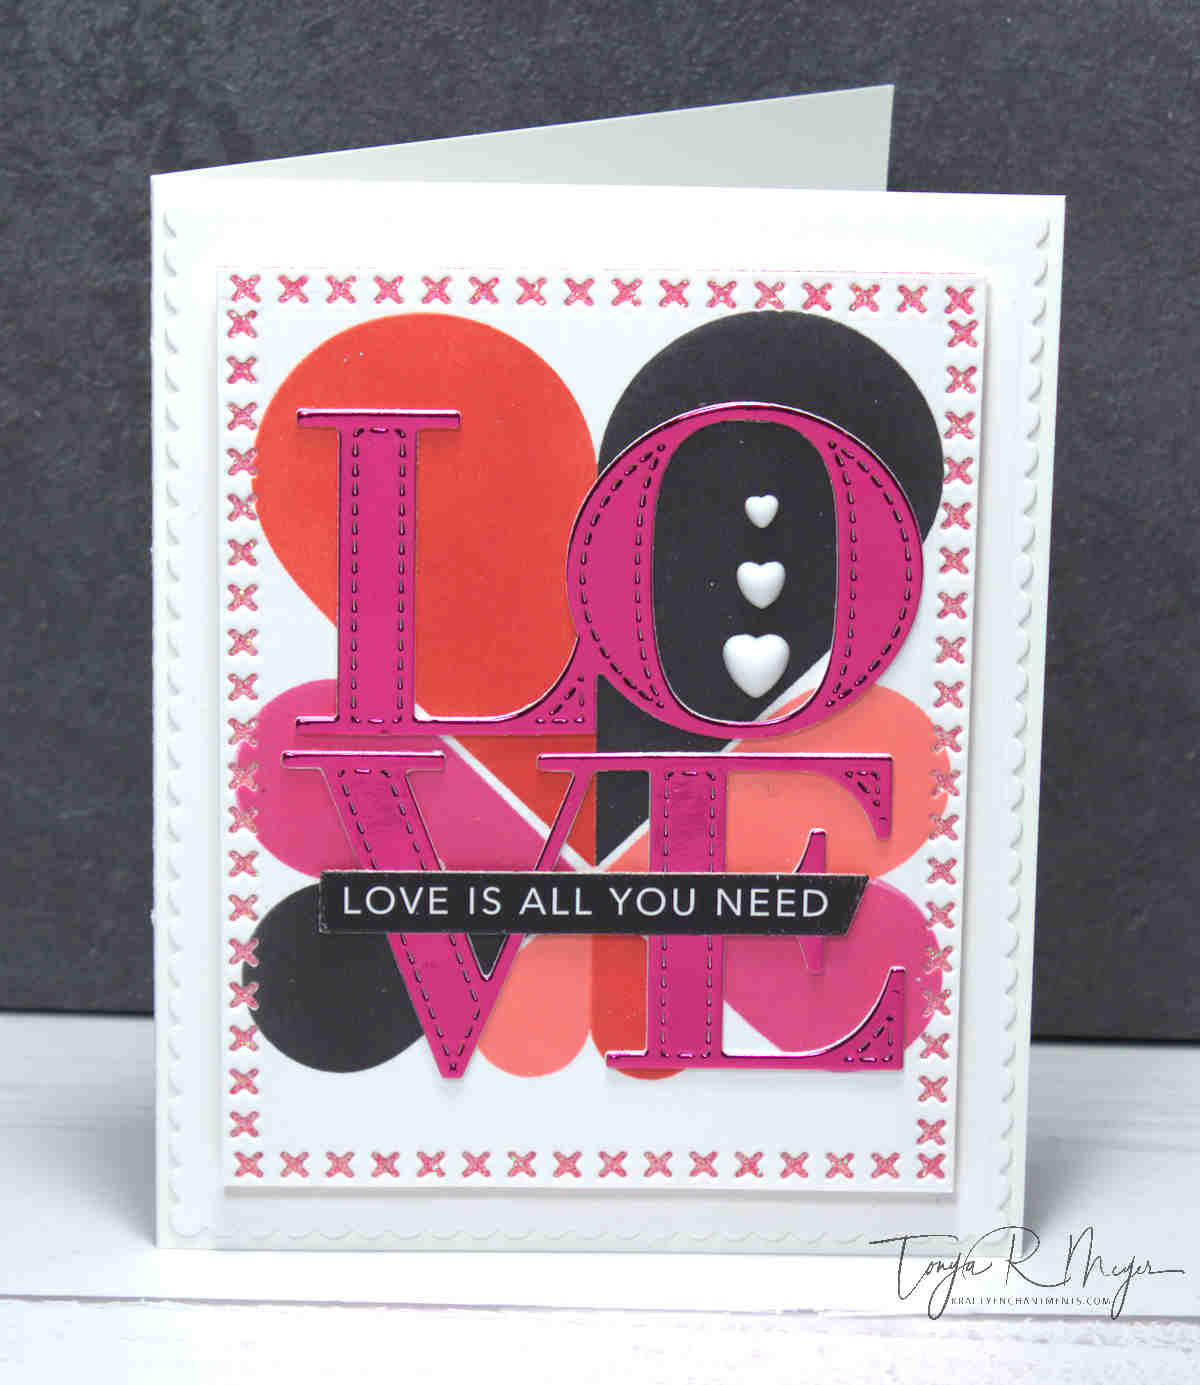
For my die cuts, I used the LOVE die and the large heart from the All the Love Die set from Concord & 9th. I cut each of them several times from a combination of white cardstock and foils and then built up the layers by gluing them together for added dimension. I also cut the little X’s O’s from the same set using some pink glitter cardstock from Concord & 9th Spring Cardstock collection.
On one of the LOVE dies, I used the white cardstock and did some ink smooshing onto my Waffleflower Stencil mat. I used the Worn Lipstick and Picked Raspberry and added a bit of water to get a distressed background. When it was dry, I added some black and gold ink splatters as well as some shimmer spray.

All of my card backgrounds were cut from a small scalloped frame die that was from MFT Stamps Blueprint Sketch dies. This die set is retired so I will link to some similar products below.
The heart backgrounds were added to scalloped cut foil papers or glitter cardstock and placed them onto A2 size cards from 110lb cardstock.
I added all of my die cut hearts and LOVE words to the card fronts with liquid glue. I used the Taylored Expressions Simple Strips in Reverse pre-printed sentiment strips. There are 18 Love themed sentiment strips on thee pre-printed strips. These work with the Simple Strips dies so that you can cut all of them at once or you could also trim them down with your paper trimmer. These are great for quick and easy sentiments without having to stamp or heat emboss. I believe that you might also be able to use Toner Foil on them and run them through a laminator, but I have not tried that myself.
Once my panels were complete I embellished with some pearls and clay hearts when I was finished.

These cards are so pretty in person, I think if you own this stencil and are having issues getting it to line up maybe try adjusting it slightly and being patient with the process. You will love the results.
I hope that Cupid’s arrow finds you and that you found some inspiration here today! Thank you for stopping by.
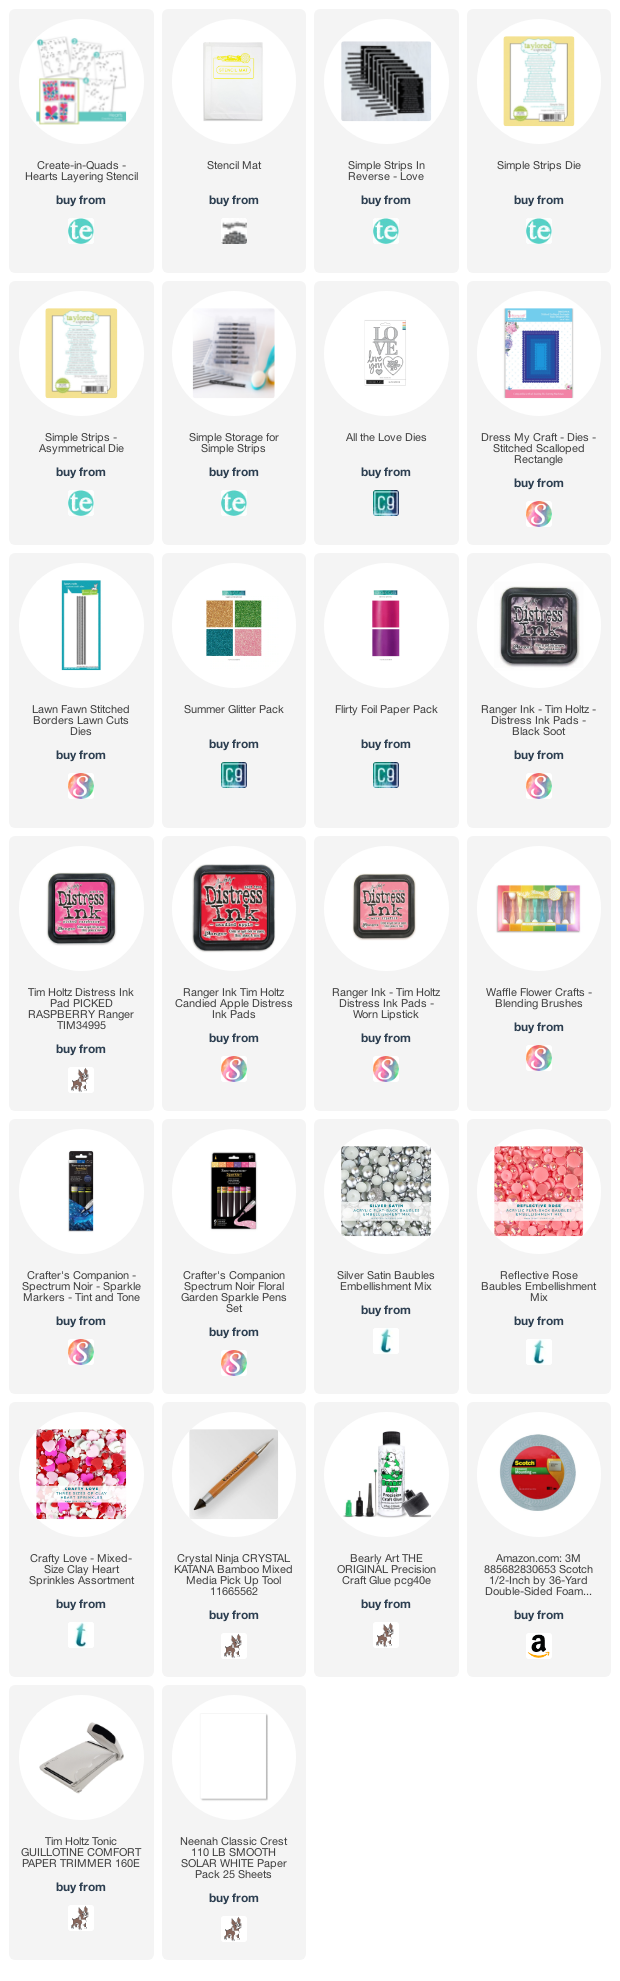
As always the products I’ve used today are linked below for your convenience.
Hugs,
Tonya
https://linkdeli.com/widget.js?id=f5e8378456858c916708

