AECP Level 1 Final Project
Hello and welcome! I’m so excited to be back today to share my AECP Level 1 Final projects. Whoo-hoo, thanks for joining me on this journey for the past few months. I’m excited to share these projects with you today.
Let’s dive in. First this is the largest card project I’ve ever taken on. Today’s post will have a lot of photos for everyone to enjoy so grab yourself a cup of joe or your favorite tea and enjoy. NOTE: I will link all of the products used at the end of my post

For the Level 1 AECP final project I was tasked with the following:
- Select ANY 3 components from the classes in Level 1 (e.g., layering 1/2, Let it shine, techniques)
- Explain the 3 components that you’ve chosen for the project
- Share design tips (if any)
- Create a His and Her Card Set birthday/graduation/encouragement cards (your choice) as a gift set. This makes TWO sets one Masculine and one Feminine.
- Each card (with various sentiments) can vary a little bit, but it should have a similar and cohesive theme as the rest of the set.
- Each card set should consist of 4-6 cards
- Also, use one recycle element on a set or its packaging.
The class components I’ve selected to showcase for my projects are:
Let it Shine – That’s my common theme for my cards
Stencil Techniques
Stamp Layering
Easy Die Cutting Techniques
And a few other AECP techniques thrown in for good measure and fun!
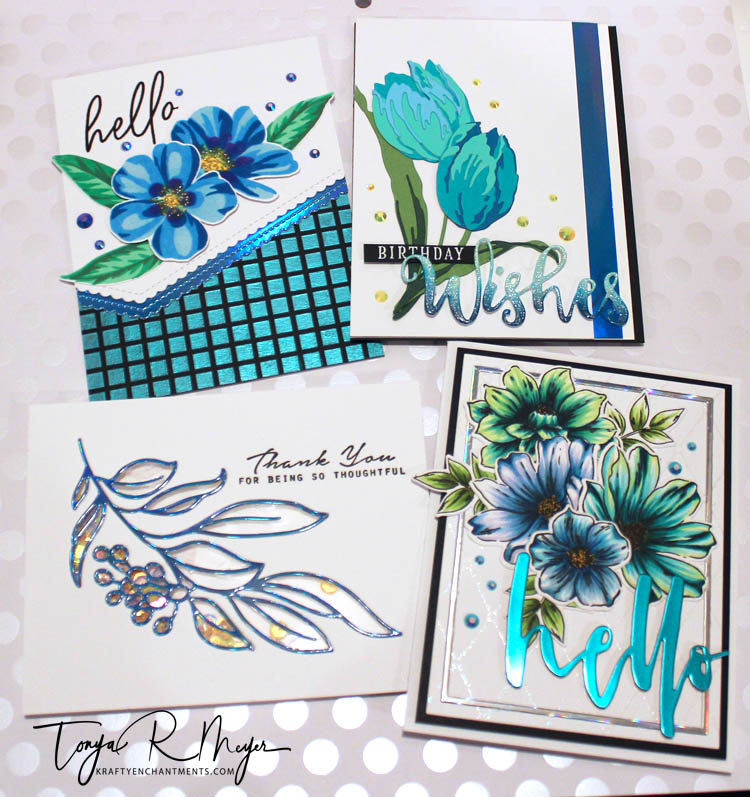
Let’s start with my card sets for HER. As I mentioned, I decided early on that I wanted my card sets to have a hint of sparkle and shine so you’ll see that throughout with each card.
For my first card I used a stamp layering technique with the Flowering Cistus Stamp set. I thought the flowers would look pretty in shades of blue and just a touch of purple. For the center of the flowers, I added a bit of Sakura Gelly Roll glimmer pen for a bit of sparkle.

My focus technique for this card was a stencil technique using the Grid stencil and some iridescent paste. I love how this paste looks on dark cardstock and the way it looks in the light. You can get so many different looks with stencils but applying paste is one of the best. TIP: be sure to immediately wash your stencil and pallet knife since the pastes can dry hard and become difficult to remove. A little soap and water removes the paste quickly.

Using a wonky scalloped border I was able to showcase both the flower and the stenciled background and added an additional layer with Tonic Marina Mist mirrored cardstock.
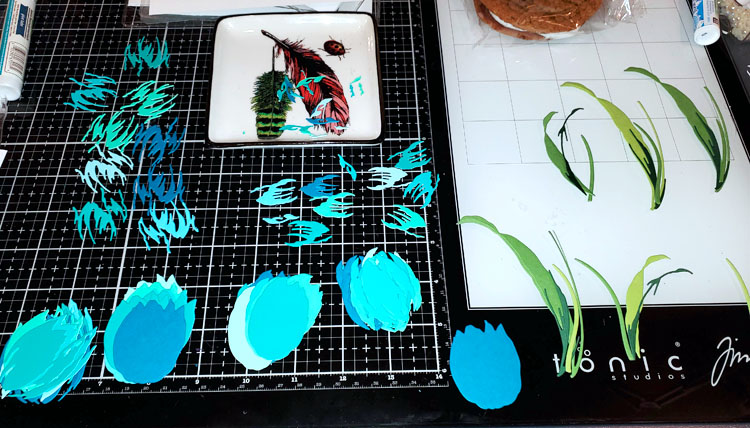
My second card features Easy Die Cutting Techniques using the Layered Tulip dies called Craft-a-Flower Tulip. For this card I used the tulip dies and cut the pieces from several colors of teal and teal green cardstock. Once I had all the different colors cut I began to play and decide what colors to layer together to give my tulips the best dimension. TIP: you can see in my photo below that when you’re assembling layering dies like this it’s easiest to create an assembly line. Also, I cut multiples of each color and assemble several flowers at once, this way I have some already assembled for future cards. OH, and crafting requires snacks cause it’s hard work, LOL!
Once all of the layers of the tulip were adhered together with liquid glue, I created the background using another stencil technique. I used the Graffiti Scribble stencil and ran it through my die cutting machine with an embossing mat. It’s such a simple technique but it gives a great result for cards.
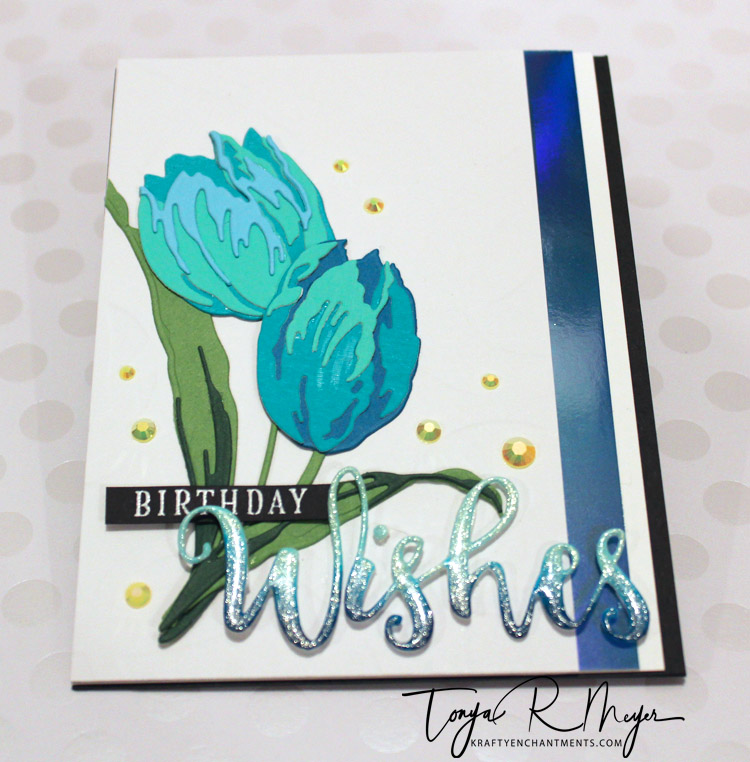
For the sentiment, I used an ink blending technique with my Altenew artist markers. To start, I colored onto white cardstock with 3 colors of markers. Once I was happy with my blend, I die cut with the Wish sentiment die. It created a nice ombre look to my word. I used a Sakura Gelly Roll glimmer pen to add a bit of sparkle over the ink blending and then heat set with two layers of clear embossing powder. I just love the look of it. I added a stamped Birthday sentiment to complete the Birthday Wishes for the card.

All elements were layered over a background that was embossed with the Graffiti Scribble Stencil on white cardstock and piece of the Tonic Marina Mist metallic blue cardstock for another pop of shimmer and shine.
My third card features a clean and simple technique with a bit of an Altenew Let it Shine technique all within a shaker card. The Hanging Garden die is just perfect for creating a shaker card. Shaker cards require a clear sheet of acetate to create the shaker barrier. TIP: Recycled acetate from your stamps or stamp packages make a great option for shaker cards.

I die cut my Hanging Garden from a 4 ¼ x 5 ½ piece of white cardstock, glued my recycled acetate to the back side of the die cut card panel. I set it aside to dry with some stamp blocks on it for added weight and prepared my dimensional foam. TIP: Dimensional foam for shakers is easiest to prepare if you fold the foam back over on itself to create two layers of foam. Then just cut down to the size you need.

Once all the foam added to the back of my acetate with no gaps for shaker elements to fall out of, I used a powder bag around the inside of the foam to keep my sequins from sticking to the foam. I added in a few gold and purple sequins and then added the back panel of my card to seal the shaker.
I added the outline of the leafy branch die to the front of my shaker. Initially I had used a silver holographic cardstock for the outline and glued everything in and ultimately decided I didn’t like it, so I added another die cut outline from the Tonic Marina Mist blue cardstock.

A simple sentiment stamped in Altenew Jet black ink completes the clean and simple, let it shine shaker card. It’s so fun!
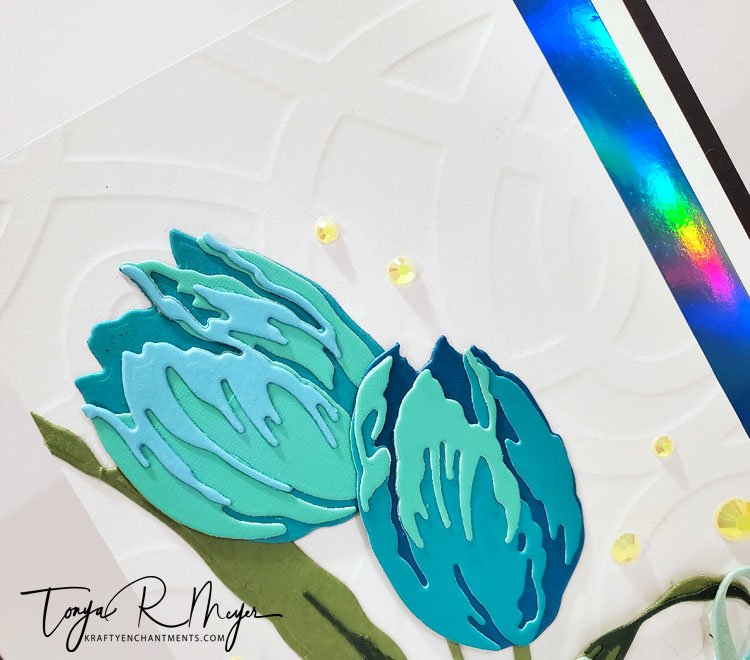
My fourth card is my favorite from this set. I saved the best for last. This card features a Let it Shine element. Frankly, it has a lot going on, but it turned out great.
I started by stamping the Pattern Play Diamond background stamp and heat setting with some Bridal Tinsel embossing powder. This gives a subtle hint of a graphic element in the background. I also die cut a skinny outline frame with the Fine Frames Cover Die from some holographic cardstock and layered it onto my stamped background.
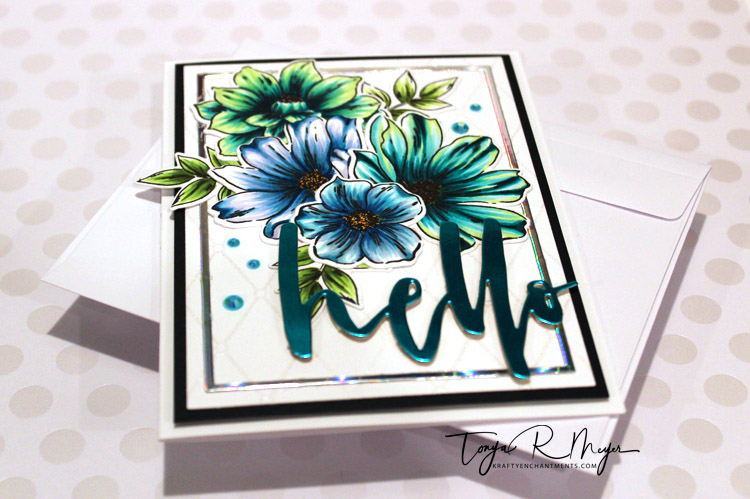
The flowers from the Perfectly Perfect stamp set were colored using Altenew’s Artist markers in shades of blue and blue-green and greens for the leaves. All of the elements were fussy cut and added to the background with layers of dimensional foam.
The large Water brush Hello sentiment completes the card from Tonic Holo Waves mirrored cardstock

Here’s a look at all the cards in my first set.
Let’s take a look at what we’ve got for the guys. Many card makers struggle with making cards to give to men, myself included. I started my project with a simple bit of inspiration. A tumbler I found at Starbucks featured a gorgeous color combo of blue, brown and mint green. Here’s a picture of that tumbler that I took. I really liked it – I might have to go back and get it as a pat on the back for making it through AECP’s Level 1, LOL!
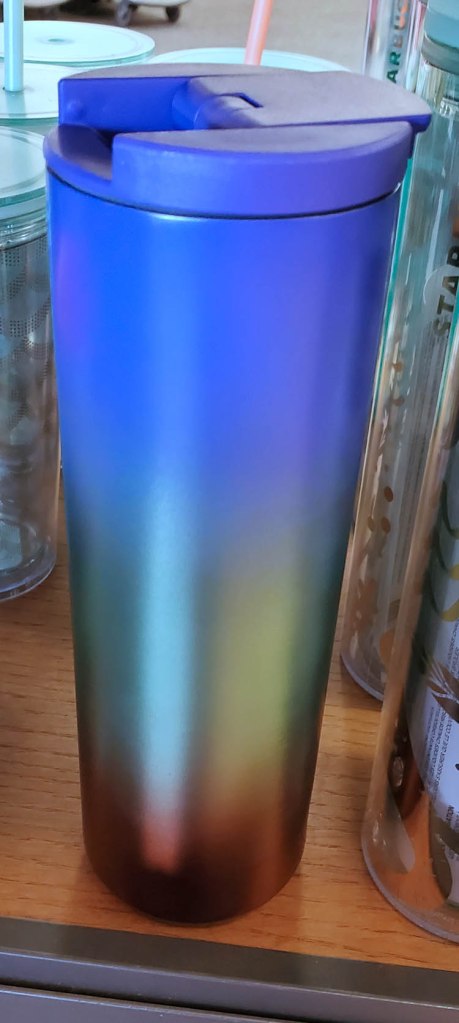
I started my cards with a bit of color inspiration and let my imagination wander.
My first card features a Stamp Layering technique with the fun cupcake from the Layered Cupcake stamp set. I stamped the layers for the cupcake wrapper with Sapphire ink and the cupcake using Milk Chocolate ink and then I stamped the base layer of the frosting with the Sweet Leaf green and then added additional dimension to the frosting with Altenew Artist markers. I did add just a touch of Sakura Gelly Roll sparkle to the frosting.
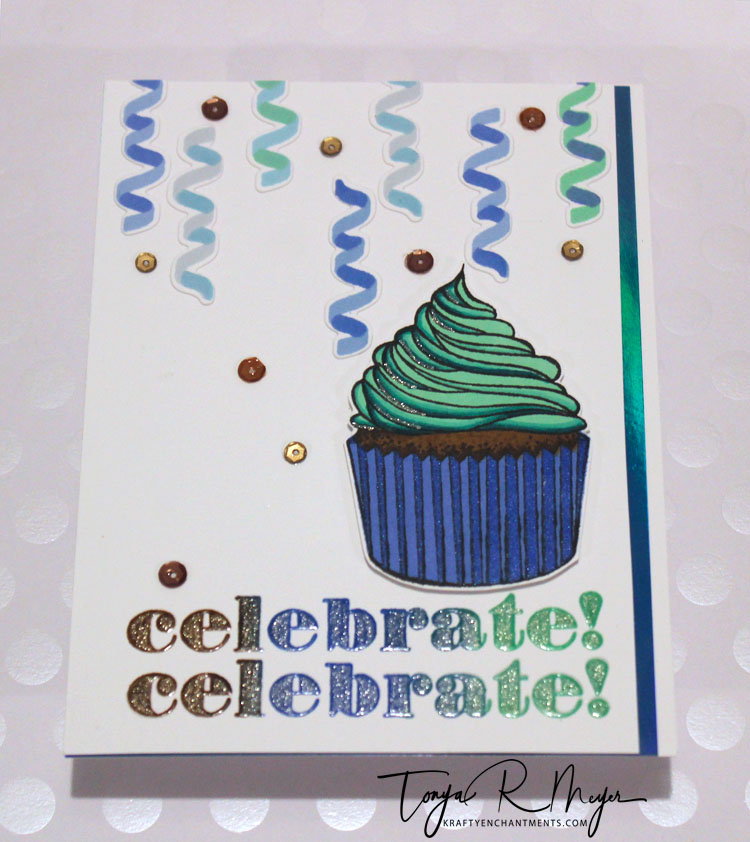
Adding some layered stamped confetti to the card in some different colors gave it a fun party vibe.
To create the ombre sentiment I used 3 colors of ink to create an ombre effect by stamping all three colors on the sentiment stamp. TIP: You can create a smooth transition of ink by using your finger or a soft cloth to smudge any obvious ink lines between colors. Don’t be afraid to get your fingers inky – just don’t touch your face afterwards – trust me!
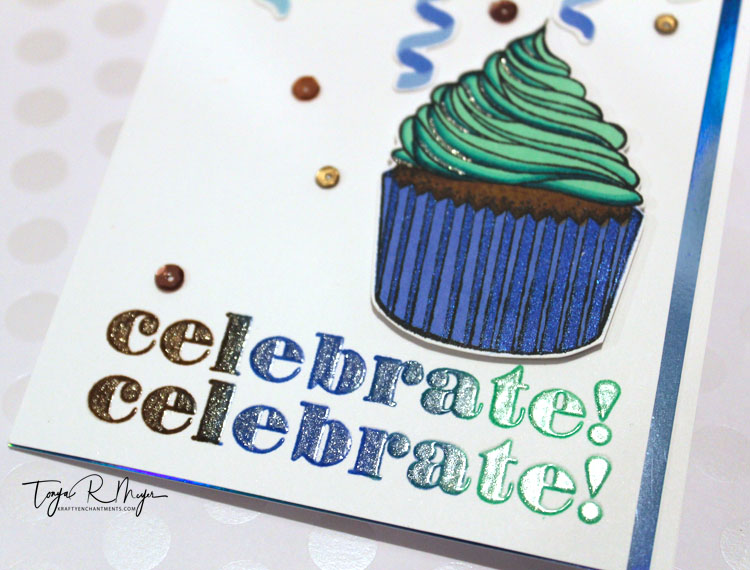
When I was happy with the ink coverage and blend, I added a bit of Sakura glimmer pen to the letters and then heat set it to be sure it was dry. Next, placing my stamped sentiment back into the MISTI I was able to restamp the sentiment with embossing ink and then heat set it with some clear embossing powder. I repeated the process twice on the card front to complete the sentiment.
I popped up the cupcake with some dimensional foam and added some brown sequins to the card front and layering the entire panel on top of a piece of Tonic Marina Mist blue cardstock.
The second card features another amazing stamp for layering and a two-for-one die cutting and embossing technique.
The Circled Greetings Hello sentiment was cut from some white cardstock cut to A2 size. Flipping the die over and placing a piece of green holographic cardstock over it with an embossing mat and running it through my die cut machine creates an embossed background for my white sentiment die. TIP: look at how you can use your dies in different ways to create additional elements of interest for your card.
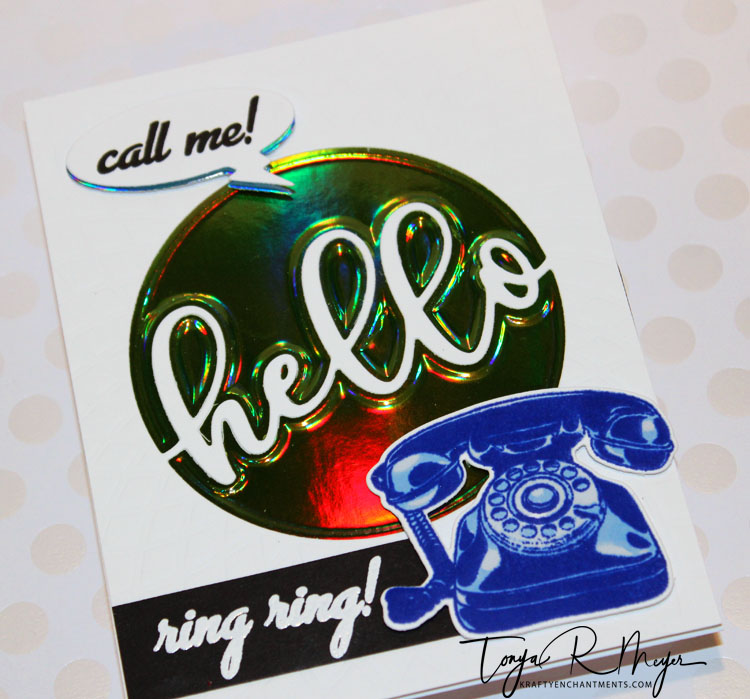
The amazing layered telephone stamp was stamped in the Gacier Caves blue inks. Then I added a die cut speech bubble which I stamped the Call Me sentiment and placed it near the top of my card. The final sentiment, Ring, Ring was stamped and embossed in white on black cardstock to help it stand out.

For my third card, I used a Stencil Technique to once again add interest to my background with the Ombre Stripes Stencil onto some Tonic Rustic mirrored cardstock.
My focal element features the Dot Botanical solid leaves which I stamped with Milk Chocolate, Sapphire and Sweet Leaf. I created a faux watercolor technique using some baby wipes to gently tap onto my inked stamp before bringing it to my paper. The baby wipes have just enough moisture to give it a watercolor look. TIP: look for everyday items you can incorporate in your stamping/card making such as baby wipes, paper towels, wax paper, Press ‘n Seal. They often can help with achieving different looks or effects for your cards.
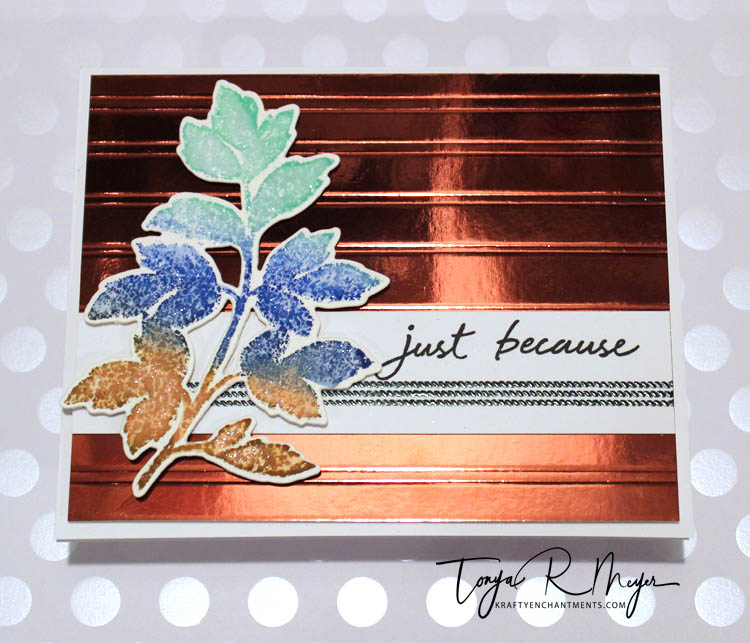
For the sentiment, I stamped the lines from the Tartan plaid builder stamp and heat embossed and then added the Just Because sentiment with Altenew Jet Black ink.
My fourth and final card for the guys also features another leaf stamp from the Dot Botanicals and a Die Cutting technique to add dimension to the sentiment.
On the background for this card, I used a bit of a different material. I die cut a piece of Balsa wood with three different sizes of background dies. Balsa wood is a very thin wood about as thick as 100lb cardstock that’s used for model making. I’ve found that it can be used with die cuts as long as you’re not using a very detailed die.

The beauty of the Balsa wood is that you can stamp on it, paint it or color it with inks. I used my ink cubes and took it directly to the three pieces of the wood to color them. Going with the grain of the wood, I dragged my ink pad across the wood several times until I was happy with the color. The more ink the bolder the color. I added a few streaks of gold ink using a Delicata Golden Glitz ink pad as well.
For the Dot Botanical leaves stamp, I stamped with Milk Chocolate, Sapphire and Sweet Leaf onto 100lb white cardstock and then used an Altenew water brush to move the ink around create a halftone watercolor effect. I stamped and added a small amount of water each time until I was happy with the look before stamping the leaves a final time to retain the dotted look as well. The leaves were cut with the coordinating Dot Botanicals die set.
The sentiment die Thanks was cut from a piece of thick, cardstock that came from the new cutting plates for my electric die cutter. I cut the individual letters from the cardstock three times to create some dimensional letters once they were glued together with liquid glue. The dimensional letters were added to the outline die cut from some Tonic Seafoam Green mirror cardstock to add an extra pop of shine.


I layered the colored Balsa pieces over a background of Tonic Rustic mirrored cardstock using some dimensional foam. The faux water colored leaves and the thanks sentiment were added to complete the card.

Here’s a look at all 4 of the masculine cards for the set.

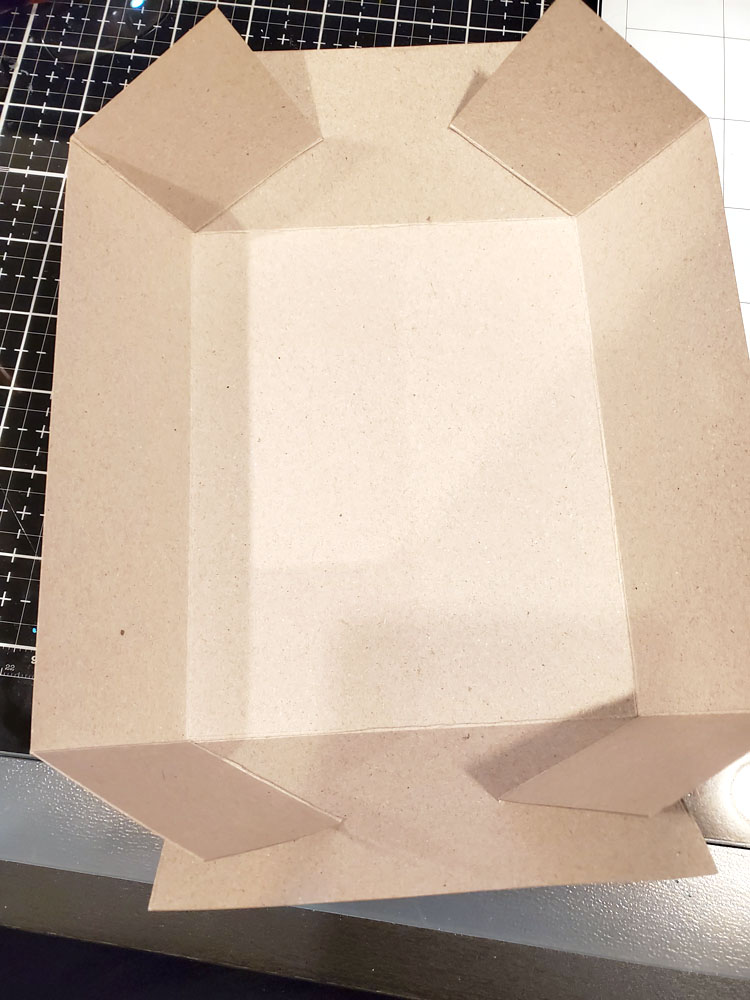
The boxes were created from some Chipboard.
Measurements for the bottom of the box:
8 ¾ x 10 – scored on all sides a 2 inches then snipped up to score line on the short edge and folded and adhered with score tape
For the top of the top add 1/16” to the measurements to allow for the top of the box to fit over the bottom. Scored and snipped in the same place and adhered with score tape.
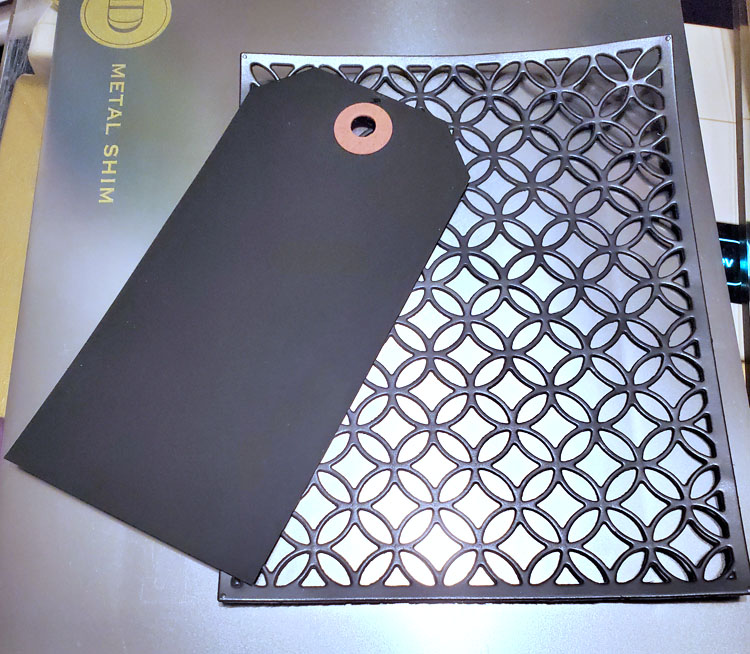
To create the tags, I used some pre-made tags I’d received in a stamp kit. I wanted to create an embossed element on my tags so I created a stencil by die cutting a thin magnet sheet using the Circle Quilt Cover die. Once the magnet was cut I found that I could use it to emboss or even letter press onto my card stock with inks. I used the created stencil to emboss at an angle on my tags. I think this gives a fun effect and the fact that you can pretty much use any die to create a stencil or embossing element creates endless possibilities for crafting.
For the Just for You sentiment I stamped one set with Sapphire and Persian Blue inks and the other tag was stamped with Tide Blue and Caribbean Sky inks. The sentiments were cut with the coordinating die. I cut an additional background from the Tonic Holo Waves cardstock.
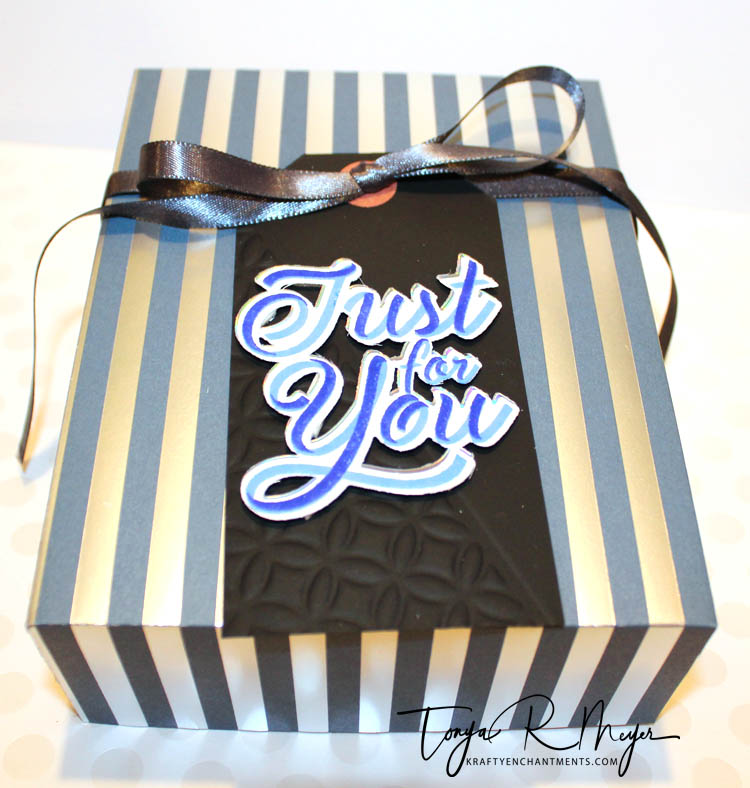
I can easily use a Sakura white or colored Gelly Roll pen to address to the recipient on the back of the tag.
The tags were added to the boxes using some ribbon from Ellen Hudson. I plan to give these boxes as gifts for possibly Christmas. The nice thing is that my boxes are roomy enough to fit in a few more cards in each box. I think that will make a nice personal gift for someone.


I hope you’ve enjoyed my cards today. This was such a fun process to go through all of the Level 1 Altenew Educator courses and I’ve learned so much. This final was the biggest card project I’ve ever had to plan and execute. It was just a teensy bit stressful – eek!
I’m gonna pat myself on the back and have a celebratory shopping spree at Starbucks to go pick up my tumbler that I was inspired by, LOL!
Thank you for hanging in there with me and sharing your thoughts and comments throughout all my course work. I’d encourage anyone wanting to learn more or take their card projects to the next Level to sign up for some classes at the Altenew Academy.
Hugs
Tonya
Supplies Used:
Female Card 1
Calming Reverie – Hello Sentiment
Creative Medium – Green Iridescent paste
My Favorite Things – Scalloped Edge Dies – sorry couldn’t locate and link
Warm Sunshine Mini Ink Cube – flower center
Milk Chocolate Mini Ink Cube – flower center
Sakura Stardust Gelly Roll pen – flower center
Tonic Marina Mist Mirror Cardstock
Female Card 2
Layered Cupcake Stamp Set – Birthday sentiment
Sakura Sparkle Gelly Roll pen for sentiment
Tonic Marina Mist Mirror Cardstock
Recollections 12×12 Cardstock – for Tulip – any cardstock works so use your favorites
Female Card 3
Handpicked Bouquet – sentiment
Tonic Marina Mist Mirror Cardstock
Simon Says Stamp Assorted Holographic Cardstock
Female Card 4
Pattern Play Diamond – background
Tonic Silky Sky Mirror Cardstock
Tonic Holo Waves Mirror Cardstock
Hero Arts Bridal Tinsel Embossing Powder
Male Card 1
Sapphire Mini Ink Cube – cupcake wrapper
Sapphire Blue Delicata Ink Cube – cupcake wrapper
Sweet Leaf Mini Ink Cube – frosting
Milk Chocolate Mini Ink Cube – cupcake
Glacier Caves Mini Ink Cubes – streamers
Altenew Artist marker Jet Black
Sakura Sparkle Gelly Roll pen for sentiment
Tonic Marina Mist Mirror Cardstock
Brown Sequins
Male Card 2
Tonic Seafoam Green Mirror Cardstock
Whimsy Stamps Comic Speech Bubbles Die Set
Simon Says Stamp Fine Detail White Embossing Powder
Male Card 3
Dot Botanicals Coordinating Die Set
Brutus Monroe Nightshift Green Embossing Powder
Tonic Rustic Dusk Mirror Cardstock
Male Card 4
Dot Botanicals – solid leaf
Dot Botanicals Coordinating Die Set
Delicata Golden Glitz Mini Ink Cube
Tonic Rustic Dusk Mirror Cardstock
Tonic Seafoam Green Mirror Cardstock
MFT Stamps Dienamics Stitched Rectangle Dies – could not find to link – may be retired
Gift Boxes & Tags
Bazzil Basics Cardstock 12×12
The Greetery Written in Ribbons Stamp
The Greetery Written in Ribbons Die set
Tonic Holo Waves Mirrored Cardstock
Frequently Use Items
Altenew Stamp packages – great for holding both stamps, dies and stencils
Springhill White Index 110lb cardstock
Revolution Die Cutting Machine
Anna Giffin Empress Electric Die Cutting Machine


Fantastic work!
LikeLike
Thank you for the kind words!
LikeLike
Girl, these are all jaw-dropping gorgeous! Wow! Lots of work went into these and I love all of them!
LikeLike
Thanks so much Leslie! It was a lot of fun and I’m happy with how everything turned out!
LikeLike
OH WOW!!!! These look fantastic! I love all that shine and the blue tones. LOVE LOVE. This is amazing work!!
Thank you for entering your work to the AECP assignment gallery.
LikeLike
Thank you Erum! I had a lot of fun going through Level 1 and I’m ready to take on Level 2! Thank you for all of your wonderful comments along the way!
LikeLike