AECP For the Guys
Hello and welcome back! I’m sharing another card today from my AECP Level 1 classes. This class was called For the Guys and was all about creating masculine cards.
I think every crafter struggles with making cards geared toward men. It is easy to create pretty, frilly cards with bright colors and flowers. Obviously most guys would not want a card that has a “girly” theme, right?!?
I struggled with this card also. My tendency is to create cards that are brightly colored with a lot of sparkle, shine and bling because that is what I am drawn to as a designer.
I started playing with a technique that was new to me and it helped to fuel the inspiration for this card.
I spent my Sunday playing with my stencils, but not in the way you might expect. Rather than using inks, glitter pastes to stencil I discovered that I could also emboss with them. This opened up a whole new world for me. I have a lot of stencils and now with this technique I can use them in a whole new way to create so many unique looks for cards and projects. I cannot tell you how excited I am about this technique. I have no idea why I’d never thought to try that before. I guess I thought that the stencils would be too thin to be able to emboss. So glad I was wrong!
To start, I used my electronic die cutting machine and referenced the guide for my machine on what I needed for an embossing sandwich. For my machine; which is the Anna Griffin electronic die cutter, I used the sandwich referenced for embossing with dies. I thought I might need a shim or an extra sheet of paper, but the end result was a beautifully embossed piece of cardstock. I used 110 lb Neenah Solar White Cardstock for this and I am over the moon with the beautiful results. I ended up embossing several pieces of cardstock using the Altenew stencils, it was so much fun! Utilizing this technique I was able to use both the embossed or debossed side of my cardstock. I actually think that embossing this way gives much better results than using an embossing folder as many times they can tear and pierce paper if you don’t get your sandwich perfect.
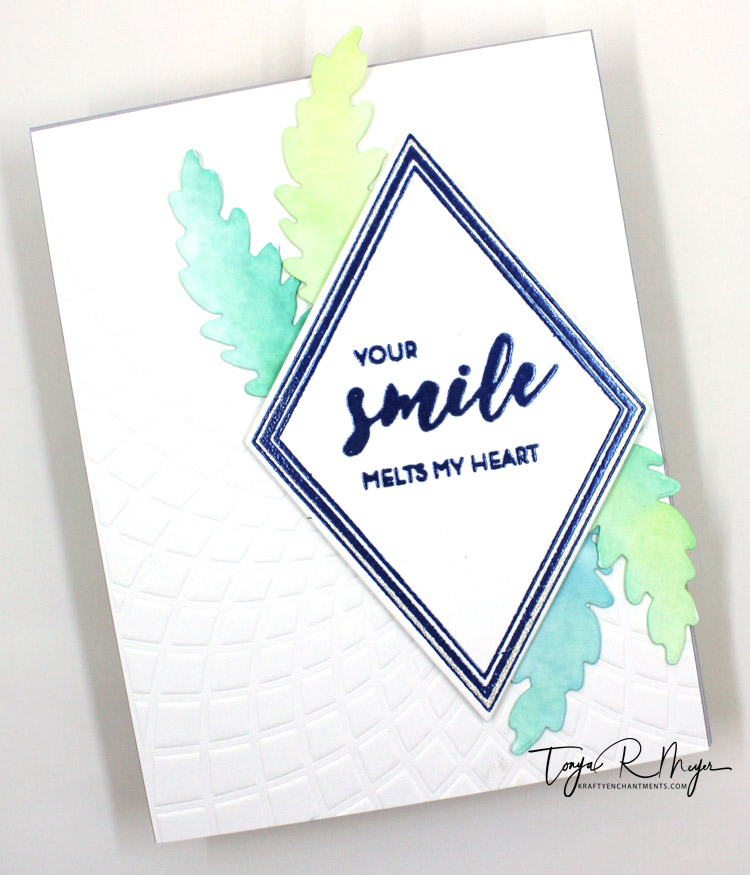
After playing with several of my Altenew stencils, I ended up loving the impression that was left by the Altenew Sunburst Stencil. I put my cardstock on one corner when I ran it through my machine so the focal point was off to the right rather than in the center.

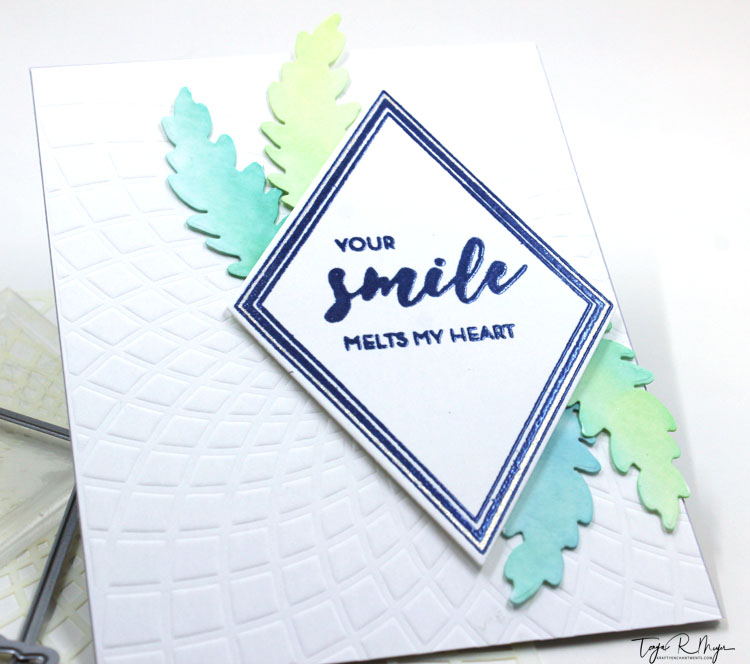
With my creativity sparked, I knew what I wanted to do for my masculine card. I used the Altenew Geo Frames stamp and die set as I could use that as my focal point with the stamped sentiment in the middle.
I stamped the diamond shaped frame with some embossing ink into onto my 110 lb. white cardstock and sprinkled on some navy embossing powder and heat set it.
Next, I stamped the sentiments from the set; Your Smile melts my Heart. These were also stamped with embossing ink and heat set with the same navy embossing powder.

Once my sentiment was heat set, I used the coordinating Geo Frames die to cut out the diamond shape.
I used another tool that was new to me, a Sakura Jelly Roll Sparkle pen. It puts a very subtle silver shimmer onto your project and it’s great for detailed areas and drawing over stamped lines. I used it to draw a line around the diamond shaped Geo Frame.
I’d originally thought I would just have a CAS card, but decided that it needed an additional pop of color. I wanted to add some greenery but didn’t want to add additional stamped images. I rummaged through my Altenew stamps and dies and found the Holiday Bow die set. I wasn’t sure if I’d be able to just add colored greenery shapes to my card, but decided to try it.
I cut a few pieces of the leaf die with some scrap 110lb cardstock. Once finished, I grabbed my water brush and my Kuretake Zig Clean Color Brush pens. Using Marine Green, Emerald Green, Light Green and Yellow I scribbled the color onto my glass crafting mat. Using my water brush pen, I picked up bits of color and mixed with water onto my cardstock. I had to be careful not to saturate the cardstock too much with water since I was not using water color paper.
After coloring the greenery, I set it aside to dry. I added some dimensional foam to my geometric diamond. Once the leaves were dry, I added them behind the diamond with some score tape before adding it to my card panel over the focal point of the sunburst.
The panel was added to a piece of soft grey cardstock cut to A2 sized and scored for a top fold.
I really love how this card turned out. I think it really is a nice card to give to the #1 man in my life, my hubby Gary!
Thanks for stopping by! Hope you’ve enjoyed today’s card and found some inspiration to create a card For the Guys.
Hugs
Tonya


I love using my stencils to emboss. I am glad you found out another use for them. I love how subtle and gorgeous the effect is. Gorgeous card, I like the colours you have used.
Thank you for entering your fabulous work to the AECP assignment gallery. Well done.
LikeLike
Thank you Erum! I now want to emboss everything with my stencils. Such a great technique!
LikeLike