Spellbinding Stamps first Challenge – Embellishments
Hello and happy Friday! Hope everyone’s had a fantastic week! I’m particularly happy as it’s a nice 3-day weekend for me. I’m hoping to have plenty of quality crafting time and unboxing of some goodies that I received this week (more details on that later).
I’m here today to welcome everyone to the first challenge for Spellbinding Stamps by Nikki Burnette. Today our challenge is Embellishments.
There are a multitude of different (and often adorable) embellishments you can add to your creations from brads, flowers and ribbon to buttons, sequins and charms. You can even choose to add embellishment to your cards and designs with intricate die cuts. With Nikki’s adorable images there are so many creative ideas you can come up with to embellish your designs – the sky is the limit.
For my challenge card today, I colored the gorgeous Payton in traditional Halloween colors and gave her some fiery red hair and a steely blue gaze using my Copic markers. I also added a bit of Wink of Stella to her wings for some shimmer.

Payton digital stamp from Spellbinding Stamps by Nikki Burnette. Colored with Copic markers and added Wink of Stella to the wings.
To embellish my card I started by cutting a very intricate die from Couture Creations called Ornamental Lace from some light weight black cardstock. Admittedly this is a very tricky die to cut because of all the detail. I had several different tries with this die. I finally had to use a layer of wax paper to get a clean-cut. Patience is key with these kinds of dies.
I layered my black lace on top of some striking bright orange cardstock and affixed some purple iRock crystals to the little circles. I love how they fit perfectly in the die cut circles.
Next I die cut 4 different sizes of Fishtale Flags from MFT Die-namics from some black, glittered orange, purple and plain orange cardstock. I glued each layer together and added my “Hocus Pocus It’s Halloween” sentiment stamp from Mama Elephant stamps in some black Versafine ink and added some black embossing powder to it and heat set it. I added two more purple iRock crystals to the bottom corners of the sentiment flag.
My lovely flower didn’t originally come with the skull & crossbones in it. It had a pearl button in it which didn’t quite work with my Halloween theme for the card. Luckily for me it was just glued on and I was able to easily remove it and replace it with the skull and cross bone.

Sentiment & flower detail
I cut two lengths of ribbon from some purple and silver ribbon stash I had and made a bow and glued it in place at the top of my fishtail flags and then glued my flower on top of it. It was quite a thick layer so I actually had to use my Tombo Multi Liquid glue to get it to adhere really well.
My final embellishment was the little bat shaped brad that I added flying over Payton’s head.
I added a die cut layer of orange glitter paper behind my top layer and adhered it to my card base and finally I placed Payton on the card with some dimensional foam to give the image some depth against my background.
Here’s my finished card:
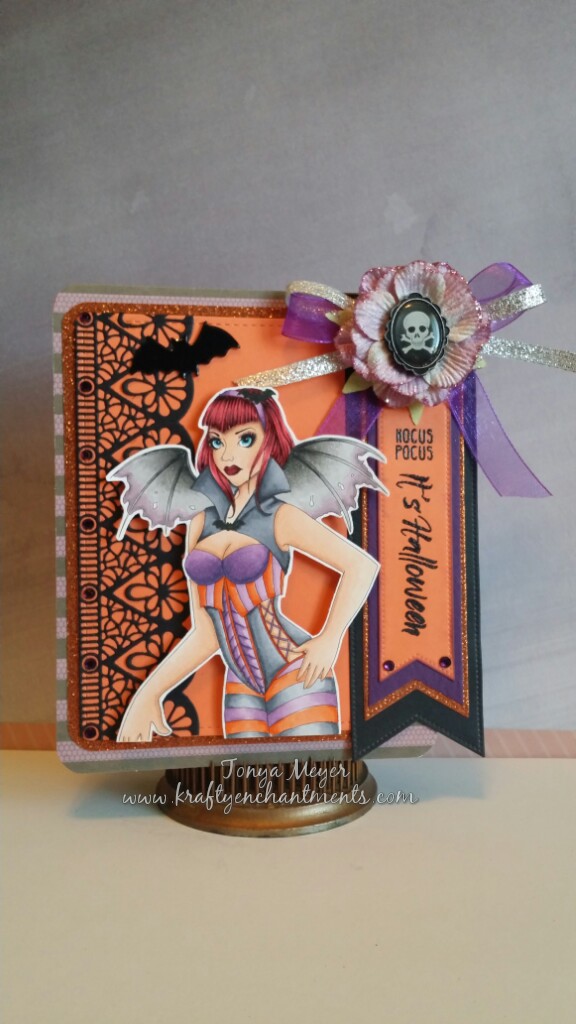
Embellishment card featuring Payton from Spellbinding Stamps by Nikki Burnette
Here’s your opportunity to play along with this challenge. Hop on over to the Spellbinding Stamps blog here and check out all of the details for the challenge.
If you don’t already have a stamp to play along, please stop by the Spellbinding Stamps Etsy shop here and choose from hundred’s of Nikki’s whimsical images so that you can play along on this challenge (you know you still have some Halloween cards to make – no worries I do too!).
For inspiration and ideas be sure to check out the other Design Team members blogs also.
You can share your finished works of art on the Facebook Fan Group here.
In case you need any of the links, here they are again:
Spellbinding Stamps Challenge Blog: http://spellbindingstamps.blogspot.com/
Spellbinding Stamps Etsy Store: https://www.etsy.com/shop/aurella27
Spellbinding Stamps Facebook Fan Page: https://www.facebook.com/groups/spellbindingstamps/
Hope everyone has a great weekend and has lots of fun embellishing cards for this challenge.
See you soon!
P.S. Something kinda cool I noticed about my card when I took photos using a flash is that it really made Payton’s blue eyes stand out against her red hair. You can also see all the glittery detail in this photo.
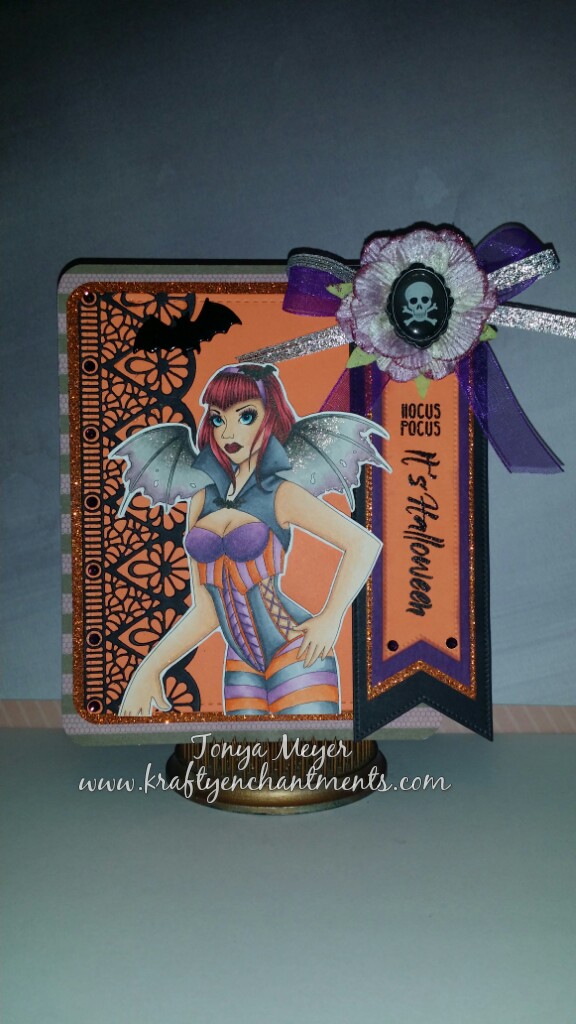
Flash photo to show all the glittery details on the card.

