Introductions are in Order….meet Spellbinding Stamps by Nikki Burnette
Hi All,
Well at last, the day is finally arrived and I can share some happy news!
I am so excited to announce that I was accepted to the Design Team for Spellbinding Stamps by Nikki Burnette. I cannot tell you how hard it’s been keeping this news to myself for the past month and a half because I really wanted to shout it from the rooftops, LOL. I’m over the moon at this opportunity to represent Nikki Burnette and to be able to create and share projects made with her beautiful digital stamps which cover all the fantasy images I like from mermaids and fairies to lovely witches. This is my very first Design Team and I’m thrilled to be working with such a talented group of ladies from every corner of the globe!
For those who might be new to my blog, welcome! My name is Tonya and I live in Denver, CO with my husband, two dogs and a cat – collectively referred to as the “fur kids”. Although I have a degree in Graphic Design, I have been Business Manager for a Spanish Language TV & Radio Group for 26 years. After long days at the office, I like to get inky and play with paper, sparkly embellishments and die cuts in my craft room as a way of relaxing and unwinding. I’ve loved crafting and paper as long as I can remember, but was only introduced to the wonderful world of Copic markers in 2014 and I have been hooked ever since. I’m passionate about learning new things and taking my cards and creations to the next level so that I can share with you and hopefully inspire you to do something crafty each day.
Today I’m here to share with you my Design Team Introduction Card.
This image is called Madelina. You can find her in Nikki’s ETSY shop here.

Madelina digital stamp by Nikki Burnette, colored with Copic Markers.
I started off by coloring the gorgeous, Madelina up with my Copic Markers in some deeper purple and orange tones with just a hint of green thrown in on the lace of her sleeves and hat for a bit of contrast.
Once she was colored, I fussy cut her out and added a faint outline of the lightest Blue-Green (BG10-Cool Shadow) I believe to give her a subtle glow since she would be standing in moonlight.
Next I needed to create a background for my image. I knew I wanted it to be a moonlit night so I started playing around with my Craftwell eBrush airbrush system. For those of you who are unfamiliar with it, the Craftwell eBrush allows you to take a variety of different markers (6 different types of markers) and airbrush with them using an adapter for each type of marker that fits on the airbrush. The adapter positions the marker so that the air blows across it and sprays the ink onto the paper. I initially tried it with my Copic markers, but decided that they’re too good to use for that purpose as the air does dry them out with continued use. So for this background I actually used Sharpies to create my night sky. I used several different vibrant colors to create the multi-toned sky and put them on in layers until I was happy with the result.
For my moon, I’d initially thought to mask a circle and airbrush around it, but decided to create a softer, glowing effect where the moon would be so I used the Sharpies once again selecting lighter shades of blue with just a hint of yellow and not adding as many layers.
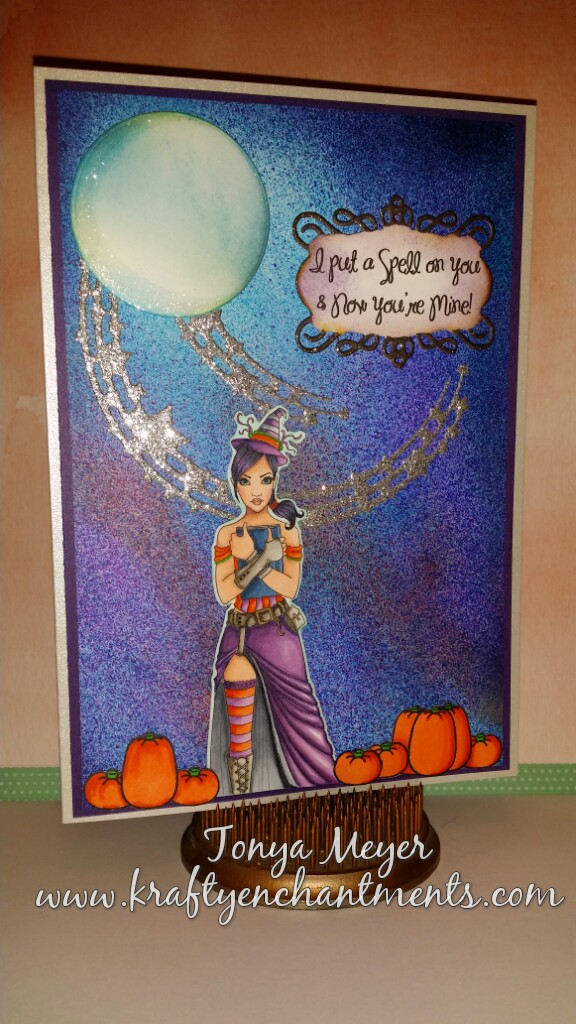
Once my background was complete, I die cut a small circle from some Neenah Solar White 80lb cardstock to use as my moon and applied some Distress Inks in Broken China and Stormy Sky with just a hint of Squeezed Lemonade. I also added a bit of Wink of Stella clear to my moon to give it some added shimmer. Here’s a picture with the flash so that you can see all the shimmer in the card:
I wanted the effect of shooting stars streaking across my sky so I used a Die Cut from Marianne Designs called Stars Flourish (CR1293). This is a very intricate die and I wanted my stars to have sparkle so I was going to use some paper with shimmer or glitter on it. I’d had a couple of 12 x 12 pads with this kind of paper and a piece of cardstock that had glitter on it. I quickly learned that not all sparkly paper is created equal as some of them actually have a sort of plastic coating over them that make it very difficult for a die to cut through and also if it’s extremely thick cardstock it won’t cut with an intricate die such as this. I scrapped several sheets of paper before finally heading out to my local big box craft store and finding actual glitter paper – that truly had paper in it that I was able to cut through. Yay! I cut two of the Stars Flourish and then cut one in half again to make the smaller shooting star trail.
To add a bit more dimensional interest and color to my card, I colored two different sized pumpkins using my Copics. I created masks for a few of the pumpkins and layered a few of them with dimensional foam to make it appear that she’s standing in a pumpkin patch.
I layered all of my elements onto a shimmery silver cardstock base that is 5 ¼ x 7 ½. I added a layer of purple cardstock that was ¼ inch smaller and finally layered on my completed background and other card elements and printed and die cut my sentiment and added it to the card with some dimensional foam. Here’s the finished card:
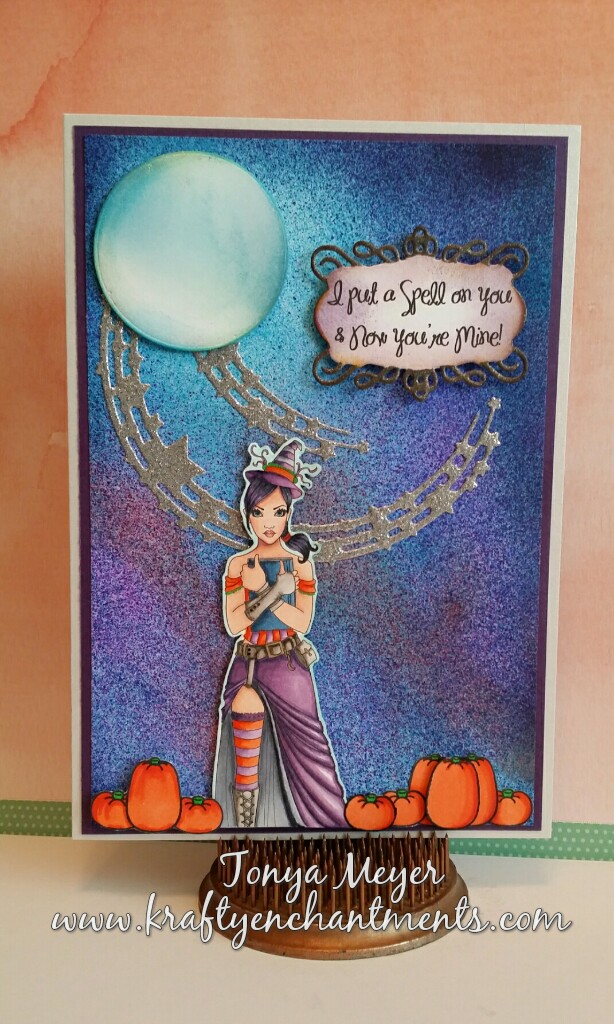
Spellbinding Stamps by Nikki Burnette featuring digi stamp, Madelina.
I’m so happy with the way this card turned out. I love the Madelina image. It actually comes with 3 different versions of the image by the way so that you can choose to color the stand alone image as I did for this card or you can use the one that has a background with lots of books and one with the books a cute ribbon banner that says, “I Love Books”.
I hope you’ve enjoyed my very first Design Tea card for Spellbinding Stamps by Nikki Burnette.
Don’t forget to stop by Nikki’s Blog and share some love for her amazing talent and artwork and check out my fellow Design Team members and their card creations there as well at http://www.spellbindingstamps.blogspot.com/.
You can also follow Nikki and the Design Team on her Facebook page https://www.facebook.com/groups/spellbindingstamps/ for all of the latest news and upcoming challenges. You won’t want to miss the fun!
Please feel free to leave comments and questions. Thanks for stopping by! Hope you have a crafty weekend!
Tonya


Yay!!!! I’m so happy for you! I love this card and I’m so excited for you!
LikeLike
Thank you! Appreciate all your help and guidance along the way! Couldn’t have gotten to this point without you!
LikeLike