Steampunk Tag featuring Nikki Burnette’s Constance
Hi crafty friends!
I’m back again today to share my latest creation. I have to say that I had so much fun with this project as there were so many different elements to it. Plenty of ways to get your hands inky and sticky.
Today I’m sharing a Steampunk themed tag I made using the digi stamp Constance from Nikki Burnette. You can find this image and many more in Nikki’s Etsy shop. Here’s the link: https://www.etsy.com/shop/aurella27.
I’ve been wanting to try to create something with a steampunk image for quite a while now. I think I hadn’t because I was a bit intimidated at the prospect of something that could involve “mixed media”. Ooohhh, those are scary words huh? LOL! I really didn’t venture too much into the mixed media on this project. I did keep it pretty basic for my first run at creating something steampunky. I just focused primarily on adding dimension and textural elements that provide added interest to the overall tag.
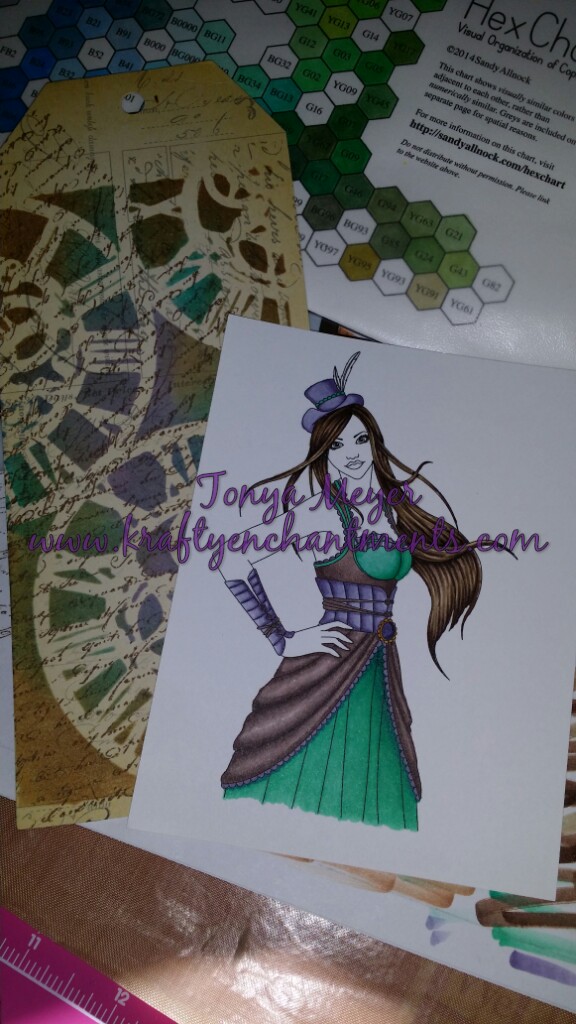
The first order of business was coloring Ms. Constance with my Copic markers. I was a bit worried about the color combos I chose because they weren’t my go-to colors for skin & hair. I’d ordered some refills for my Copic markers and they hadn’t arrived yet. When I was initially coloring the image I wasn’t excited about how it was looking but I continued with the new combos because I was determined to finish the image.
Nikki Burnette’s digi stamp Constance
I wanted her clothing colors to have rich jewel tones but be sort of muted at the same time so I used the brown overlay of her dress to tone down the green a bit. Then I threw in a bit of purple for good measure, plus it’s one of my favorite colors.
Once I was done coloring everything, I fussy cut the image out. I also used an X-acto to cut the smaller areas between her arm and hair because I wanted the tag I was going to mount her on to show through.
Next I started working on the tag background. For my tag, I used a tag from the Prima Marketing Tag Pad. These are pre-cut tags and they come in a variety of colors and sizes, which is great for making quick projects. The tag pads have two sides to them usually, one is a shiny side and the other is a matte finish. For this project I used the matte side.
I placed my tag on my indestructible craft mat and taped a stencil to it. The stencil I used is from the Tim Holtz Collection and is called Clockwork.
Completed digi image Constance and finished tag background
I sponged over the stencil with some Distress Inks in Walnut Stain, Vintage Photo, Dusty Concord and some Peacock Feathers. The Peacock Feathers color is very vibrant so I did tap off onto a scrap paper before blending that color with the others. I was also carefully peeling up my stencil to see how the colors were blending together and to make sure I wasn’t missing any areas.
Once I was satisfied with the look of my blending I removed the stencil. After looking at the blended colors I decided it needed a little something extra over the stenciled areas. I wanted something that wasn’t going to be too distracting so I chose a background stamp that I had from Stampabilities called Faded Text Background. This stamp is a 5 1/2 x 4 1/4 inch wood block stamp that you can find at Hobby Lobby. It’s perfect for adding some extra background noise to your cards. I inked my stamp with some Memento Rich Cocoa dye ink and stamped my tag in a couple of places.
Once my stamp ink was dry, I sprayed the entire tag with some Glimmer Mist from Tattered Angels. This gives the entire tag a hint of sparkle that looks very cool in the light.
Then it was on to embellishing my card. Let me say, there are so many types of steampunk themed embellishments out there. It’s hard to know when to stop with some of that stuff and you can get very elaborate with texture and dimension. I actually purchased several of my embellishments from Hobby Lobby’s Paper Studio brand and they were on sale.
First I started by positioning my film strip across my tag. This film strip was the Paper Studio brand but Tim Holtz also makes something similar. Once my strip was in place I cut it and then glued it using some Glossy Accents. Not sure that Glossy Accents was the best glue for this project but it seemed to work and it dries clear which is a bonus. If anyone has any recommendations for some glue that could work better for future projects like this that would be awesome.
Next I arranged some of the different clocks, gears, flower, fleur-de-lis and accent gems to get a visual on how it would look. Once the layout seemed to work I began gluing each piece in place with my Glossy Accents. I did use some dimensional foam and glue on the two clocks and also on the flower to give them a little more surface to adhere to.
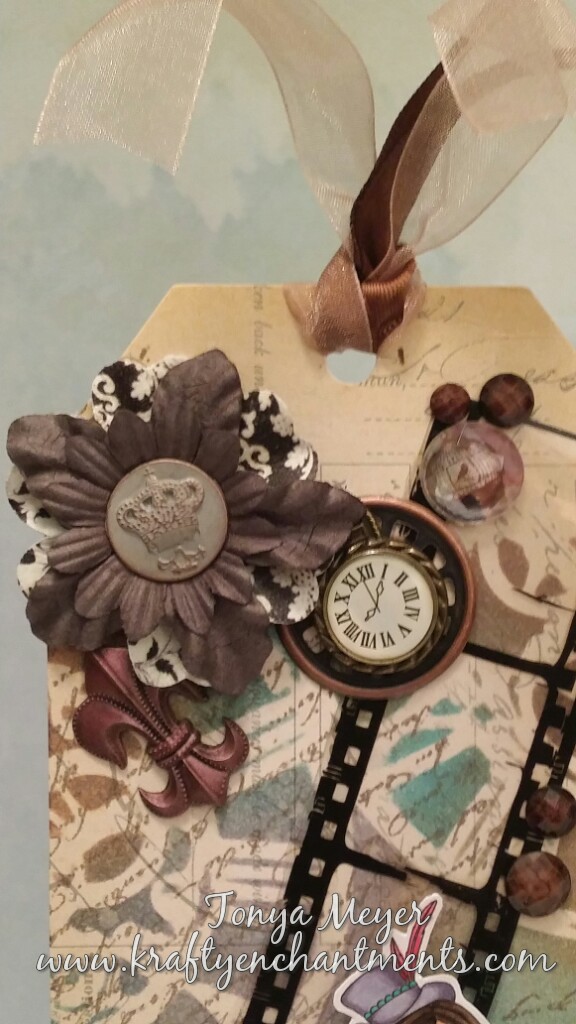
Once everything seemed to be dry I put dimensional foam on Constance and positioned her on the card. I also glued a little clock at her waist.
The final embellishments I added were the accent gems in a dark brown and the one near the top which actually has an image of a birdcage in it.
I added two pieces of ribbon tied to the top of the tag.
Initially I’d thought I would put a sentiment on the card. I even had one picked out but it’s a bit long so I left the sentiment off for now as it would cover a lot of the tag design. I can always go back and add a sentiment later if I needed.
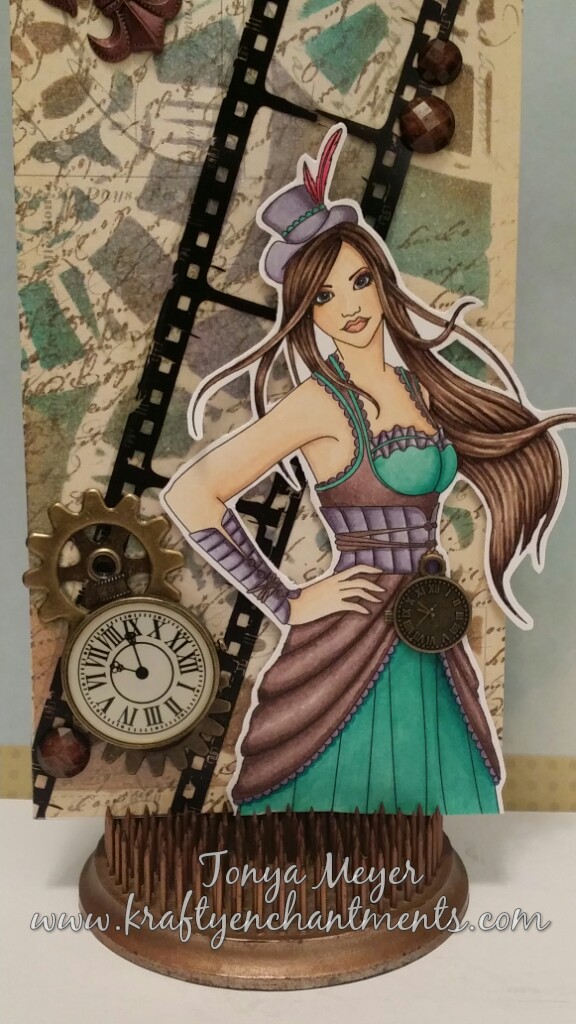
Here’s the completed tag:
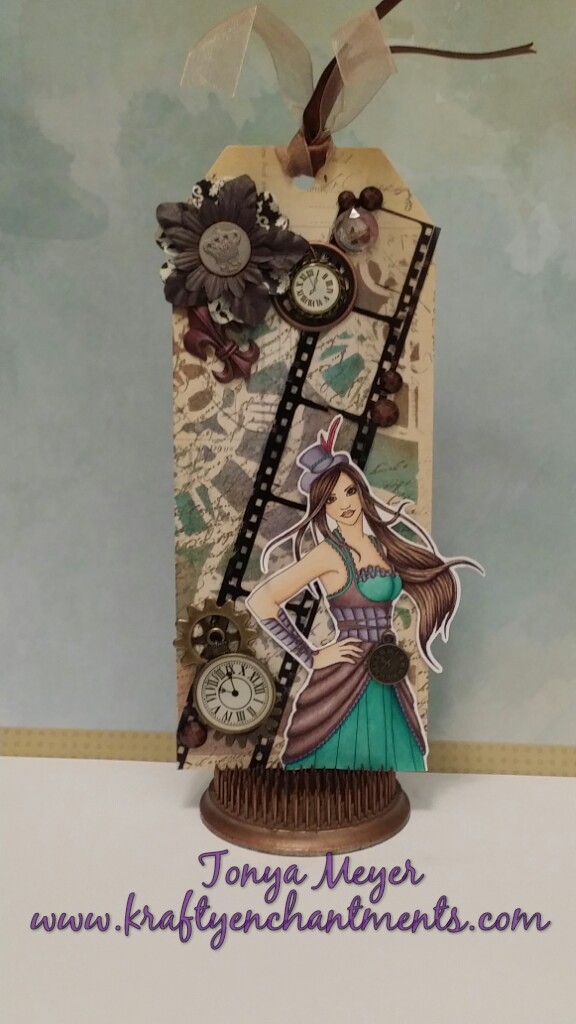
Completed Steampunk tag featuring Nikki Burnette’s digi Constance
This tag was such a blast to create! I was absolutely grinning from ear to ear when I finished it. The color combos I used on the digi really ended up working well with the rest of the layout. It’s always a bonus when something turns out better than you’d expected.
Thanks for stopping by! Hope you enjoyed this little tag creation. Comments and questions are always welcomed.
Have a great day!

