A Little Spring Mix for Easter
Hello and welcome! So glad you stopped by!
Today I am sharing a card I created using The Greetery’s Print Shop Spring Mix stamp, stencil and die set.
You can check out my YouTube video for this card by clicking the link below:
I used this set to create some beautiful Easter cards that were extremely easy to pull together. The stencil, stamp and die combo takes all the guess work out of making these cards and the results are beautiful!
For this project I ended up with three completed cards, however I did only photograph one of the three as the others were given to the recipients. One thing I did realize with my third card was that it is easier to do the die cutting first. I had to figure that out the hard way.
To start, cut two pieces of cardstock to 4 ¼ x 5 ½ or A2 size. Note the die will cut edge to edge on the bottom so if that is a problem you can also use a bigger piece of cardstock. I used the coordinating die for the Spring Mix stencil and cut two of these from my A2 cardstock. The die cuts a lot of little spaces so it is handy to have a poking tool to poke out the negative pieces.
Next, I placed my cardstock on top of a silicone mat. The mat helps to keep the cardstock in place for ink blending and you do not really need to worry about it moving around. Alternatively you could also use a sticky mat for this process as well.
The set comes with five stencils which are are numbered in the upper left hand corner 1 through 5 so that you know what order to use the stencils. Additional there is a thin line around the edge that acts as a guide to align your A2 cardstock. The set also comes with a reference sheet which is good to have handy for color reference and later stamping references.
For my cards, I used all Pink Fresh Studio inks and one from Simon Says Stamp. The first two layers create the stems and leaves of the flowers and layers 3 through 5 are for the floral layers. The stencils make if quite easy to add some extra shading and details.
The die comes with some additional flowers that you can cut if you want to add dimension to your card. I did not use them for this project because I chose to just add depth with color.
Once the ink blending was done, I added the panel to my MISTI and used the reference guide to determine which stamps correspond with the flowers. The stamp set is numbered so you know exactly which stamps to use. It is easy peasy!
Once the flower centers were stamped, I used the second panel that I die cut and glued it to the back of the ink blended, stamped panel. This is to give it a bit more stability for the card base and help it stand up.
Using the Easter scripty word die from The Greetery, I cut it several times from some Neenah 110lb cardstock and then from some Tonic Studios Purple Mist cardstock. I glued all of the die cut pieces together with some liquid glue to give the sentiment piece some stability. I used some liquid glue to add it to the front of my inked flower panel.
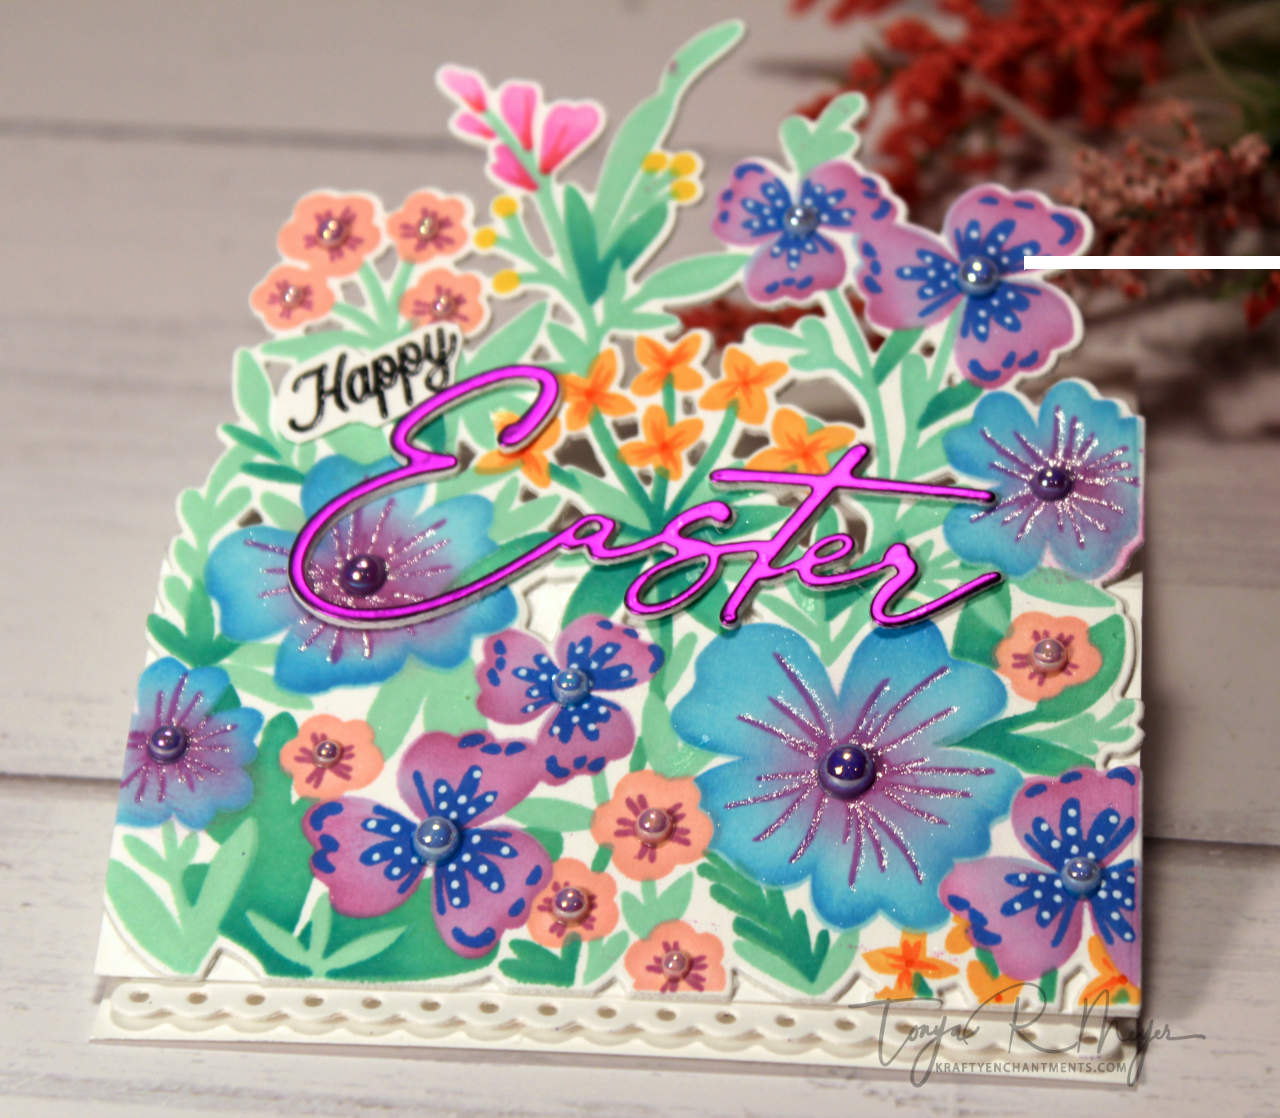
I masked and stamped the word Happy from the Photoplay, Hop to It stamp set with some black detail ink and then a second time with some embossing ink and heat set it with some clear embossing powder. I did not have a die for the word so I fussy cut it out. I added that in the upper left above the word Easter with some liquid glue.
To add a bit of bling, I added some pearls to the flower centers in coordinating colors. I like the dressed up look of the flowers with the pearl centers. Such a fun detail!
For the card base, I cut some Neenah 110lb cardstock to create a top folding A2 size card. On the front of the card, I created a score line horizontally that was two inches from the bottom of the card.
Next, for the stopper on the inside of the card, I used a die from Dare 2B Artzy that is part of the Center Step Die set. It is the cute little scalloped layer from the die set and it measured 4 x 2 1/8 which ended up being the perfect size for the inside of my card. It was big enough to add a sentiment and a small image.
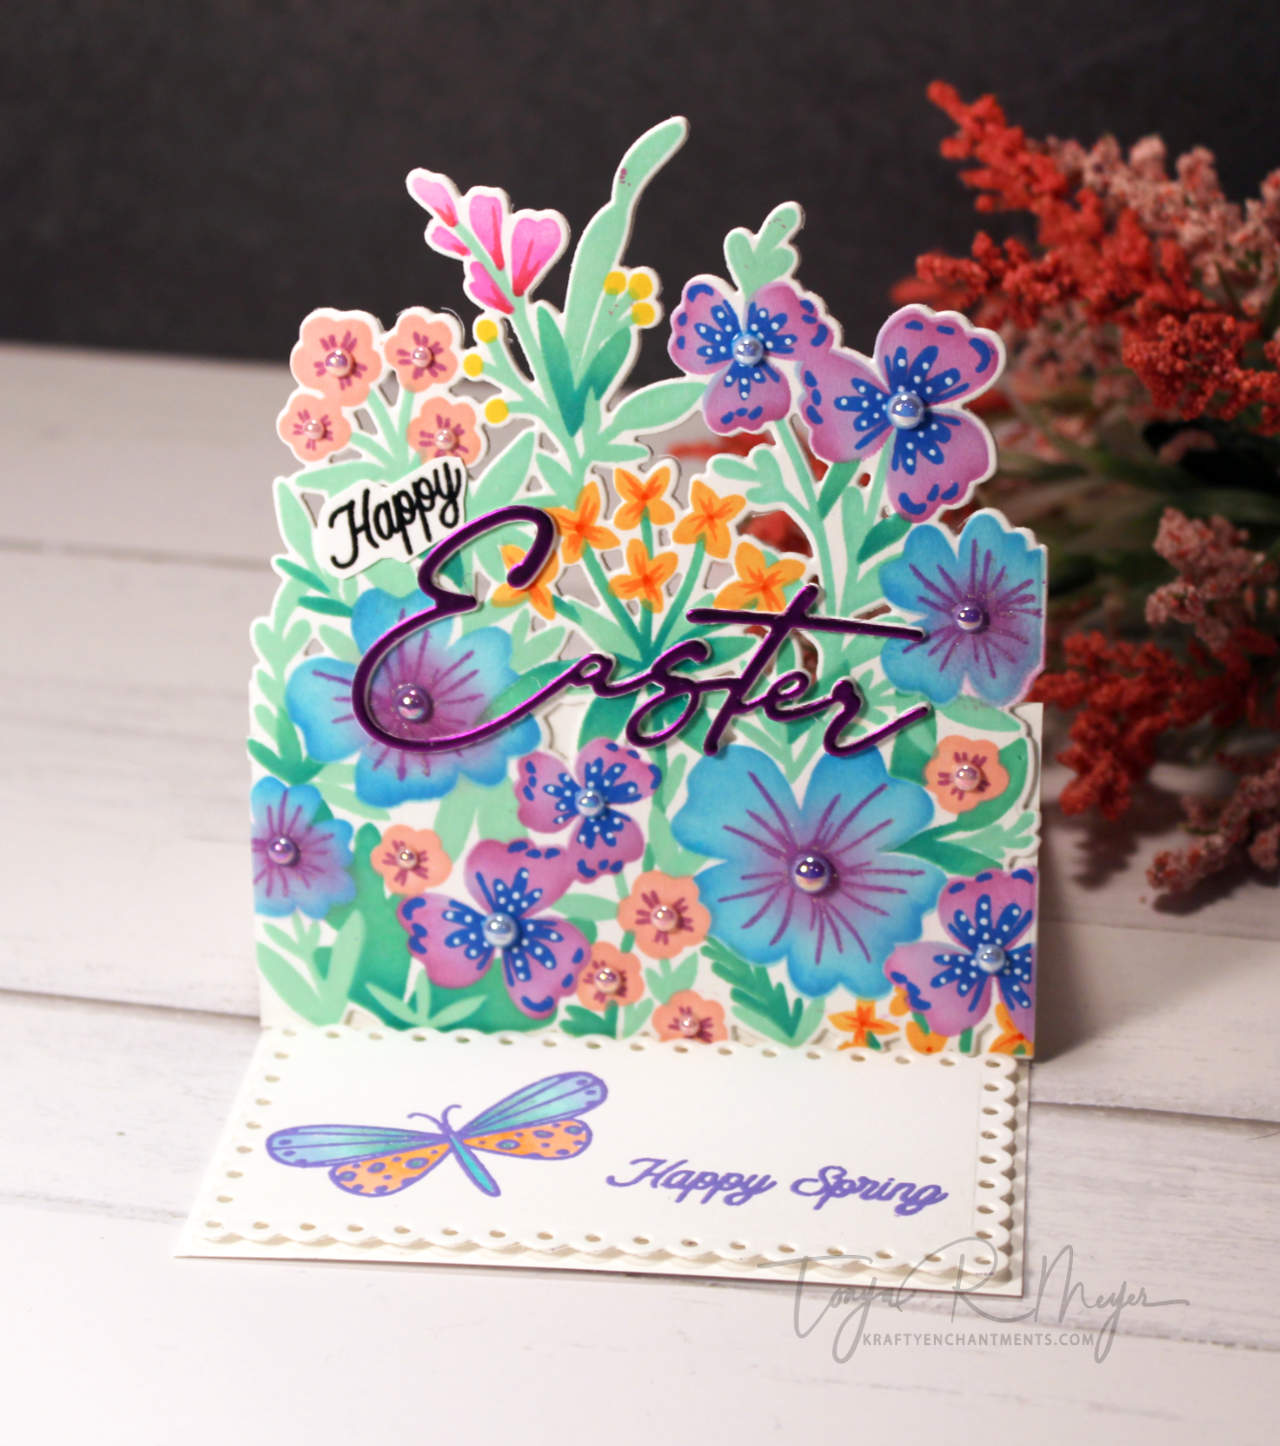
I cut the scalloped layer from some more Neenah 110lb cardstock. I stamped and heat embossed the sentiment Happy Spring and a cute little dragonfly from the Photoplay, Hop to It stamp set.
The dragonfly was colored with some pale mint green, light blue, light pink, and orange Copic markers. I added a bit of Jelly Roll Stardust pen to the wings to give them a bit of sparkle.
I added the little scalloped panel to the bottom of the inside of my card base with some dimensional foam. I wanted to stand up a bit to make sure that the card would stay open. You would not have to add the dimensional foam as it might be able to stay open with just a sentiment strip or something glued in place on the inside of the card. The positioning of the little scalloped panel still leaves plenty of room at the top of the inside of the card for a personalized message.
Finally, for the front of the card base, I added some liquid glue just on the 2 inch section below the score line on the front of the card. Once I had a fair amount of glue, I slid my die cut panel in place at the bottom and made sure it was lined up evenly. I set some stamp blocks on top of it for a few minutes to dry.
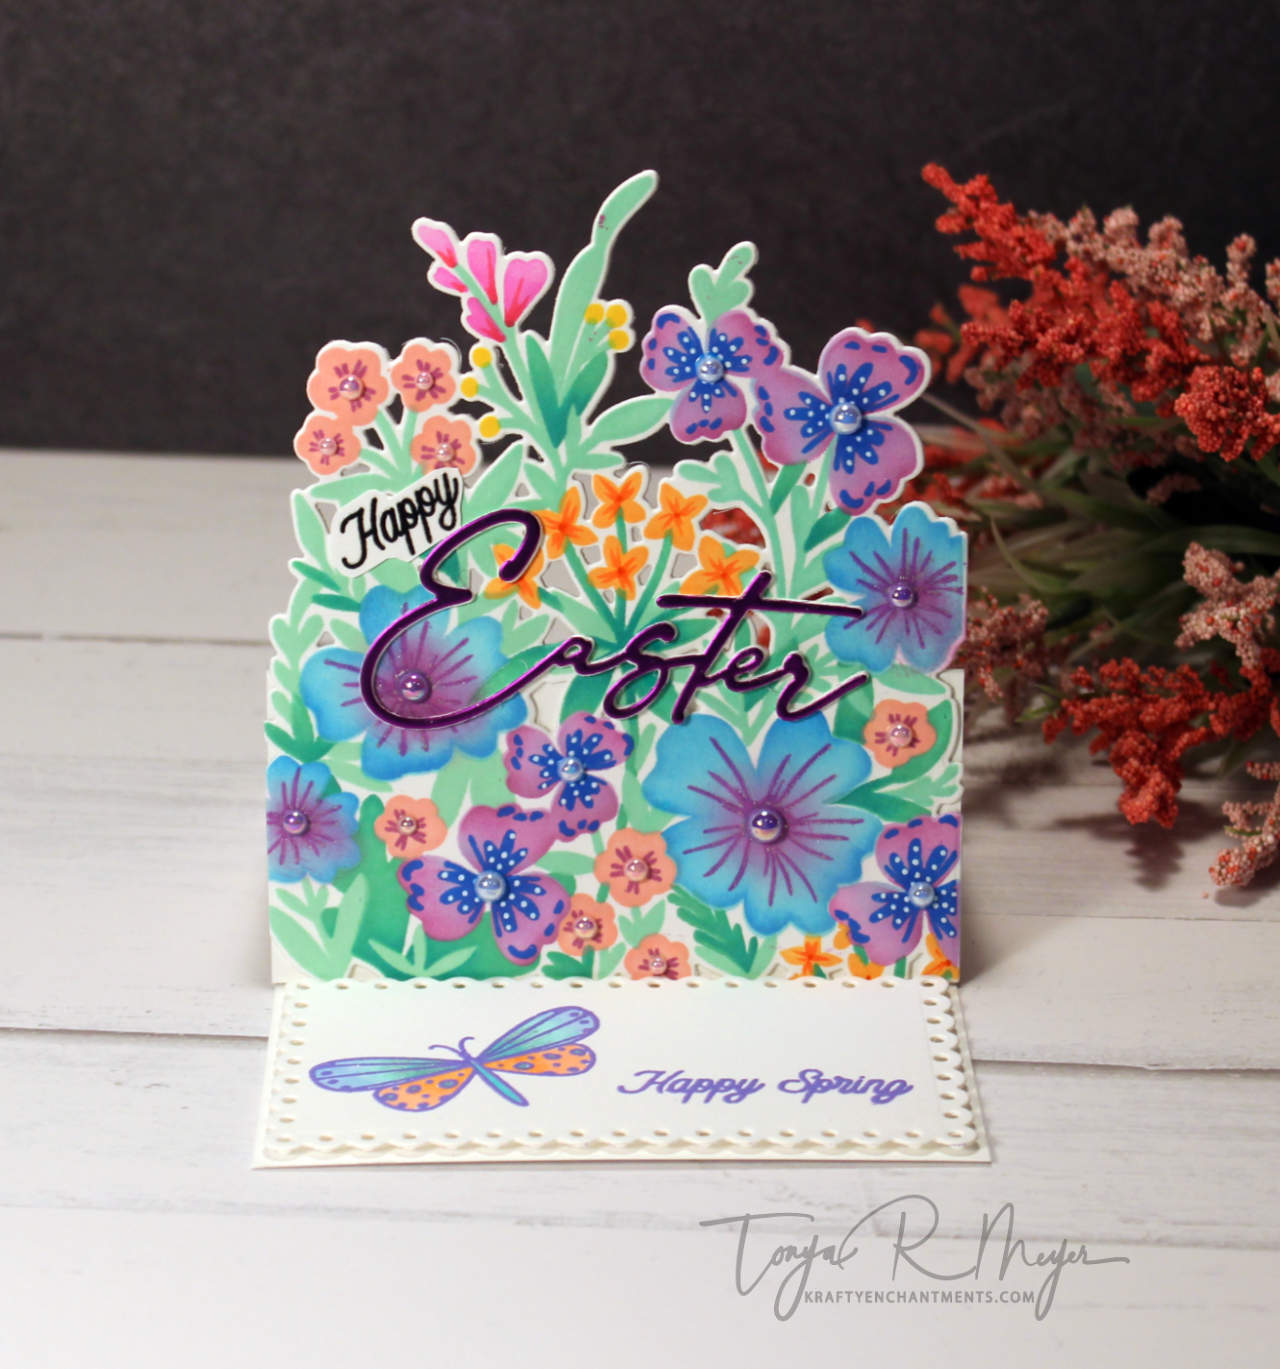
The finished result is an easel fold card with the gorgeous floral display that came together so easily. The Print Shop Spring Mix stamp, die and stencil set is perfect for creating any occasion floral cards and I think you could even use this into the fall season by changing up the colors.
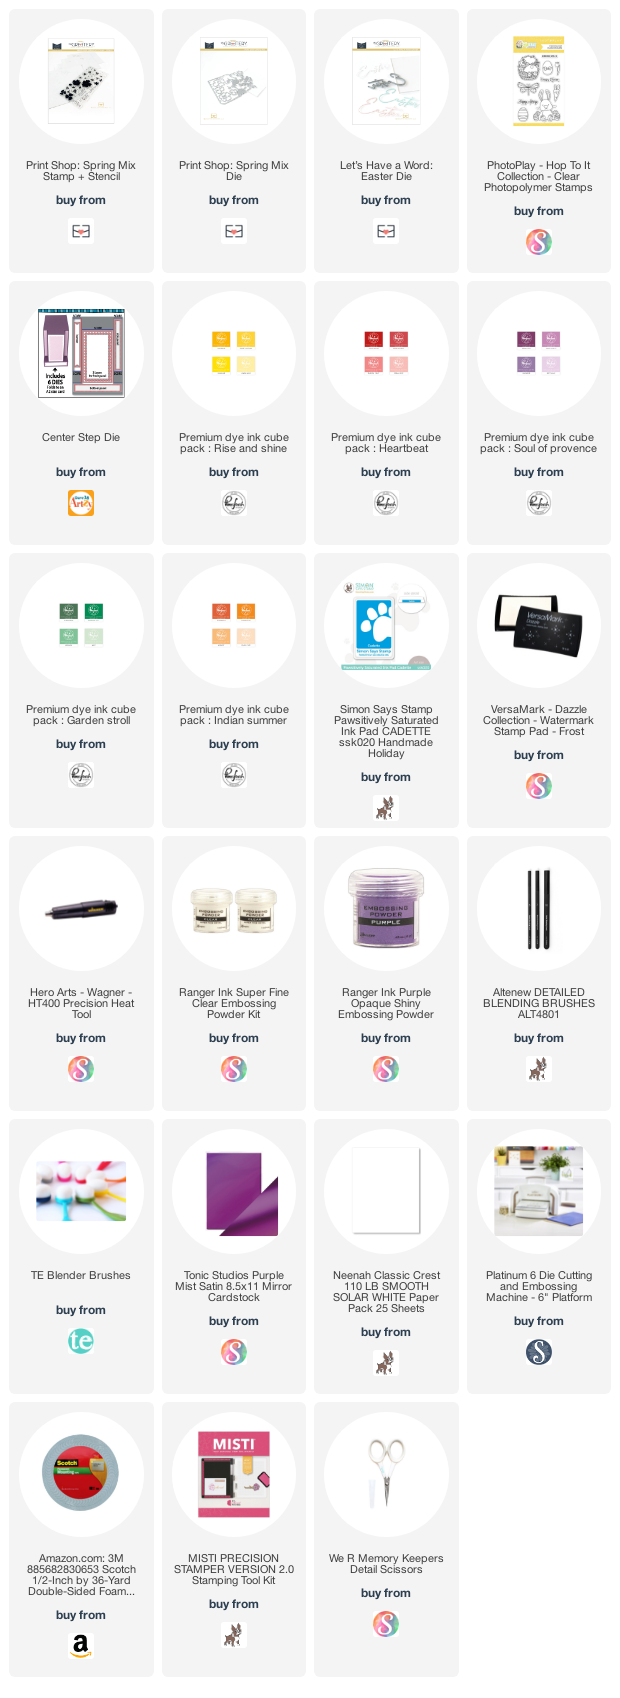
I will have all of the products used in today’s card linked below for your convenience.
Thanks so much for stopping by!
Hugs,
Tonya
https://linkdeli.com/widget.js?id=f5e8378456858c916708

