Falling in Love with the Cone Flower
Happiest of Friday’s everyone!
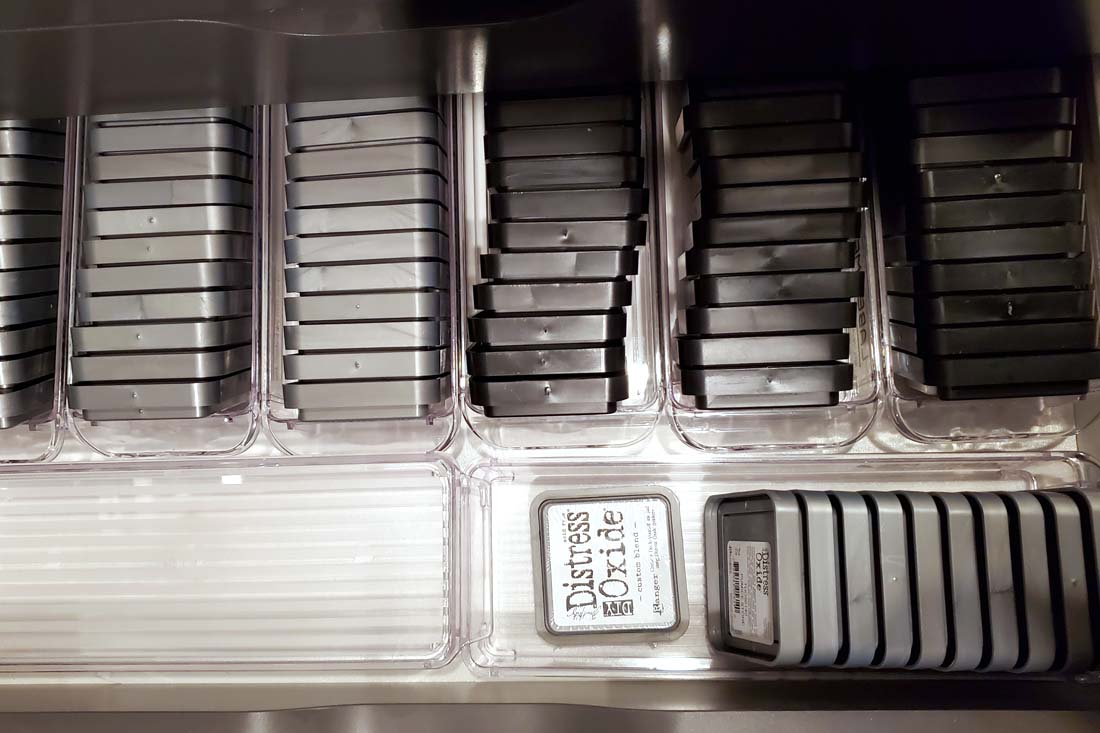
Hope you’ve had a wonderful week and are looking forward to a nice relaxing weekend. I have a crafty weekend planned with some Dare 2B Artzy projects and I’m hoping to get in some more time to organize, swatch inks and add more stamps and dies to my database. I recently found a better storage option for my Distress Inks and it worked out perfectly. I’m kind excited about my little drawer containers below, now I just need swatches. Before this my inks were stacked in my Ikea Alex drawer and I hated having to look through all the stacks of inks to find what I was looking for. This is a much better solution.
Now that my inks are better organized, I had a chance to get crafty with the Honey Bee Stamps, Cone Flower die that has been calling to me since it came in the mail a few weeks ago. Now that I have played with this gorgeous layering die, I’m asking myself why I waited so long. I think this is one of my favorite dies. I love it! Once I started playing with this die, I almost couldn’t put it down.
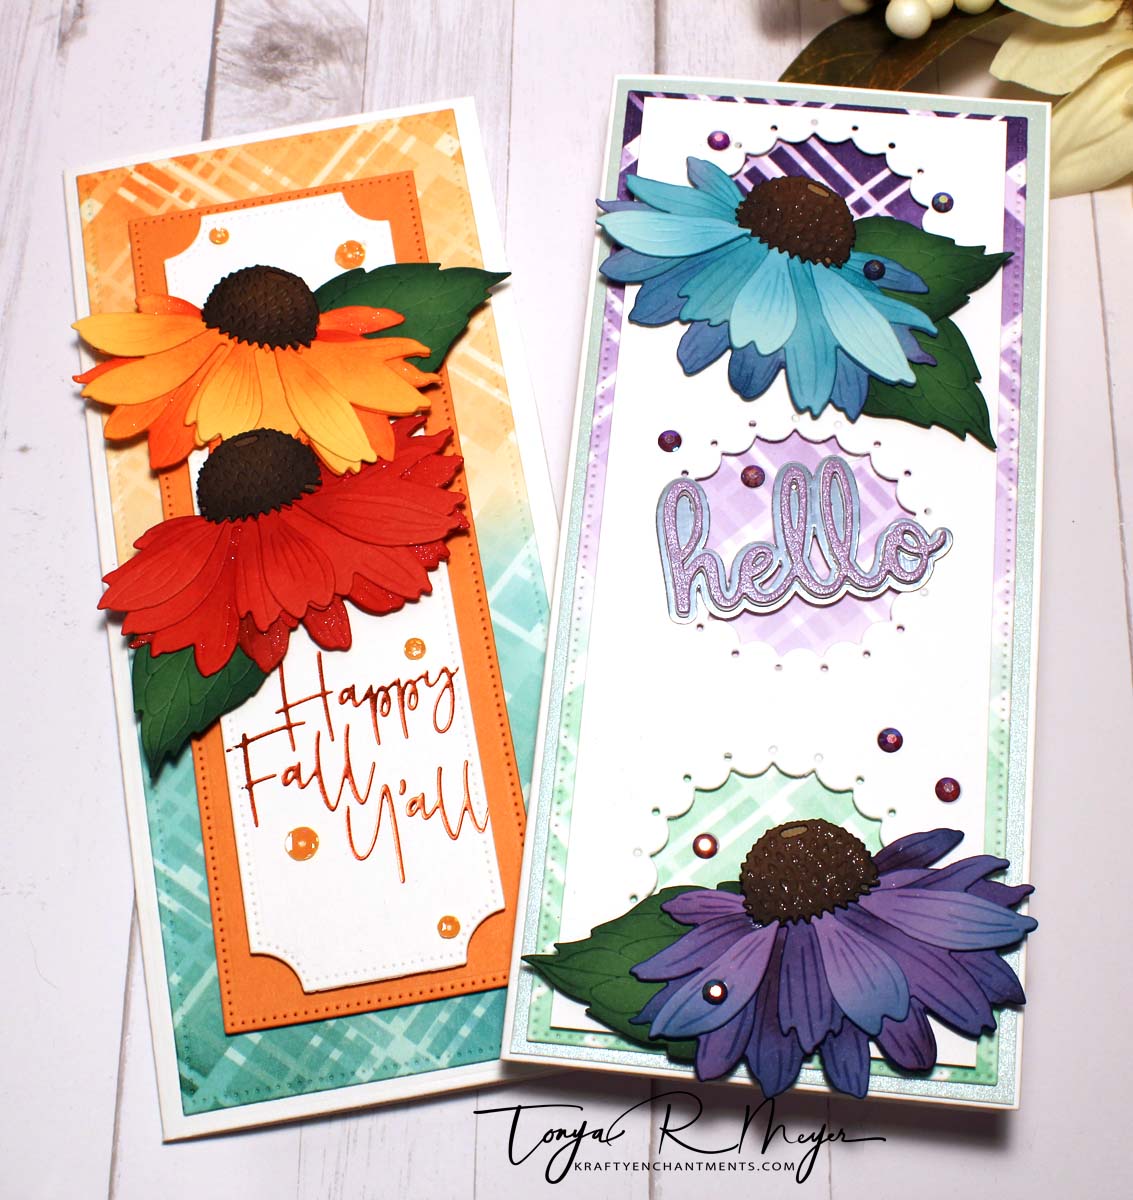
For my first card, I used the Catherine Pooler Just Plaid slimline stencil and a piece of 110lb cardstock. Using my blending brushes I started at one end blending on Marmalade ink from Concord & 9th. I blended to the middle of the stencil and then used another blending brush to blend Evergreen on from the opposite end of the stencil. I tried to keep the middle very soft with the darkest parts at the top and the bottom. When I was satisfied with the blending I removed the stencil and cleaned it off. Next, I flipped the stencil over and upside down so that the stencil was the opposite pattern. I did the same process with my ink blending from end to middle. Once finished, I removed the stencil and then used the remaining ink on my blending brushes to fill in the white areas with the soft color. I don’t think the stencil pattern is technically reversible but that’s how I used it. Initially when I finished the ink blending I didn’t like how it looked but then I thought it was kind of unique.
I die cut the ink blended background using a large rectangle stitched slimline die from the Dare 2B Artzy Wavy Slimline Framelets set.
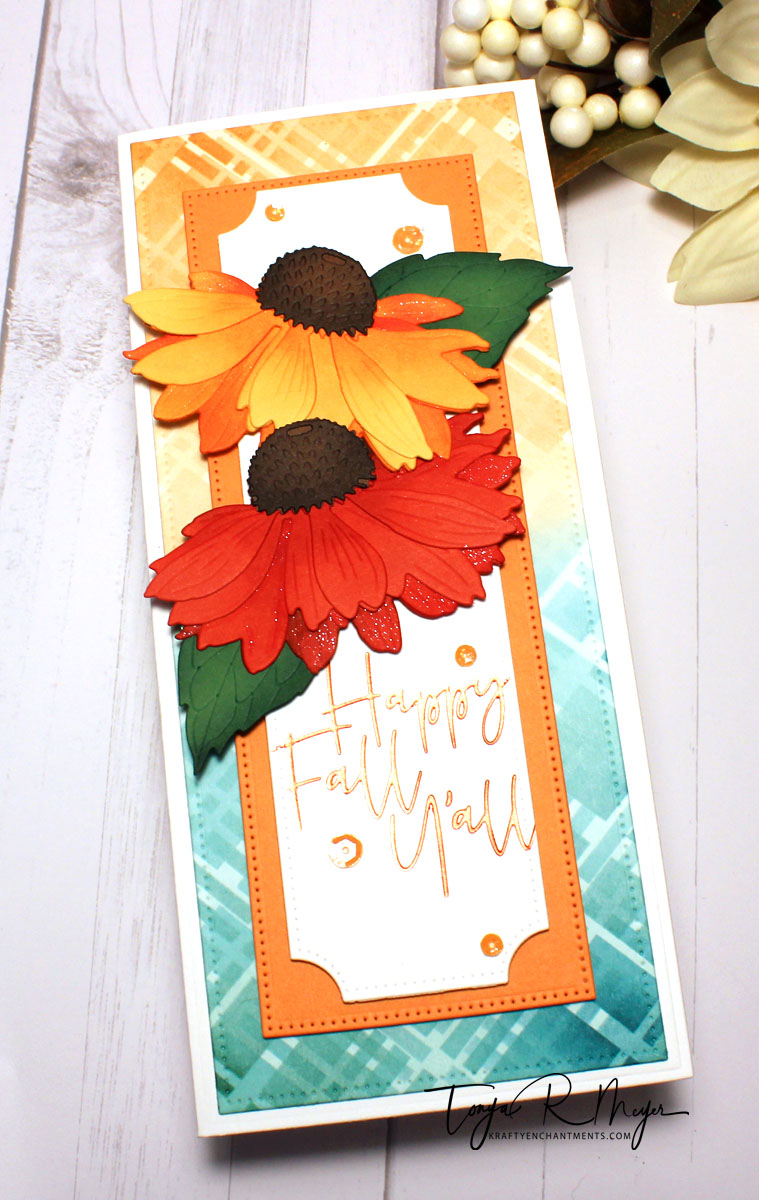
For the cone flowers, I die cut two from some colored cardstock from my stash. I used a dark yellow and a orange. I die cut everything. Using more of my Concord & 9th inks, I used some fingertip blending brushes and added some additional darker shades of yellow with more Marmalade and some Poppy inks and then added a bit of Poppy to the orange cardstock. Using the colored cardstock and adding ink to it to give it dimension is a great way to build these flowers.
I cut the leaves from some mid-tone green cardstock and added some Evergreen ink to give them some depth. The flower centers were cut from a brown and a tan cardstock. I added some Concord & 9th Mushroom ink to the bottom and a small amount around the top.
I added some Honey Bee liquid adhesive to the flower layers. They were so easy to layer because they line up so perfectly, they’re not complicated at all which I love. I used my reversible tweezers to hold everything together until the adhesive was dry. Once everything was dry, I used one of my fingertip blenders and added some more of the Mushroom ink around the cardstock edge on the coneflower center to darken up the paper layers so that they weren’t so noticeable.
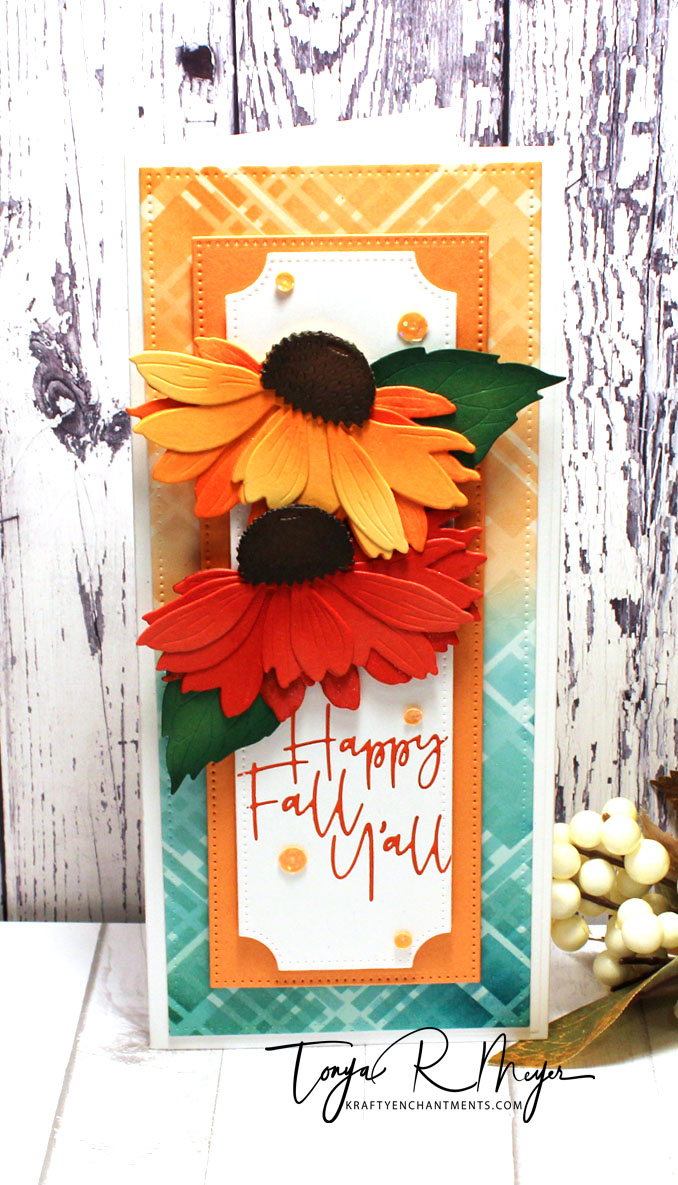
To add some layers to my background, I die cut a slimline rectangle from the Dare 2B Artzy Wavy Slimline Framelets die from some orange cardstock.
Next, I cut a piece of 110lb cardstock using the Studio Katia Dotted Slimline die set. I used the die that sort of looked like a slimline ticket with the notched corners. I added a foiled sentiment directly to the white cardstock using the Spellbinders Crimson Fall hot foil kit of the month. This set was from October 2020 but it is still available in the Spellbinders store. I added the Happy Fall Y’all sentiment to my card using the Tangerine hot foil. I thought this sentiment was so cute.
I added my layered cardstock to the background with some dimensional foam. The flowers were added with a bit of dimensional foam just about my sentiment.
For a bit of bling, I added some orange sequins to the card panel. I also added a bit of clear Nuvo Aqua Shimmer to the bottom layers of the flower petals. My background was added to a slimline card base from some 110lb cardstock.
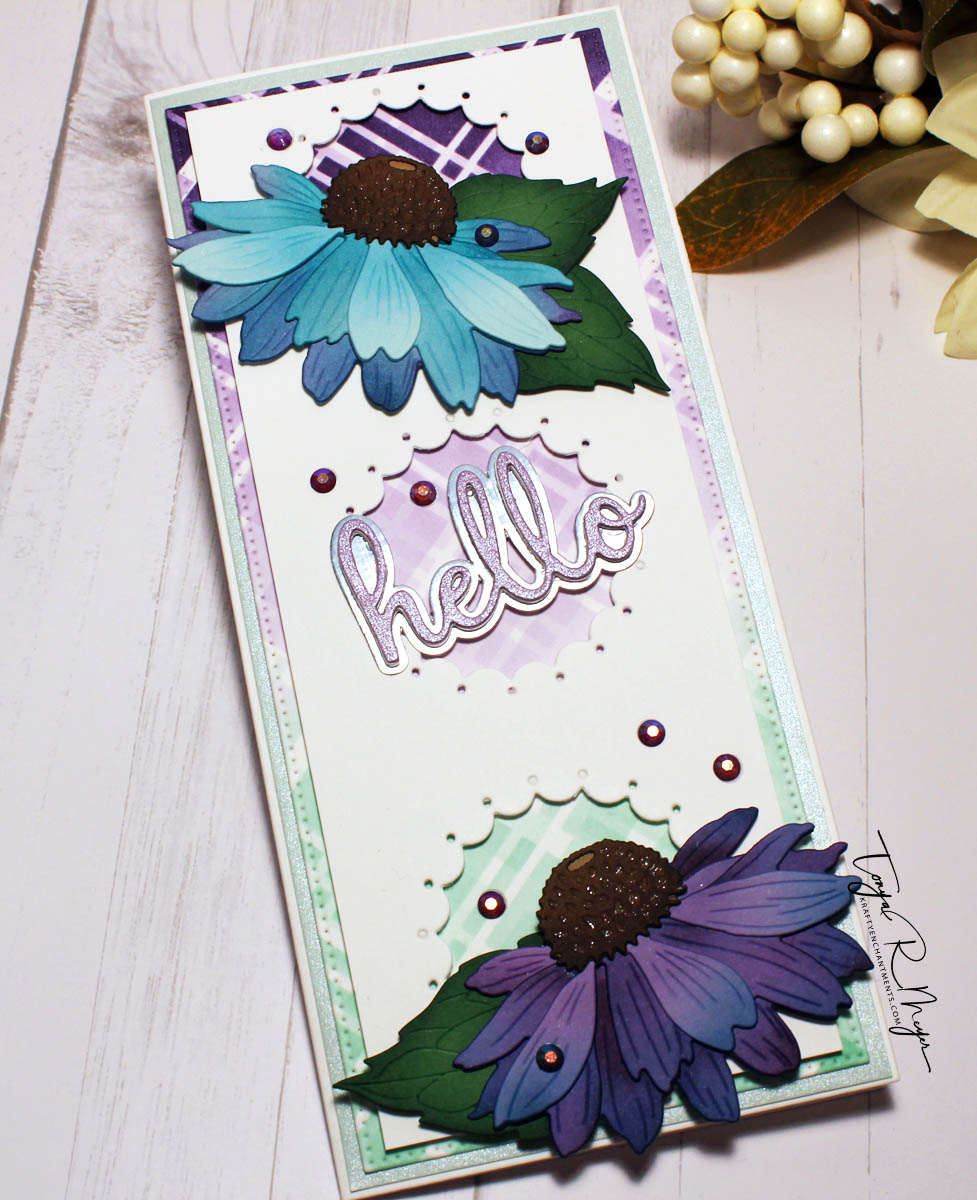
My second card was created much the same with some different colors.
I ink blended the background with the same stencil using Concord & 9th’s Sea Glass, a touch of Aqua Sky and some Eggplant. I die cut it with the slimline stitched rectangle die.
The flowers were cut from some light blue-green cardstock and some lavender cardstock. I ink blended on Aqua Sky and Eggplant for the flower petals to give them some dimension and interest. The leaves and coneflower center were created exactly the same way. I added some Nuvo Aqua Shimmer to the little die cut indentations on the centers of the coneflower for a bit of sparkle. All of the flower layers were glued together and set aside.
For the background, I cut a piece of 110lb cardstock with the Pink Fresh Studio Slim Stitched Scalloped Circles panel. I layered that over my stenciled background with some dimensional foam.
For the sentiment, I die cut the Hello sentiment from the Pink Fresh Studio Phrase Builder Set. I cut 3 from white cardstock and 1 from a shimmery lavender cardstock and layered them together for some dimension. For the shadow die cut, I used some specialty silver mirror cardstock.
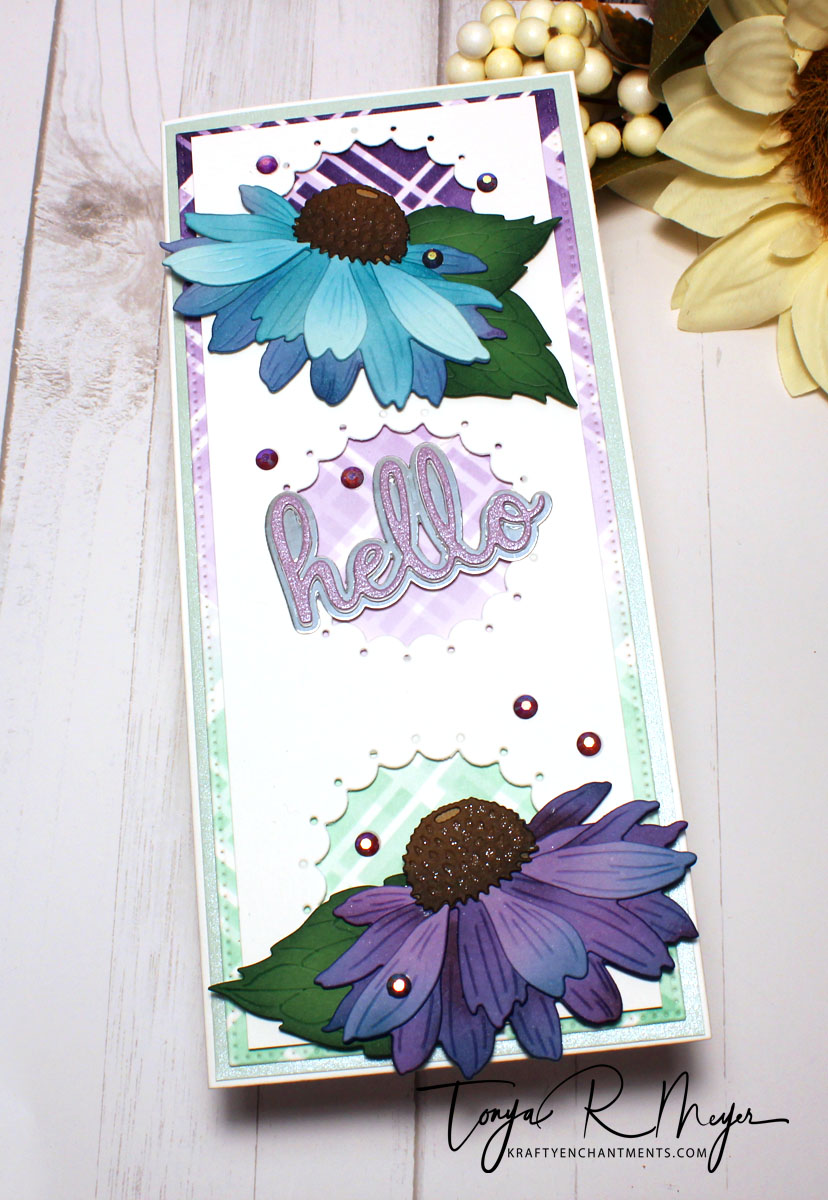
I layered the flowers at the top and bottom of the panel with the plaid background peeking through the scalloped circles.
For a finishing touch, I added some purplish-blue gems to my card panel. My entire background was added to a slimline card panel made from some 110lb cardstock.
Of course, I’ve not yet gotten used to having my camera on to film my card making all the time so I didn’t get these on film. I have a ton more ideas for this cone flower die set so I’ll be sure to get the next one on film and get a video up on my YouTube channel.
I hope you’ve enjoyed today’s cards. This process of playing with the cone flower die was so relaxing and fun! It was a nice crafty retreat from life this week.
All of the products used in today’s card are linked below.
Thanks so much for stopping by today!
Hugs,
Tonya

https://linkdeli.com/widget.js?id=f5e8378456858c916708

