A Day to Celebrate Dad’s
Hi All!
Happy Father’s Day to everyone! Hope you all had a wonderful weekend and had a great time celebrating with your fathers!
Well it’s Sunday here and as promised I’m sharing the cards that I made for Father’s Day!
The first card I have to share is the one that I made for my own step-father. He’s really the only father I’ve ever known since he and my mom were married when I was about 6 or 7.
For his card I wanted to use this cute stamp set called Fly High from The Cat’s Pajamas. I absolutely adore their line of stamps as they are so cute and whimsical. They make me giggle every time I look at them.
First off I colored up Mr. Bunny in his space suit and his little carrot with my Copic markers. I kept the colors pretty simple as I knew my background would be a dark, space-like setting. Once I finished coloring him I fussy cut him out and then added some Ranger Glossy Accents to his mask and the carrot’s bubble to give it the look of glass. I let that dry overnight while I worked on the rest of the card.

Close up of my little Space Bunny
For the outer space background I used a piece of Canson 140lb watercolor paper and cut it to a 4 x 5 size. I wanted to create something that resembled a moon so I had to create a mask. I used the half circle die from the Die-namics Blueprints 21 set and created a mask to fit my watercolor paper. To create my mask I used a 4 x 6 removable label from Avery labels that I picked up at the local office supply store. I cut one mask with the half-circle die at the bottom center at the label. This gave me the two masks I would need to do my background coloring – one to mask off the background while I created the moon and one to cover the moon while I created the space background.
This was actually my first time using a mask like this and it worked pretty well. While I had the background masked off I used my Ranger Distress Inks in Weathered Wood and Old Paper with a bit of Squeezed Lemonade thrown in. I put some of the inks down on my craft mat and picked them up with my water brush and tried to create something that resembled the moon. Not sure I achieved that exactly but it could definitely be a planet in our galaxy I suppose. After I finished coloring my celestial orb I let it dry a bit and then masked it off with my half-moon die cut piece of my Avery label and started coloring my space-looking background.
To create the look of a glowing planet/moon, I used a bit of Ranger Distress Ink and I started from the top of my watercolor cardstock and sponged in some more Ranger Distress Inks in Faded Jean, Chipped Sapphire and then Black Soot to darken it up a bit. Keeping my color closer to my masked off planet/moon lighter. Once I was satisfied with the color blend I finished by adding some random stars to the background with my Signo White Gel pen.
Once my background was completed I cut a sparkly silver looking piece of cardstock using the two wonky-looking squareish shapes from the Die-namics Blueprints 15 set. I glued them as a layer behind my background in opposite corners so just a bit of the sparkle from the paper peeks out. I layered the whole thing onto some Neenah Solar White 80lb Cardstock. Then I added my little bunny in the spacesuit and his carrot using some dimensional foam to look like he was floating through outer space.

Finished Father’s Day Card for my step-dad.
For my sentiment I used the Lisa Johnson Designs For the Boys Stamp set from My Favorite Things. I stamped the Thank You sentiment and the For All You’ve Taught Me onto some Neenah Solar White Cardstock and die cut each sentiment in a bit different shape and adhered them to my card with some glossy accents.
To add a bit more dimension I added three glitter stars to the card front.
On the inside of my card I used the Happy Dad’s Day sentiment from the For the Boys Stamp Set.
For my second Father’s Day card I’m sharing the card I made for my Father-in-Law. As with the previous card, I used a cute bunny from The Cat’s Pajama’s called Take Off. It is another irresistibly cute stamp set.
First I started by stamping the bunny in the plane onto some Neenah Solar White 80lb cardstock and fussy cut it out. This would be my main image. I wanted to try something different so I elected to use paper piecing on this image rather than color the entire image with my Copics.
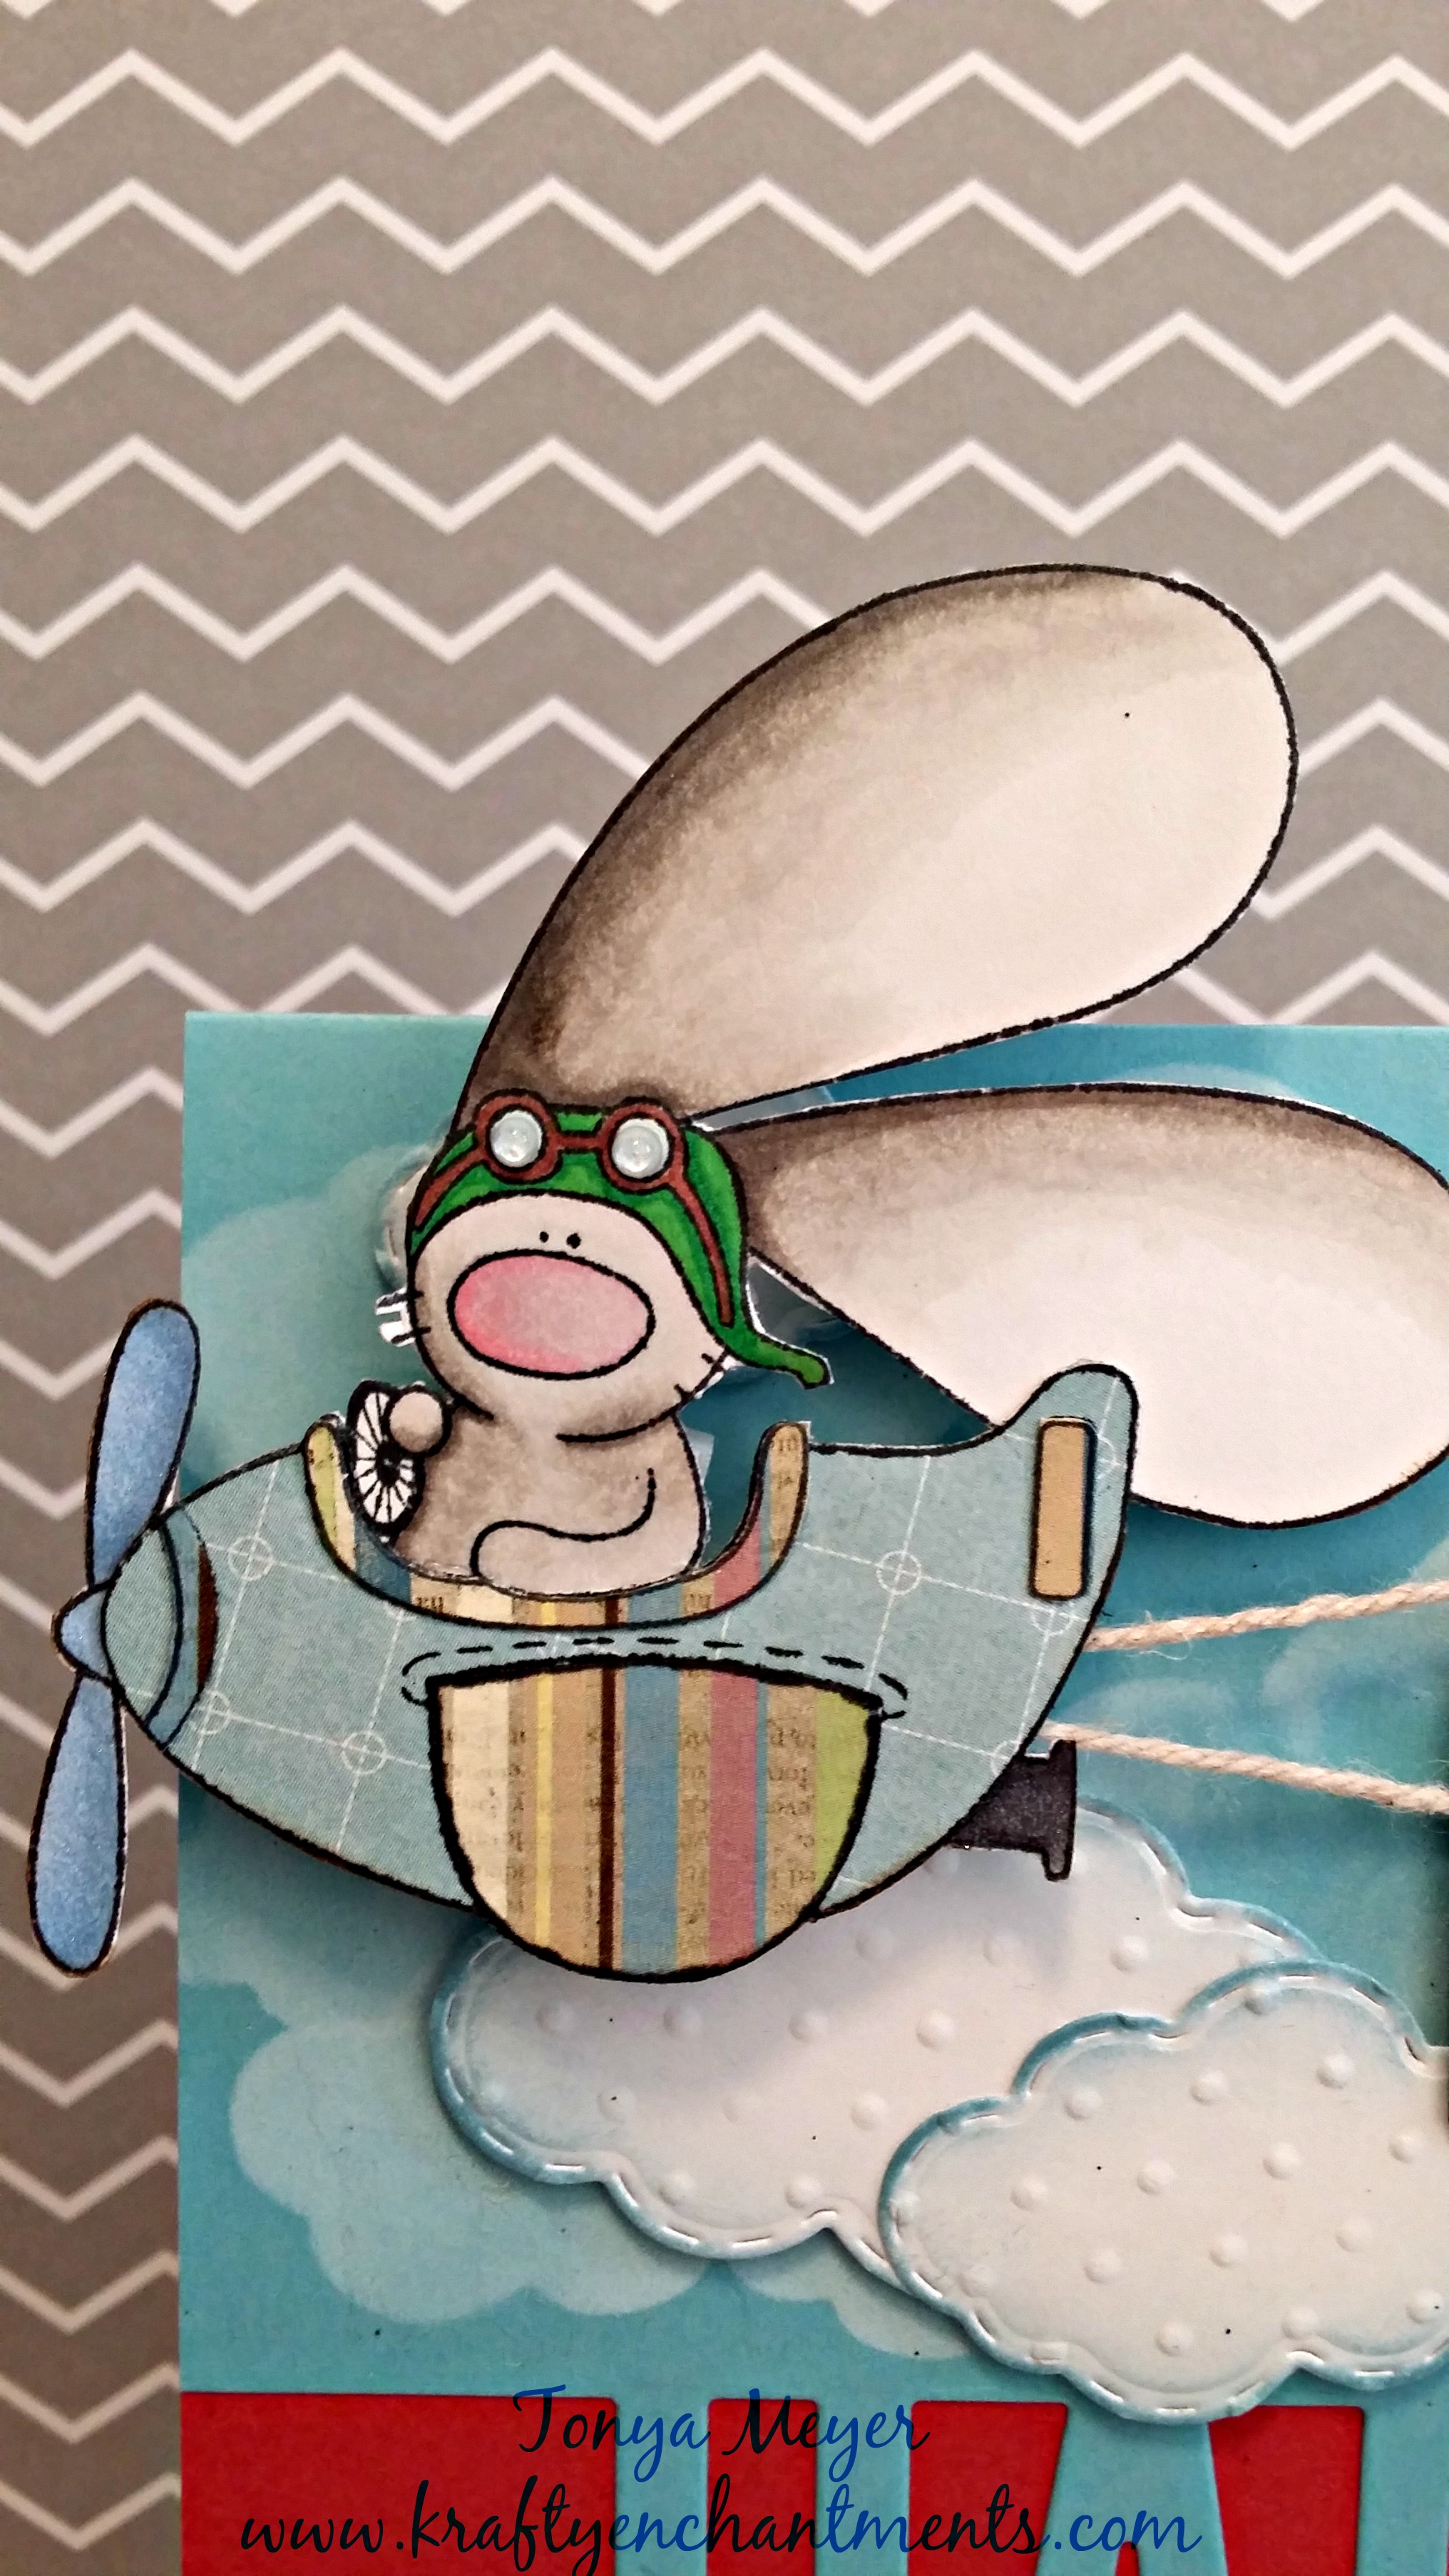
Here’s the closeup of the finished bunny in the plane with the completed paper piecing.
To do the paper piecing I had to pick out some papers to use for the body of my plane, the wing and the prop. For each paper I stamped my image onto the patterned paper and then fussy cut out that piece of paper and glued it down to my original stamped image. Once I had all my pieces of patterned paper glued down I colored the remaining parts of the image (the bunny) with my Copic markers.
To create the background of my this card, I used the die cut Happy from Die-namics. I cut the Happy out of some light blue cardstock and used this for my card base. I glued a piece of red cardstock behind the happy to make it pop a bit.
I knew I wanted to create a 3-dimensional looking card so I started by sponging some white ink directly onto the light blue cardstock base using a cloud stencil to create some fluffy white clouds in the very background of the card. Then I added more dimensional clouds that I die cut from My Creative Time called Fun Stitched Clouds. Once I die cut the clouds I ran them through my die cut machine in the Swiss Dots embossing folder from Cuttlebug. I added a bit of dimensional foam to each cloud and adhered it to my card.
Next I used the sentiments again from Lisa Johnson Designs For the Boys Stamp set from My Favorite Things. I stamped the You Amaze Me and then the You’re Pretty Darn Great onto some tan cardstock and die cut each using the Pierced Fishtail Flags STAX from Die-namics. I had to cut the flags down a bit by cutting one half and then the other so that they wouldn’t be too long for my card. Once the sentiments were cut out I added a bit of distress inks to the edges to make them look worn and added some cute antique button brads to the ends.
I wanted the bunny’s plane to look like it was pulling the sentiment banners behind so I cut some bakers twine and adhered it to the plane and to each of the banners and then glued it into place on each element. Then I used dimensional foam on each of the banners and on the bunny to make it stand out above my die cut clouds.
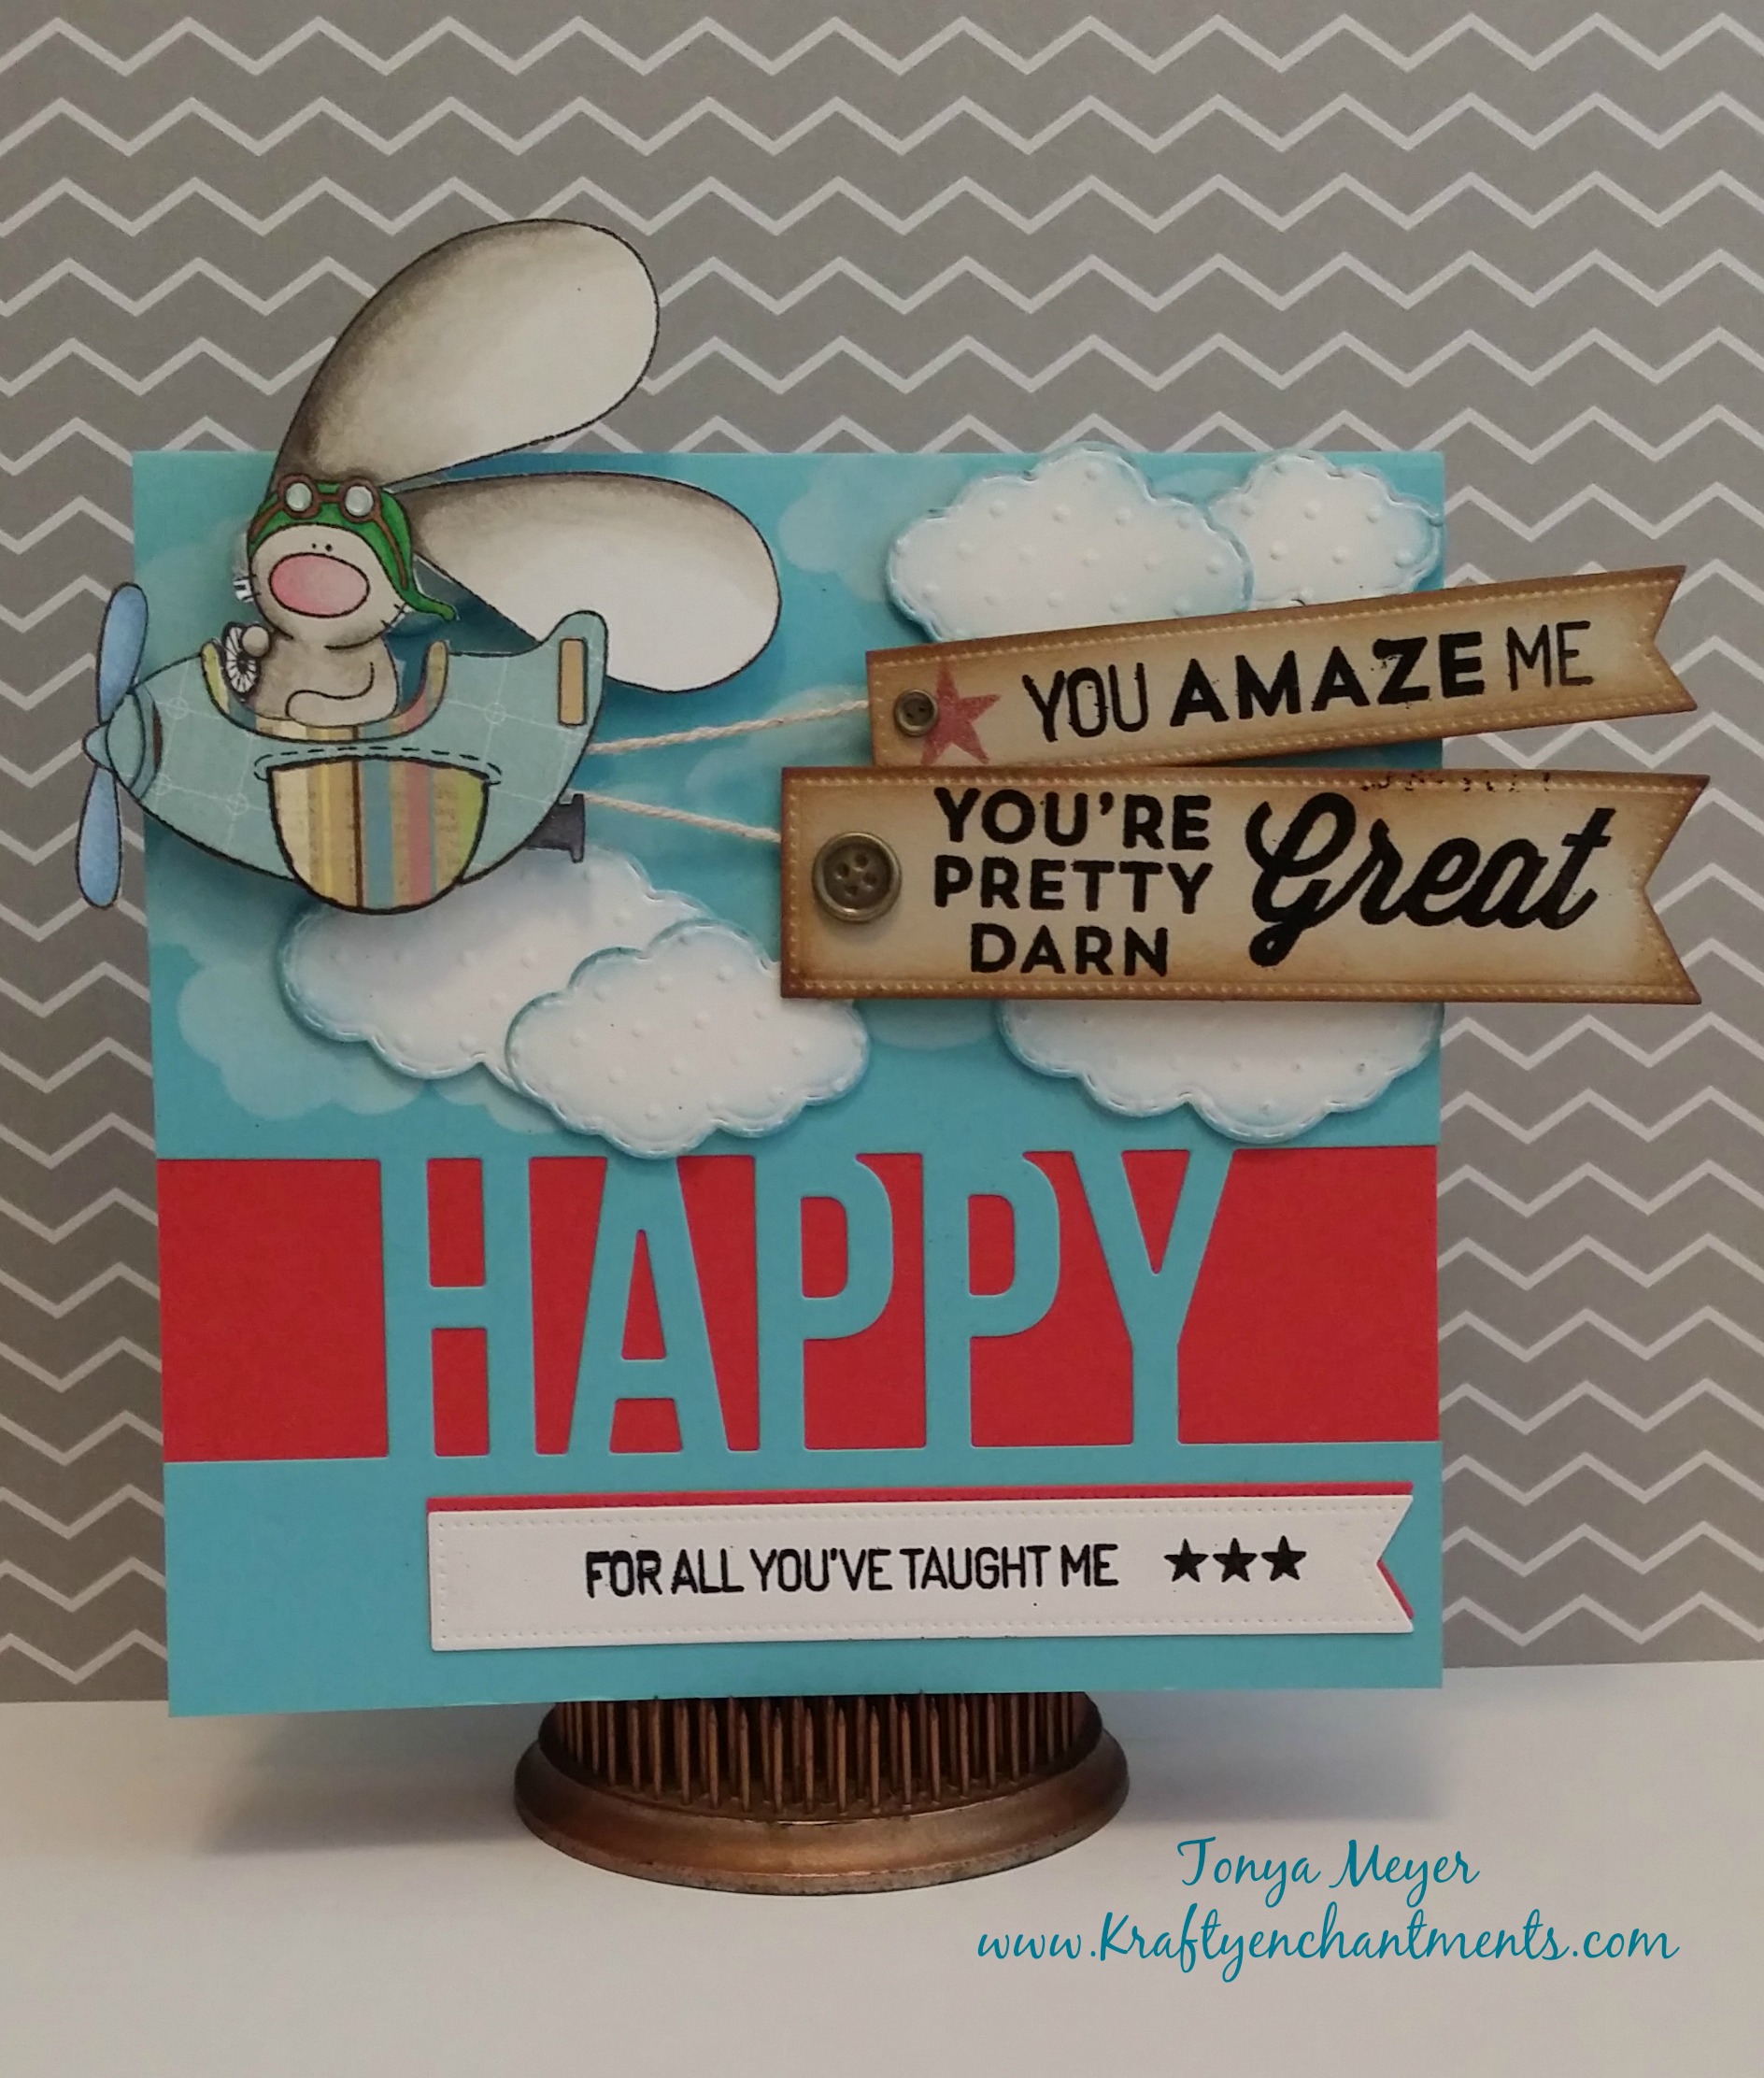
Father’s Day card using Takeoff Stamp Set from The Cat’s Pajamas
At the bottom I layered two fishtail flags again, one in red to pull from the background and one in white which I stamped the sentiment, For All You’ve Taught Me with three little stamped stars. So the card reads Happy for all You’ve Taught Me…flowing into the sentiment on the inside of the card.
Because my card base was light blue with red on the front I wanted to be consistent on the inside of my card. I cut a red cardstock square 1/4 inch smaller than the inside of the card for my base and a white cardstock base 1/4 inch smaller to layer on top of the red and to stamp the sentiment, Thank You and Happy Dad’s Day.
I apologize for the long post today but I wanted to make sure I got to share both cards with you. Hope you enjoyed them. I had so much fun making these cards and was able to try out some new techniques I’ve never used before like masking and paper piecing.
Hope you have a wonderful week!

