BOO Cats
Hello and welcome back!
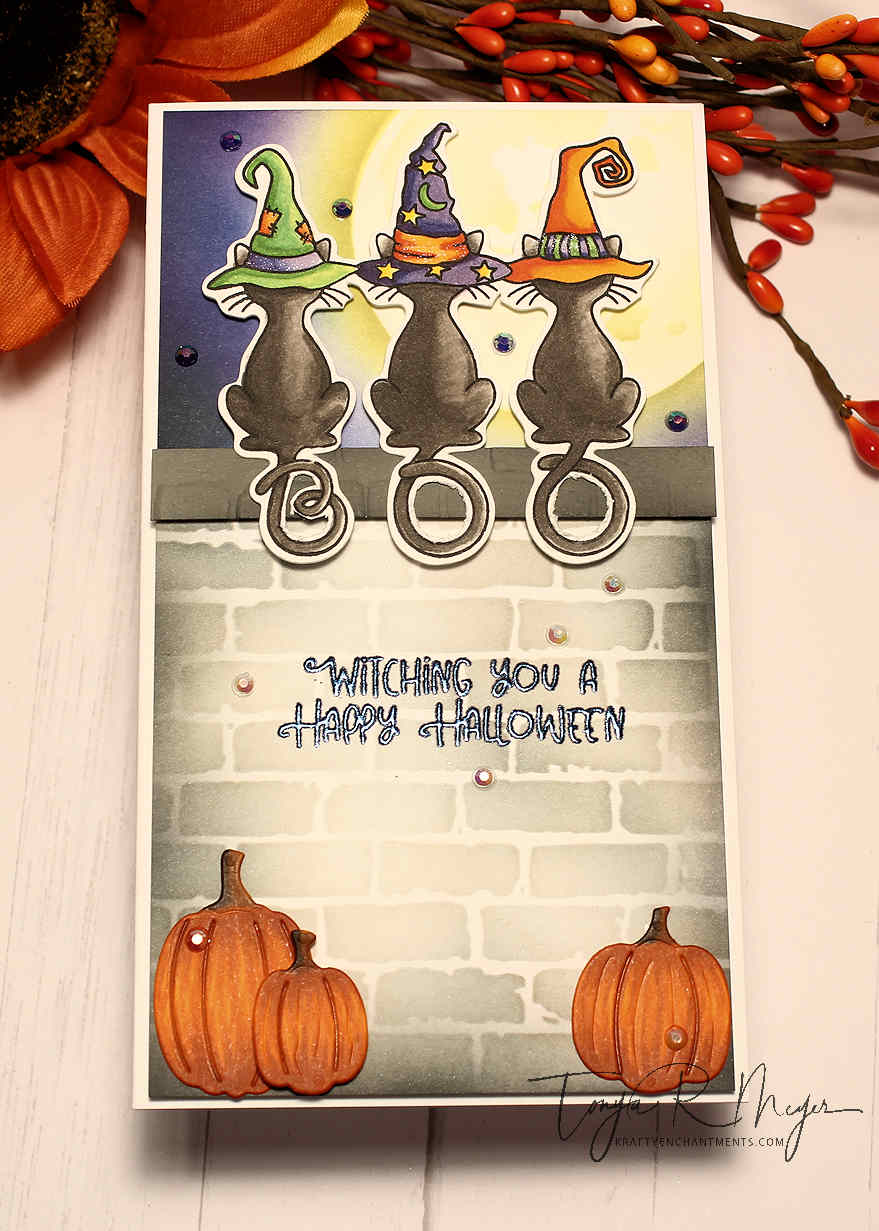
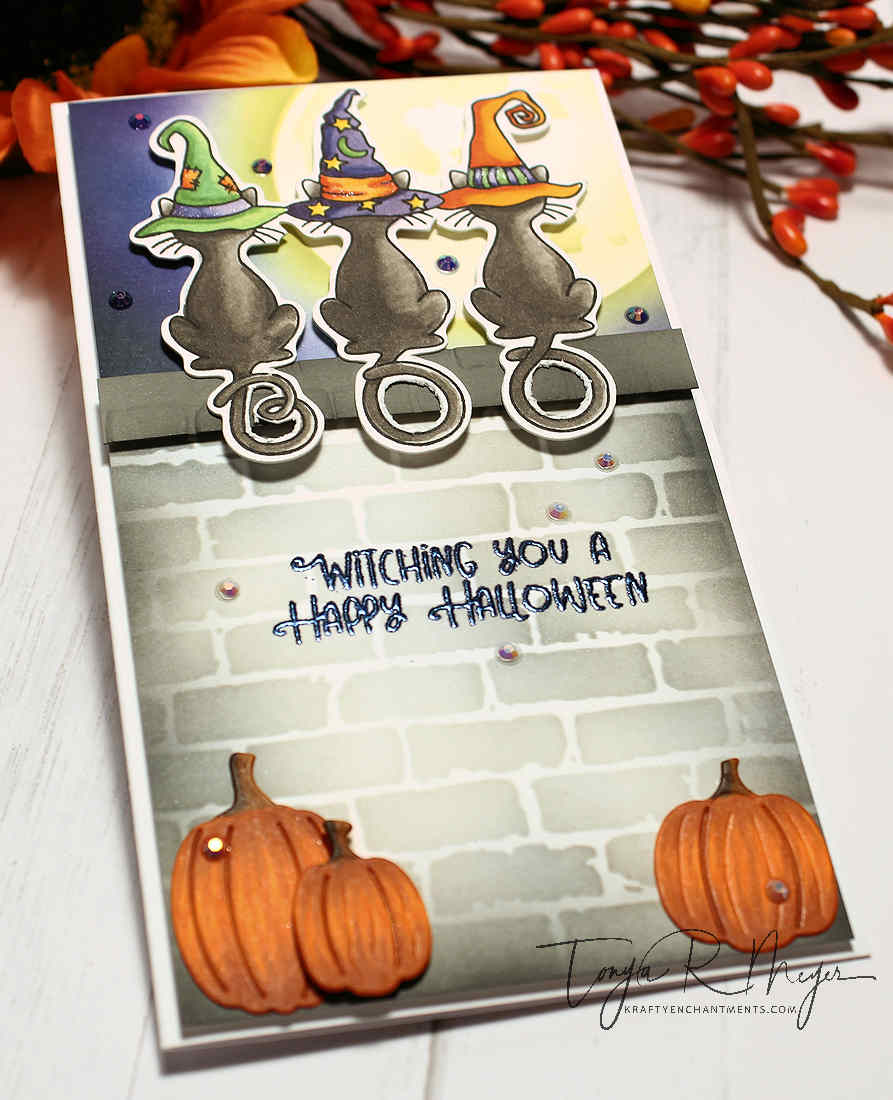
I have a spooktacular card today featuring the adorable Boo Cats stamp set from Miss Ink Stamps. This stamp was in a recent fall release and I fell in love with these adorable witchy kitties in their hats. I knew immediately what kind of card I wanted to make with this stamp set.
Please check out my YouTube Video for this card here: https://youtu.be/_xjwexD_KkQ
To start my card, I grabbed a scrap piece of my Neenah Solor White 110lb cardstock. It was roughly the shape of a slimline card and I didn’t bother to measure or trim it.
I placed the cardstock in my MISTI and put the Boo Cat stamp set inside near the top of the short edge of my cardstock. This was just to get an idea for placement. I made a mark on the edge of my cardstock with a pencil and removed it from my MISTI.

I added a couple of transparent Post-It notes to the card panel right where the pencil marks were so that I wouldn’t get any ink below that line.
Next, I added a bit of repositionable tape runner to the back of the smallest moon mask from the Tim Holtz Moon Mask stencil set. I added the moon stencil with the detail to my cardstock in the upper right corner. I used a small blending brush to add some Squeezed Lemonade Distress ink to create the glowing moon. I added a bit of Old Paper Distress Ink to create some of the shadows and color variation on the moon surface. Using the solid stencil I placed that over the moon and then created a bit of a glowing halo around the moon with more Squeezed Lemonade ink. When I was finished, I left the stencil in place, covering the moon so that I could ink blend the rest of the sky.
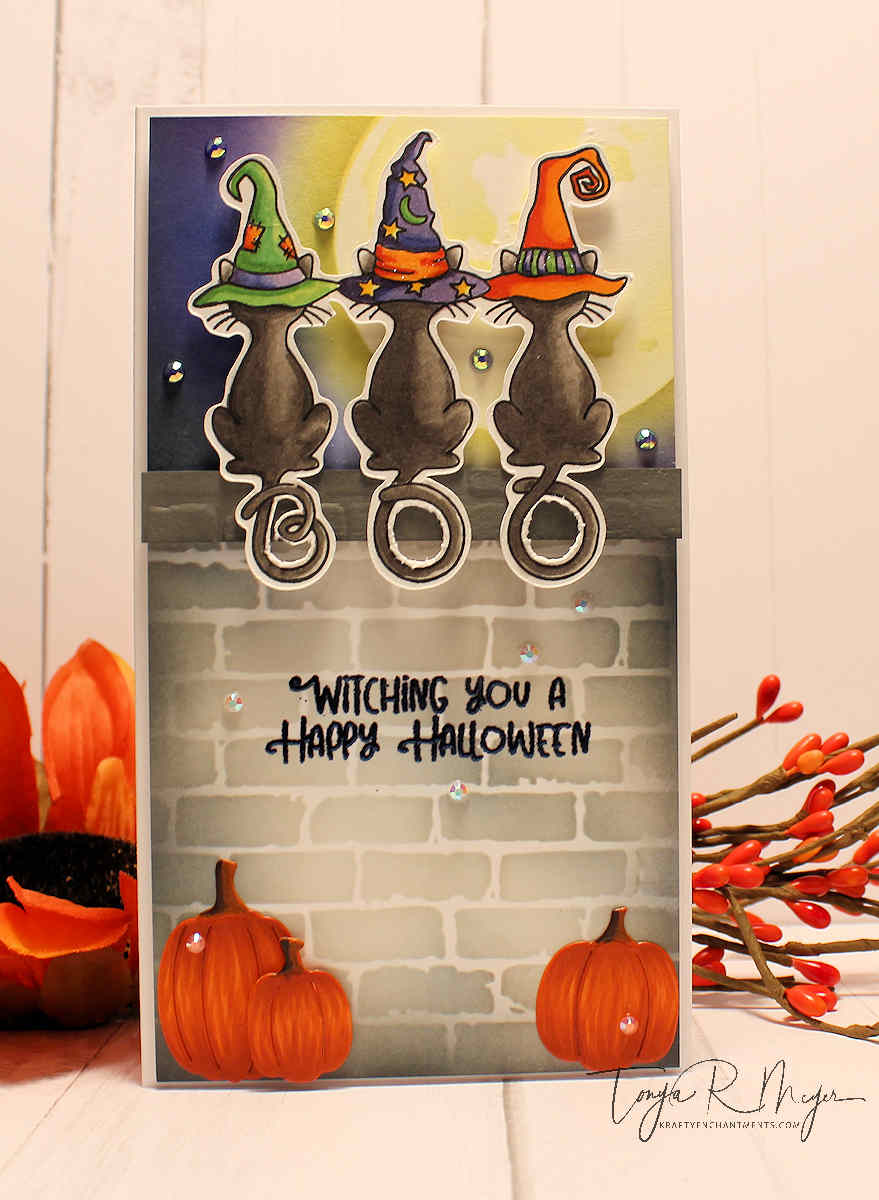
To create my sky I used a combination of, Prize Ribbon, Wilted Violet and Black Soot Distress Inks and blended the rest of the sky. I blended to the left side of the moon being careful not to get too close to the moon glow.
When I was happy with my moon and sky, I removed my masks on the bottom part of the cardstock. I added the Tim Holtz Brick Wall layering stencil to the panel and added a bit of Washi tape from the back to hold it in place.
I added some Pumice Stone and Hickory Smoke through the stencil to create a nice brick wall. Since my cardstock was a tad wider than my stencil, I added more Pumice Stone and Hickory Smoke to the sides to cover up the areas that the stencil didn’t reach all the way to the side of the cardstock.
After my background was completed, I stamped an colored the Boo Cats stamp into some Neenah 110lb Cardstock and colored with my Copic Markers. I used Warm Greys for the cute kitties and then some Orange, Yellow-Green and Blue-Violets for the hats.
When I finished coloring, I used my Brother Scan-n-Cut to cut out my image. Unfortunately, I wasn’t able to cut the center of the tails with my machine so I had to fussy cut the tail centers out. I had to use my precision scissors in conjunction with an Xacto knife which wasn’t quite sharp enough. Not the greatest job fussy cutting, but it is a pretty small area to cut out.
Next, I used an embossing folder from Stampin Up called Brick & Mortar. I cut a strip of grey cardstock and embossed it so that it would have a little texture to it. I added the strip of cardstock to my background with a bit of dimensional foam. This created a top ledge to my wall on my background.
I added my Boo Cats to the top of the ledge to give the appearance that they were sitting on the top of the wall looking at the moon.
I also die cut 3 pumpkins from the Nichol Spohr Spellbinders fall release using the dies from the Welcome Fall and Wagon Full of Fall die sets. I cut the pumpkins from some orange cardstock. I add a bit of interest and dimension, I used some dark orange & brown Copic markers to color the pumpkins.
My 3 pumpkins were added to the bottom of the card with some liquid glue and the smallest pumpkin was added with a bit of dimensional foam.
For the sentiment, I stamped and heat embossed the Witching You a Happy Halloween with some Brutus Monroe Night Shift Blue embossing powder. I added the sentiment right below the cats on the front of the wall.
I added my panel to a mini slimline card base made from Neenah 110lb cardstock.
For a finishing touch, I added some gems around the card panel.
Thank you so much for stopping by today! I hope you’ve enjoyed my card! I’ve included links for all the products used in today’s card below for your convenience.
Hugs,
Tonya
https://linkdeli.com/widget.js?id=f5e8378456858c916708

