Fun with Mixed Media & Spellbinding Stamps
Hello & happy, happy Friday to everyone!
Today I’m sharing my mixed media project for Spellbinding Stamps by Nikki Burnette.
I have to admit I had some anxiety about doing a mixed media project as it’s a bit out of my comfort zone. However, never one to admit defeat, I put my brain to work and came up with an idea for my project but it required a bit of manipulation of one of Nikki’s images. Fortunately for me, Nikki was very gracious and allowed me a little bit of creative freedom to play with her image to fit my project.
To start off, I colored the Sydney digi stamp from Nikki’s Etsy shop with my Copic markers. For the project I had in mind, Sydney would need to transform into a harvest witch so I colored the entire image except the plump little strawberry that Sydney was perched upon.
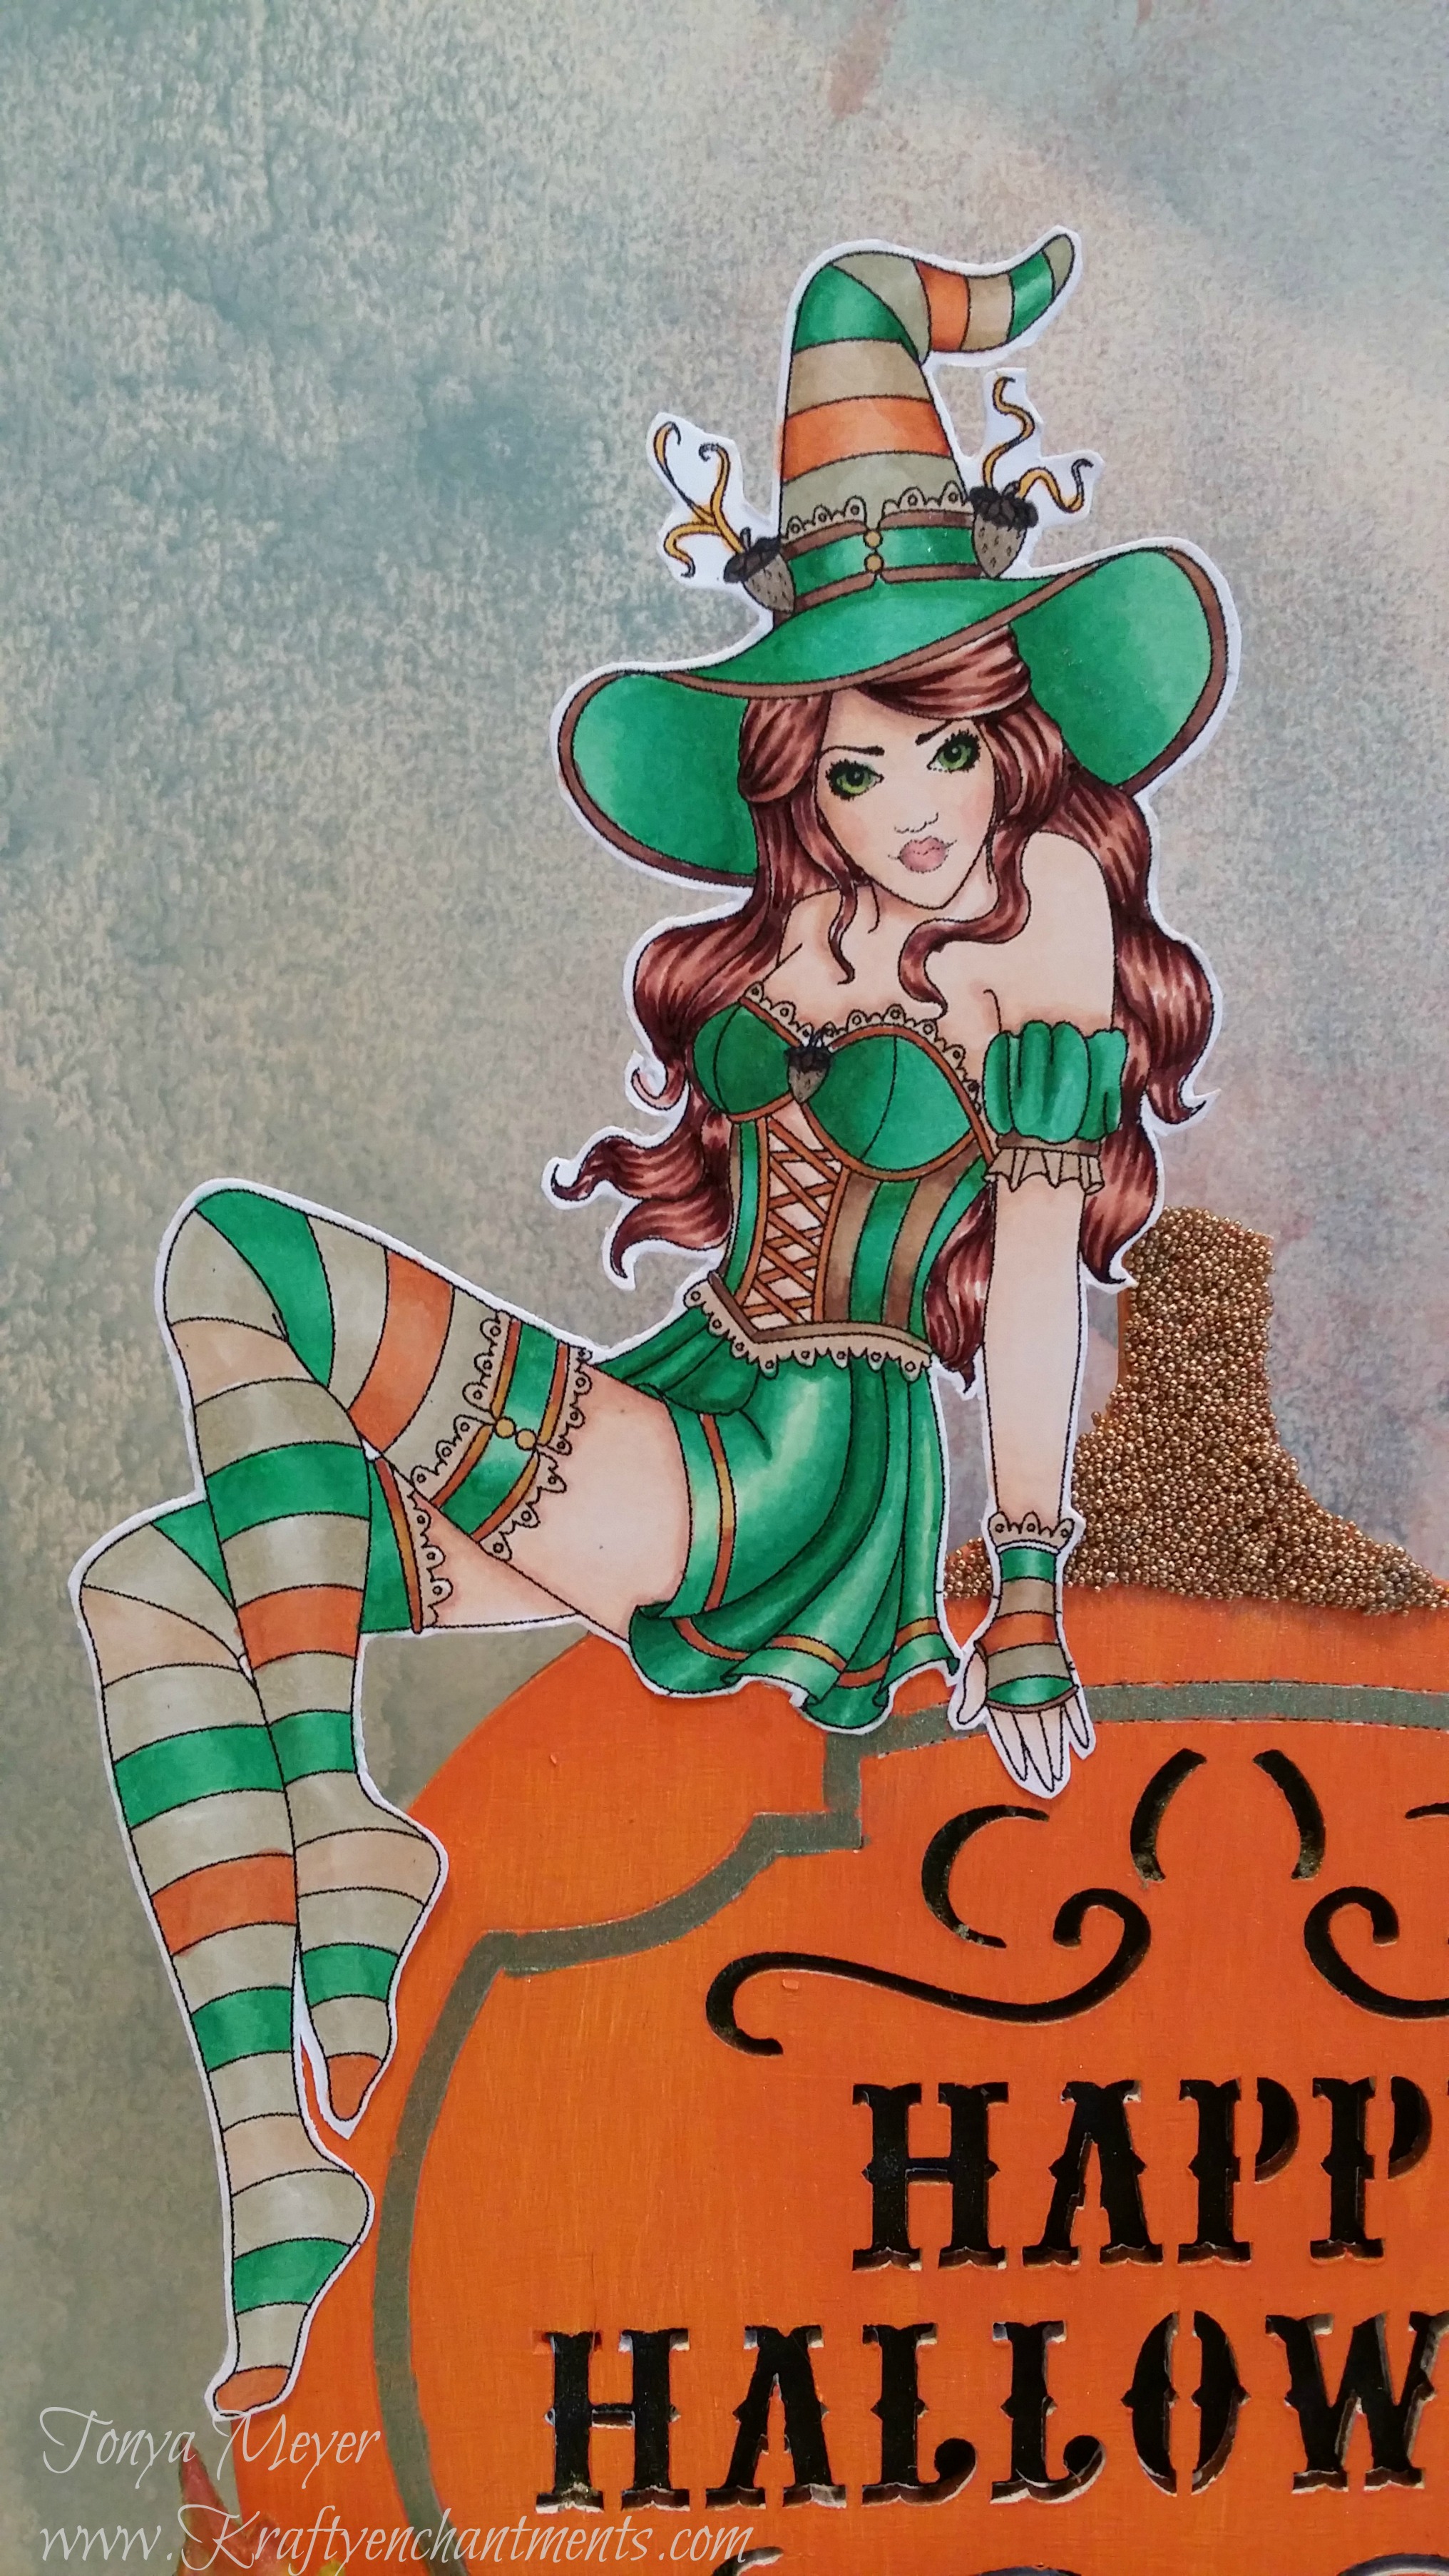
Sydney digi stamp from Spellbinding Stamps by Nikki Burnette. Colored with Copics.
I even colored the little strawberries on her hat and on the front of her dress so that they would look a bit like acorns in order to fit with the fall theme I was going for. Of course I’ve got to have some sparkle, so I also added some clear Wink of Stella to the top of her stockings and the thick green ribbon on her hat.
Once I was done coloring her, I fussy cut her out removing her from the uncolored strawberry portion. At this point she looked like she was sitting on air, but not for long.
To create the rest of my project, I found a cute little unfinished wooden pumpkin that was on a stand at a local arts & crafts store (this was actually the first item I purchased that started my project idea in motion). I needed to paint my pumpkin. A bit of trial and error painting on some test wood with distress paints, led me back to the art supply store to pick up some Gesso. This was a product which I knew nothing about until I had to purchase some for this project. LOL! As I said, this was a learning experience for me. I bought the Dina Wakely Gesso because I wasn’t sure how I’d like it and it was in the smallest tube available (2 fl oz.). I’m sure I’ll be buying more at some point for future projects now that I know I need it for these types of projects.
Gesso is essentially primer for artists. It gives a bit of texture to your project and prepares it for being painted with various mediums and prevents those mediums from soaking into porous surfaces like wood. I painted two layers of Gesso on the entire pumpkin front, back, bottom and edges and allowed them to dry.
Next, I used some Americana Acrylic Paint in the very fitting color of Jack-O’-Lantern Orange and painted two coats onto the entire pumpkin and allowed it to dry overnight.
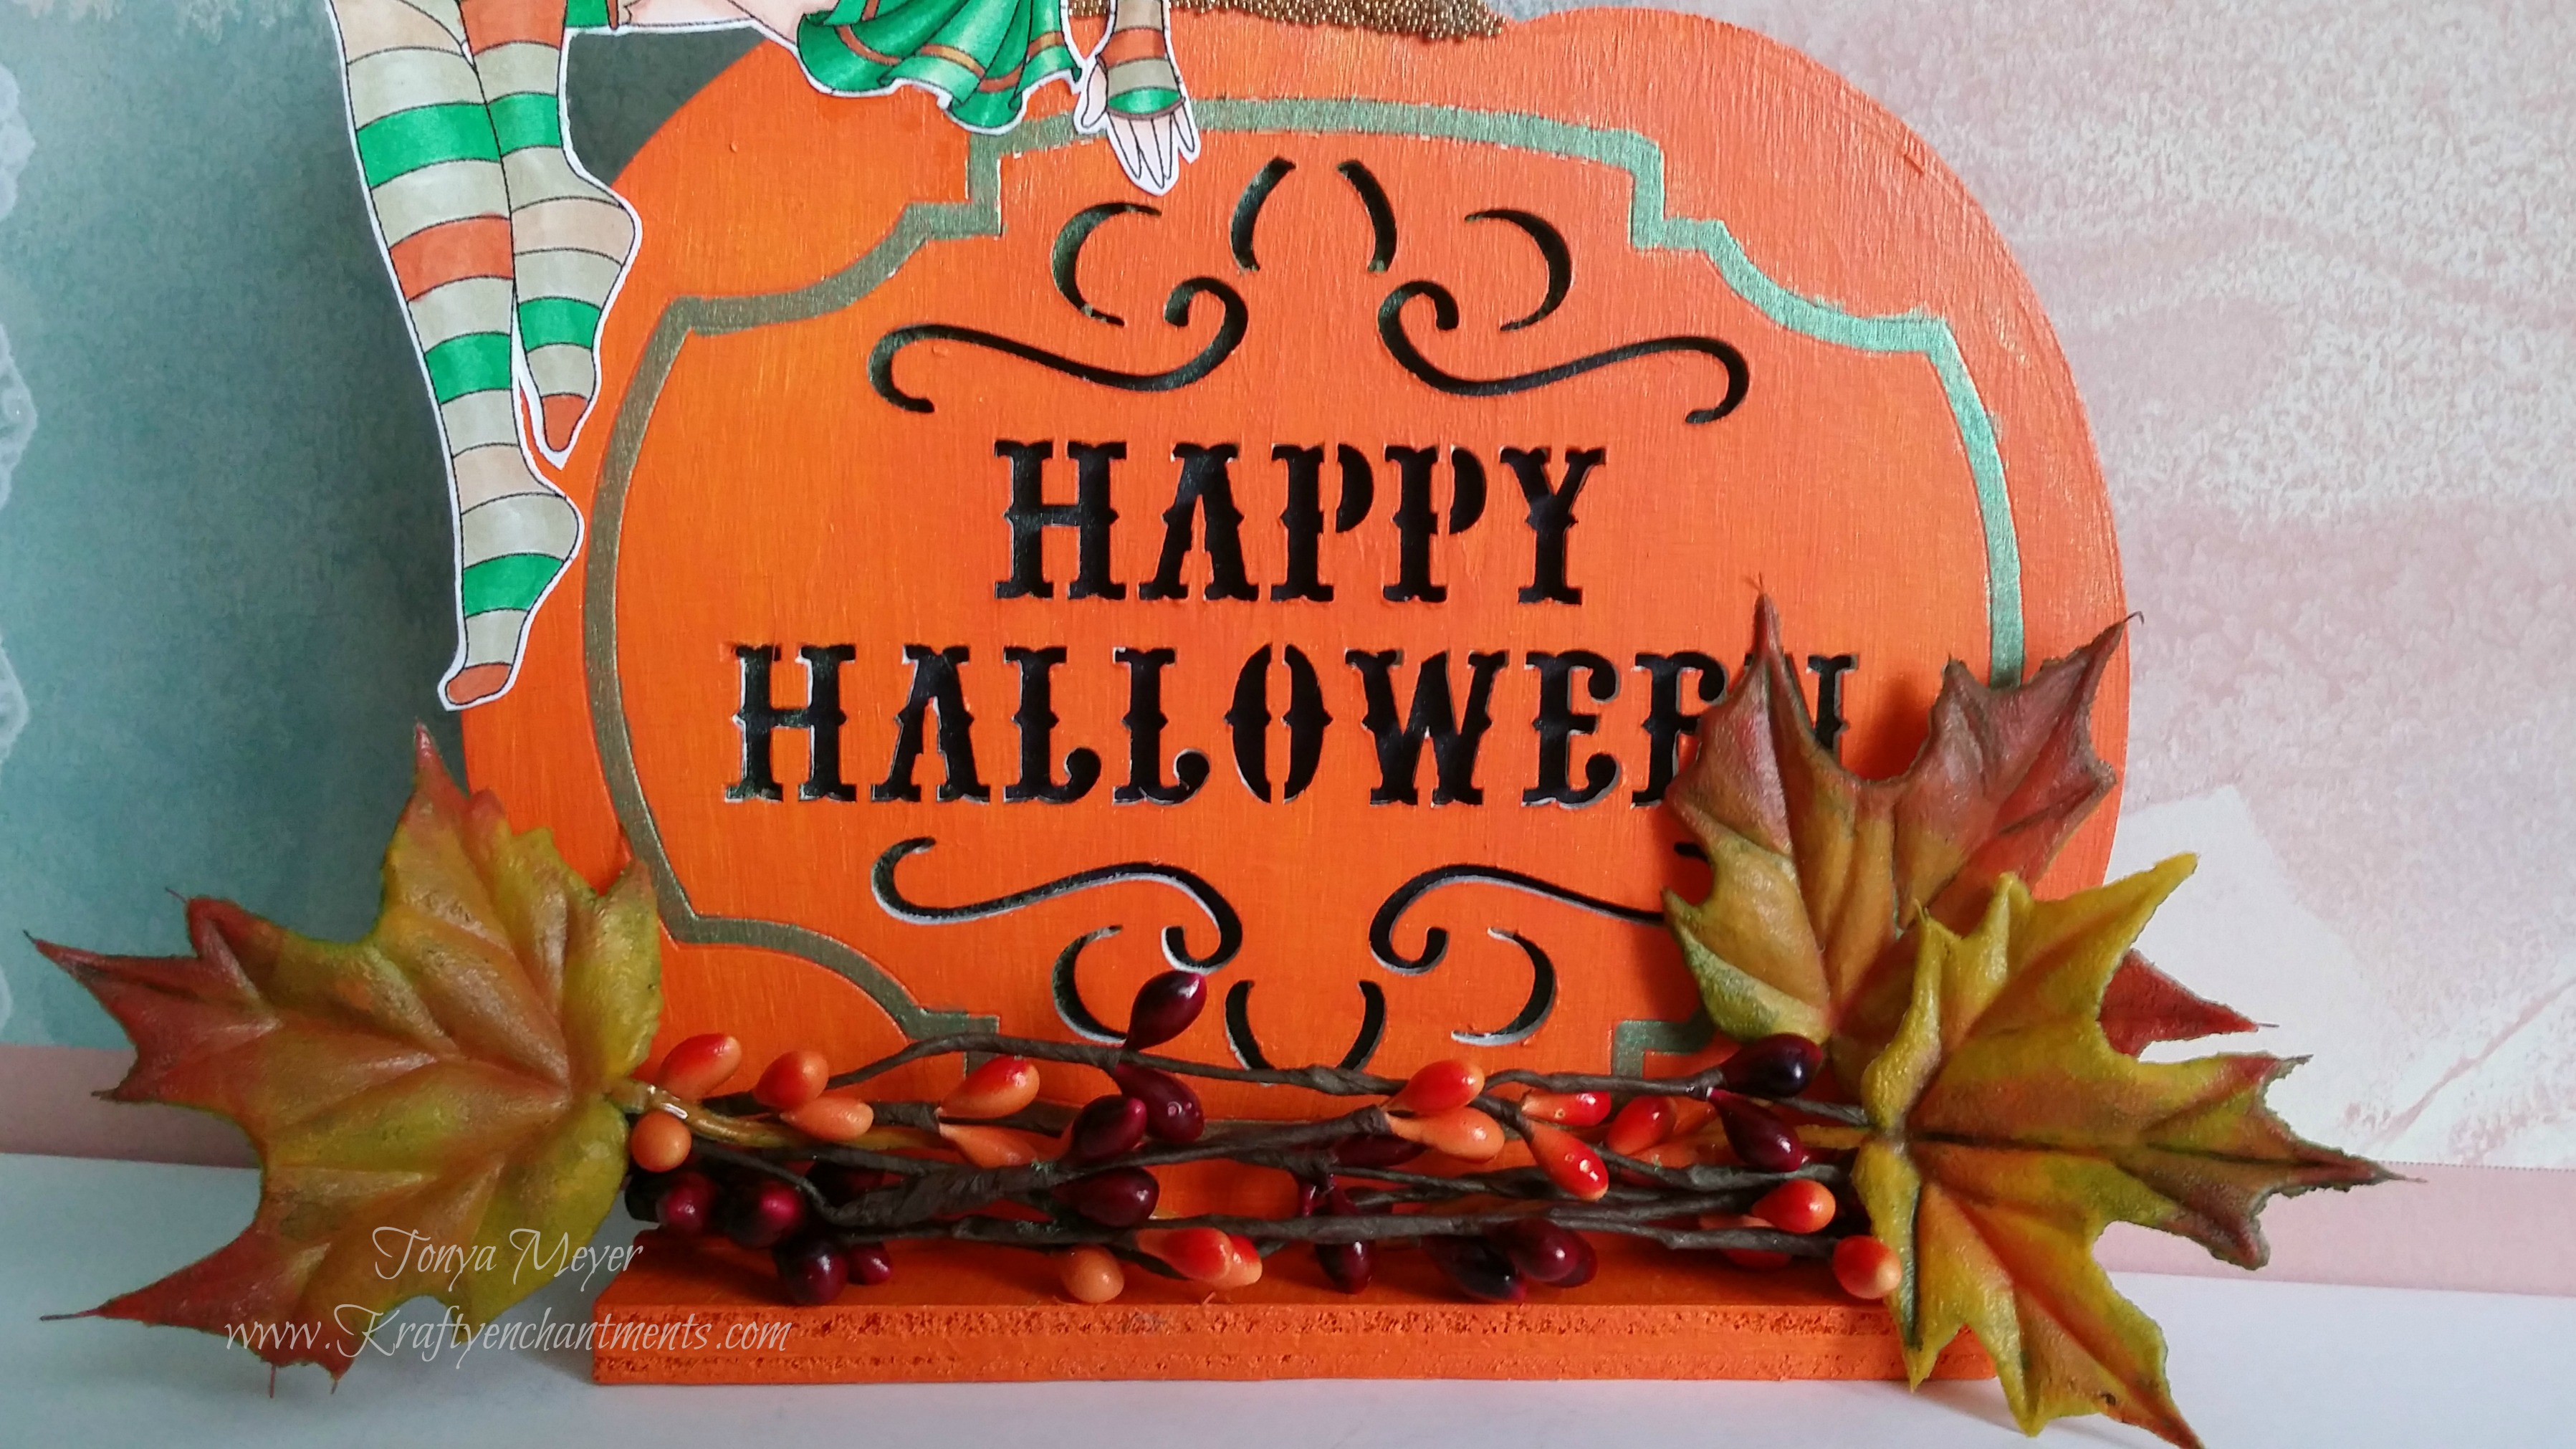
Wooden pumpkin painted with Gesso primer and Acrylic Paint. Added Perfect Pearls on trim. Added floral wire and leaves for textural embellishment.
Now that my pumpkin was looking more like a pumpkin, I wanted to add a bit of shimmer to the pumpkin which had a nice etched border around the Happy Halloween. I decided to use my Perfect Pearls powder on it. I started with my Perfect Medium pen and drew a nice thick coating onto the etched border in sections. Then I’d use my Forever Green Perfect Pearls powder, carefully dusting it on each section making sure I had good coverage and retouching any little areas I missed with the Perfect Medium pen. I continued on in sections until the entire border was completed with a nice metallic green color that really offset the color on the rest of the pumpkin.
To make the Happy Halloween sentiment on the pumpkin stand out, I glued a piece of black cardstock to the back of the pumpkin.
I added a bit of textural embellishment to the pumpkin with some fall floral wire that had orange and burgundy buds on it and wrapped it around he base of the pumpkin. Then I added a couple of fall leaves and glued them in place at the base of the pumpkin as well.
I also used a bit of glittering glue on the stem of the pumpkin and sprinkled some Champagne colored Micro Beads onto the glue until I had a nice layer of texture to look like a pumpkin stem.
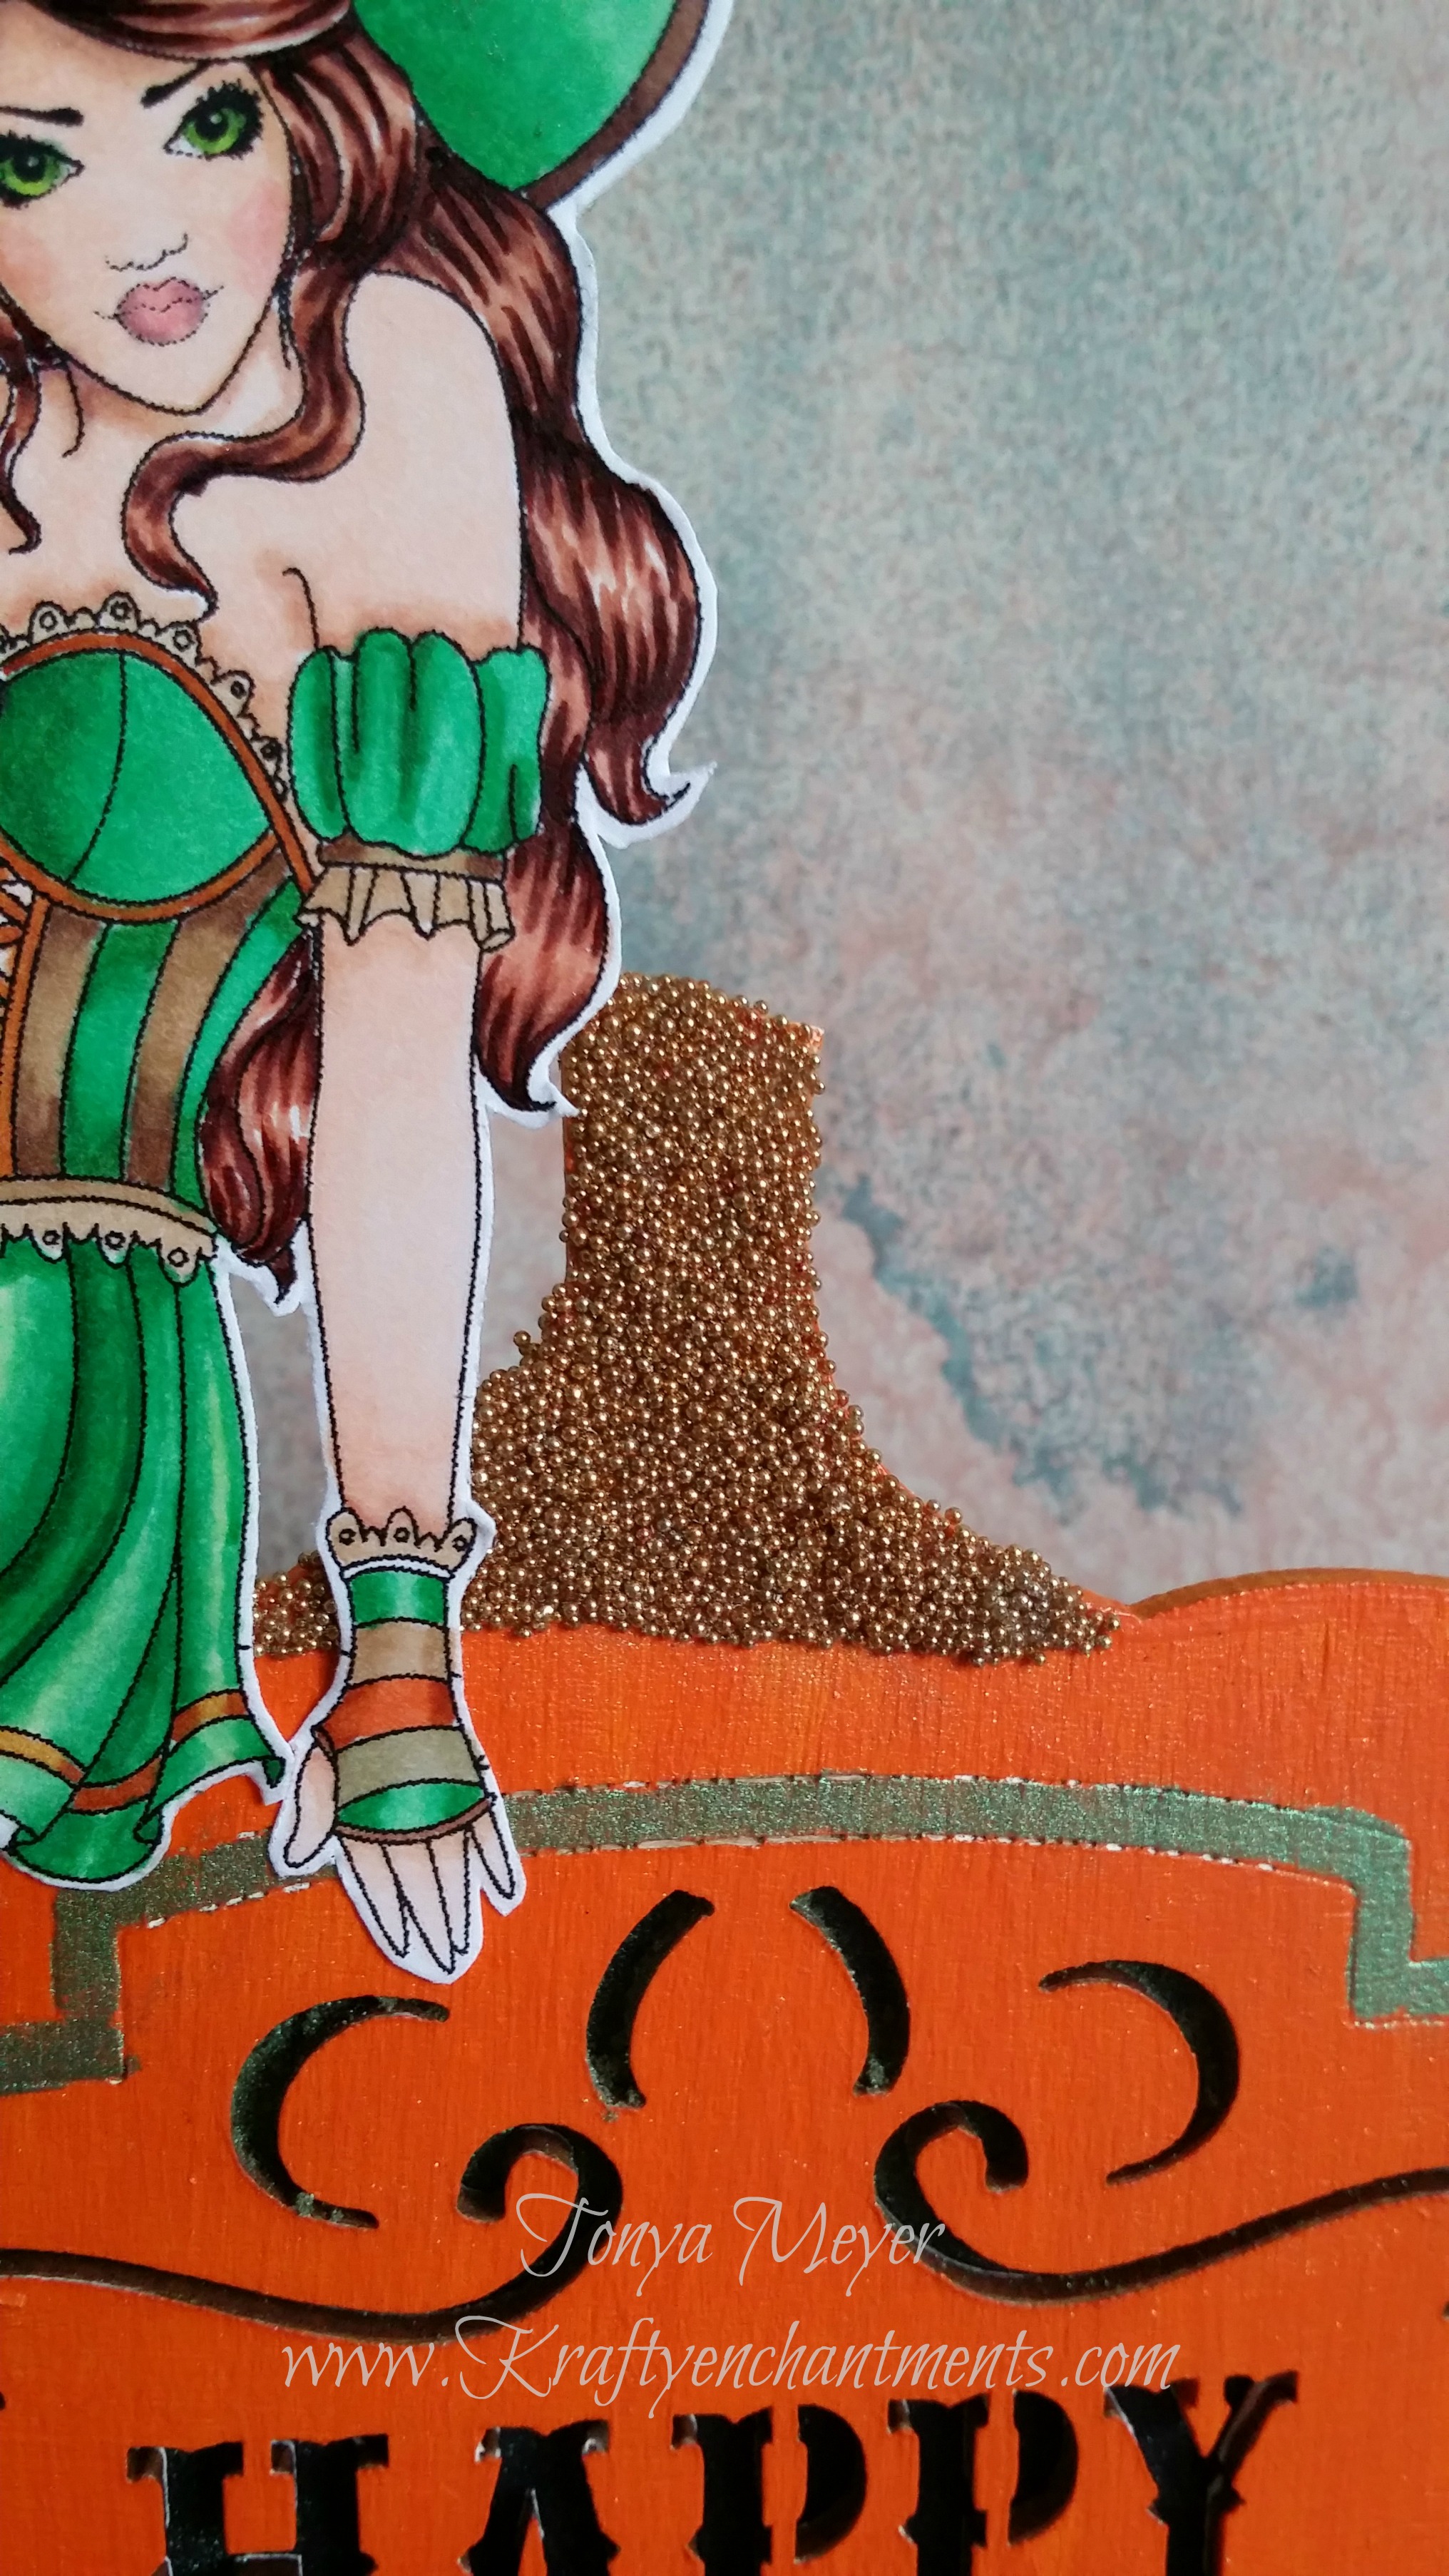
Pumpkin stem with Champagne colored Micro Beads glued on.
To complete my project I took the Sydney digi that I colored and fussy cut and glued her onto the top of the pumpkin so that it would appear that she was sitting on the pumpkin.
For a project that I was nervous about, I really enjoyed the process and learned quite a few things along the way. I’m thrilled that my little centerpiece turned out better than I’d imagined and I think Sydney looks right at home on top of a pumpkin.
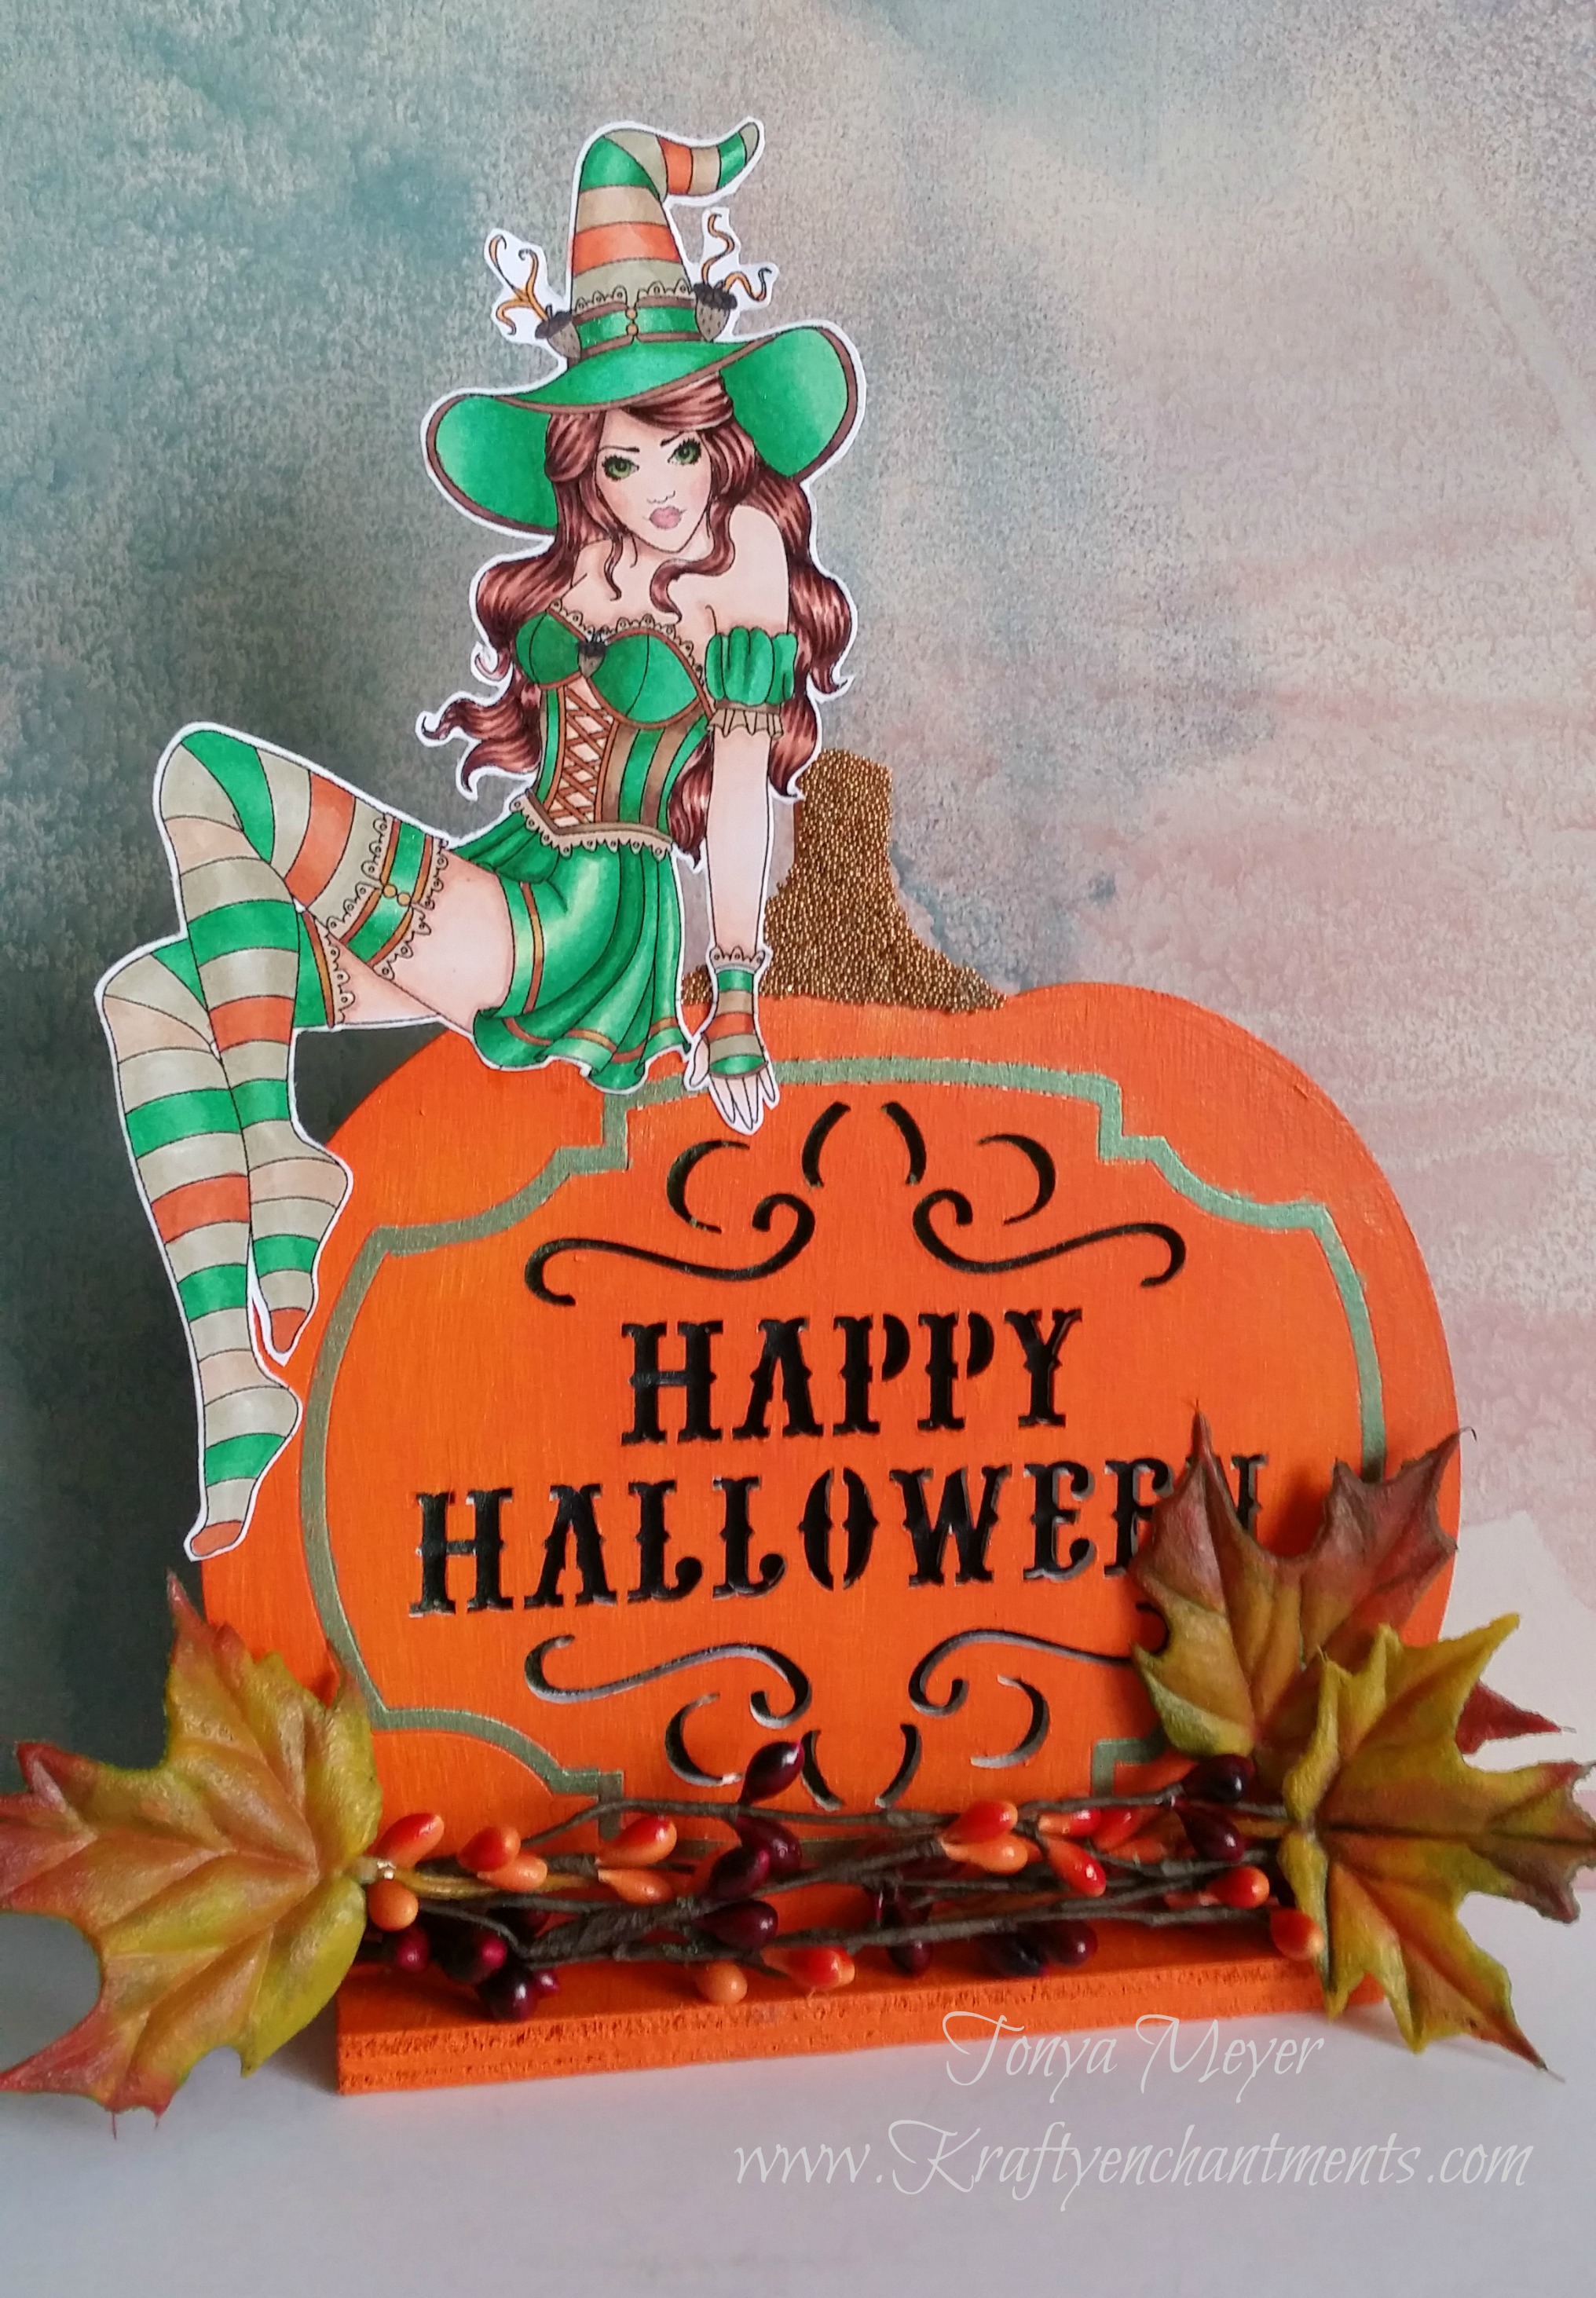
Completed mixed media centerpiece with Sydney image from Spellbinding Stamps.
Please stop by Spellbinding Stamps to see what amazing projects the rest of the DT ladies have created for the mixed media project.
You can also join our Facebook group to get all the latest and greatest details on new stamps, challenges and see the amazing images everyone shares in the group.
Hope you enjoyed my mixed media project today featuring Sydney from Spellbinding Stamps by Nikki Burnette.

