Cute and Spooky Halloween with Mama Elephant
Hi All,
I’m sitting here this evening wondering where the summer has gone. The neighborhood kids are all headed back to school, traffic on the drive to work has been heavy and next weekend is already Labor Day. We had a bit of a chill in the air this past week which made it feel just a teeny bit fall-like for a brief moment.
Fall is absolutely my favorite time of the year. I just love the cool crisp air, sweater weather, pumpkin spice everything and hot chocolate on the long, cool nights. In the spirit of the retailers who are already beginning to put out their Halloween decorations and in some cases Christmas (which I don’t even want to think about yet, eek), I’m starting to work ahead a bit. This past week I finished my first two Halloween cards and I wanted to share one of them with you.
First up is my card using the adorable little witch cat from Mama Elephant’s stamp sets Meowlloween and Meowlloween Extras. If you haven’t had a chance to take a peek at this stamp set you really need to. It is jam-packed full of super cute kitty cat stamps dressed up in various costumes and a ton of extras to use for your Halloween cards. I just love these stamp sets. There’s also a coordinating die set for both stamp sets.
I got the inspiration for this card from the amazing, Laura Bassen who is on the Mama Elephant Design Team. Her card was so cute and simple and I wanted to do something similar.
I started out inking up a 4 x 5 1/4 panel of white cardstock with distress inks in Squeezed Lemonade, Spiced Marmalade and Wild Honey. I sponged on distress ink over entire cardstock panel from light to dark making sure it was well blended to create a sort of ombre look.
Next I cut a piece of the same white cardstock to be just slightly larger at 4 1/4 x 5 1/2. Once I had my panel cut, I used the larger stitched circle die from the W Plus 9 Love Mom Layers die set. and positioned the circle in the center of my cardstock and die cut it.
I wanted to use the little witch cat, but I wanted her to have the cute hat with the stars on it, so I created a mask by stamping the original kitty on a piece of Post-it Tape with the hat and fussy cutting the hat off to create the mask. Next I, placed my mask down onto the cardstock I would be stamping on and re-inked and stamped the kitty so that the hat wouldn’t show. Then I was able to take the hat with the stars on it and position it where the other hat would have been on the kitty’s head.
Once my image was stamped I was able to color it with my Copic markers. I chose a neutral brown for the kitty and then made her dress and bow a bright purple and her hat is green with purple stars. I added some clear Wink of Stella to the hat and the bow on the kitty.
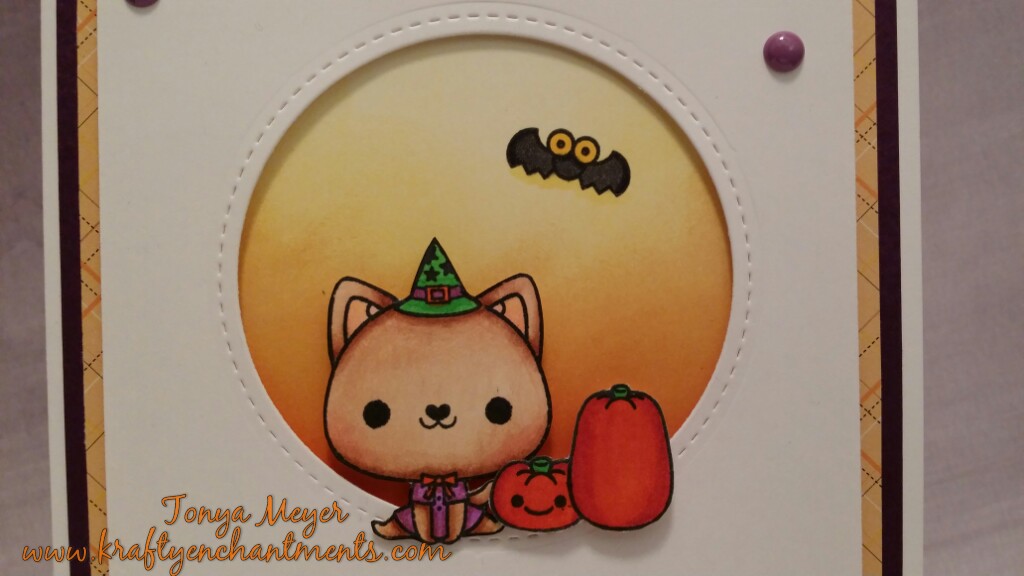
Kitty, pumpkins and bat stamps from Mama Elephant’s Happy Meowlloween stamp set. Colored with Copic markers.
I wanted to stamp more than one pumpkin to have sitting next to my kitty so I created another mask using the larger pumpkin. I stamped it onto some Post-it Tape and then fussy cut it out. Positioned my mask onto a small scrap piece of white cardstock and then stamped the large pumpkin and placed the Post-it mask over it. Next I stamped the small pumpkin so it would appear to be behind the larger pumpkin. Then I selected one of the little smiley faces to add to the smaller pumpkin and stamped it. I colored both my pumpkins with Copics and fussy cut them out.
To assemble my card, I cut a card base that was 10 1/8 wide x 6 1/4 tall from some 80lb Neenah Solar White cardstock and scored it in the center.
Then I cut a piece of dark purple cardstock to 4 3/4 x 6 and adhered it to my card base with some Ranger Glossy Accents. Next I cut a piece of plaid patterned cardstock to 4 1/2 x 5 3/4 and glued it in place with Glossy Accents over my purple cardstock.
I added my ombre distress ink colored panel to the center of the patterened paper and glued it into place. Then I added some 3M Dimensional foam to the back of my panel with the die cut circle and centered it on top of my ombre colored panel to give the illusion of a moon in the background.
Finally I was ready to add my kitty and my pumpkins so I added some dimensional foam to the back of my kitty and placed her on the bottom edge of the circle. Then I doubled up my dimensional foam on the pumpkins to make them look like they were sitting in front of my kitty.
A look at my Sparkly Bat flying across the moon. Colored with Copics and added clear Wink of Stella.
I also decided to add the cute little bat flying across the moon in the background so I stamped him and colored him with my Copics and then I did add a little bit of clear Wink of Stella to him to make him sparkle a bit. Who doesn’t love a sparkly bat in the moonlight, right?
I added 3 little purple sugar dots to the top of my card for some added dimension.
My final step in this card was adding my sentiment to the bottom of my white die cut panel. I actually should have stamped the sentiment onto my panel before I added the dimensional foam but I had forgotten to do that step. I inked up the Happy Meowlloween sentiment using a Noir Black Palette Hybrid Inkpad. I lined up my sentiment at the bottom of my white die cut panel and stamped it making sure to press the stamp firmly down. Luckily it inked up pretty well considering the layer of dimensional foam I had on the back. I did have to retouch a couple of spots with a fine black pen. Whew – disaster averted this time, LOL! Next time I’ll be sure to remember to stamp my sentiment BEFORE assembling all my card layers.
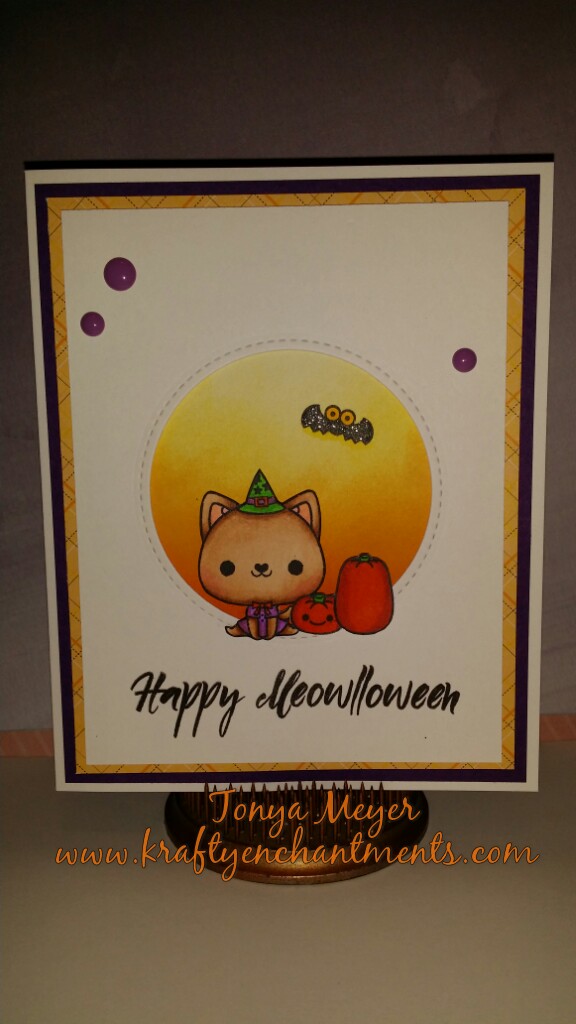
Here’s a look at the final card:
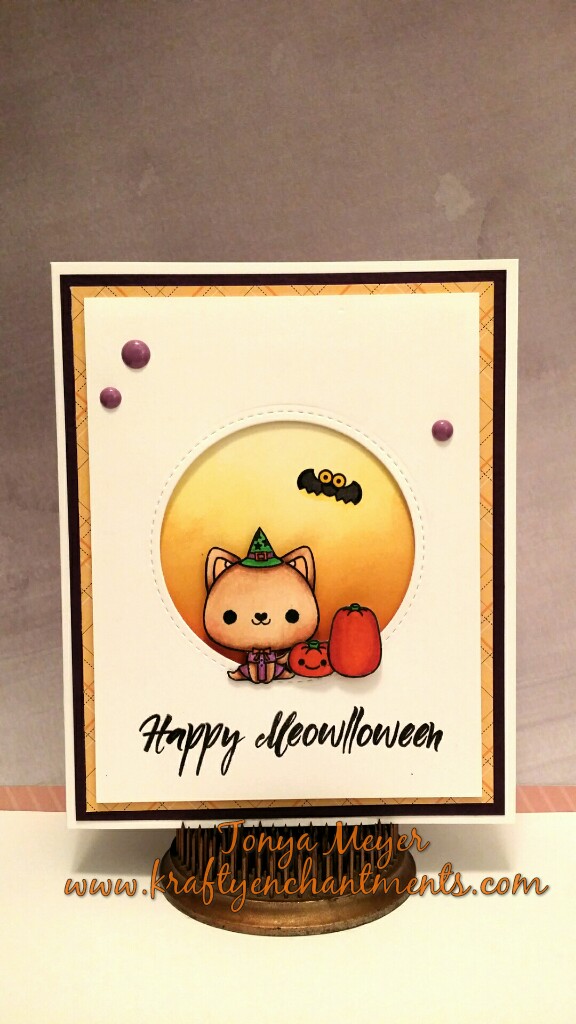
Completed Happy Meowlloween Card.
Hope you enjoyed my first Halloween Card of the season. If you liked this card or have questions, please feel free to drop me a line in the comments.
I’ll have more Halloween cards to share in the next few weeks so check back for more cuteness and maybe even something a bit sexy and sassy.
Have a wonderful start to your week.

