3-D Rosette Ornaments
Hello! Hope you’re having a wonderful day. We plan to put up our Christmas tree today so I’m excited about that. It always seems like such a chore to dig all the decorations out and put up the tree, but everything is all sparkly and beautiful when it’s done so that makes it all worth while.
Dare 2B Artzy’s 3-D HOP is still going on over on Instagram. You can check out all of the amazing projects created by the design team there. There’s ton’s of inspiration to create your own 3-D Holiday Projects.

I thought I would share how I created the 3-D Rosette Ornaments (or gift tags because these could be used for that purpose as well). These ornaments are so super quick and easy to make. I think they would be a great project for families, just make sure that you let an adult handle the hot glue portion.
To start it’s good to think about how wide you will want your ornaments to be. it takes two strips of accordion folded paper to create the ornaments. When I created my first ornament, I wasn’t thinking about the width, I just went with a strip size that I thought would be easy to fold and manipulate and my ornament ended up being 5 1/4 inches wide.
Once you have decided on a size for your ornament or tag, divide that width in half and that will determine how wide your strip of paper needs to be. If you want a 3 inch ornament, your strip of paper needs to be 1 1/2 inches for example or for a 4 1/2 inch ornament, your strip of paper would need to be 2 1/4 inches wide.

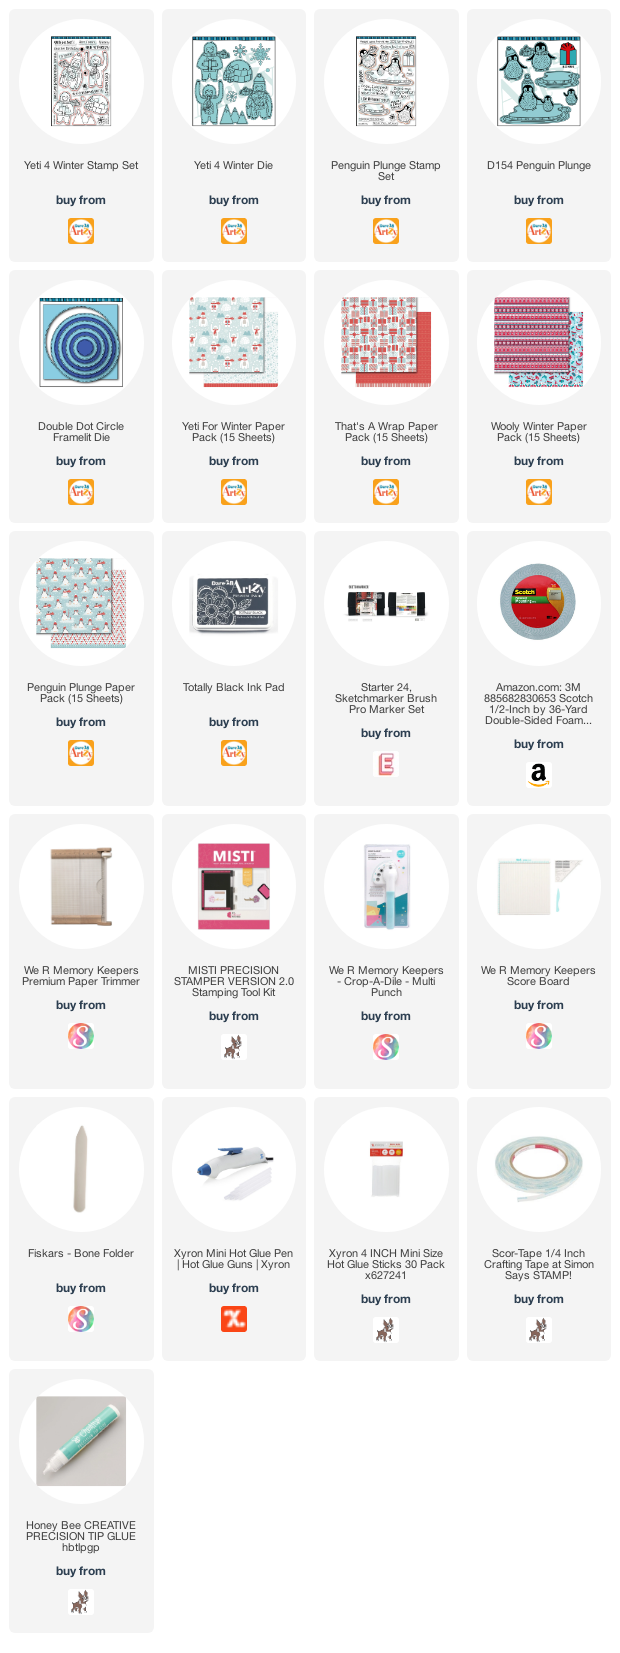
For paper, you’ll want to pick a good sturdy scrapbook paper or a paper that’s not too heavy. I would suggest not using anything too heavy because you will need to make a crisp accordion fold. I think that double sided 12×12 scrapbook paper like Dare 2B Artzy’s Penguin Plunge, Yeti for Winter, That’s a Wrap or Wooly Winter are perfect for making these rosettes. All are double sided with fun images and graphics on both sides.
To begin, I cut my strips of paper and set them aside.
When I had all of my paper cut, I used my We R Memory Keeper mini scoring pad to score my strips of paper. This was a little challenging on a small scoring pad, but it can be done.
You will want to determine how deep you want your ornament to be. For mine, I scored the strips of paper at every 1/2 inch mark from beginning of the strip to the end and that was a good size for my rosettes. Keep in mind that the smaller the scoring the more detailed it will be but it might also be more difficult to fold and keep crisp lines.
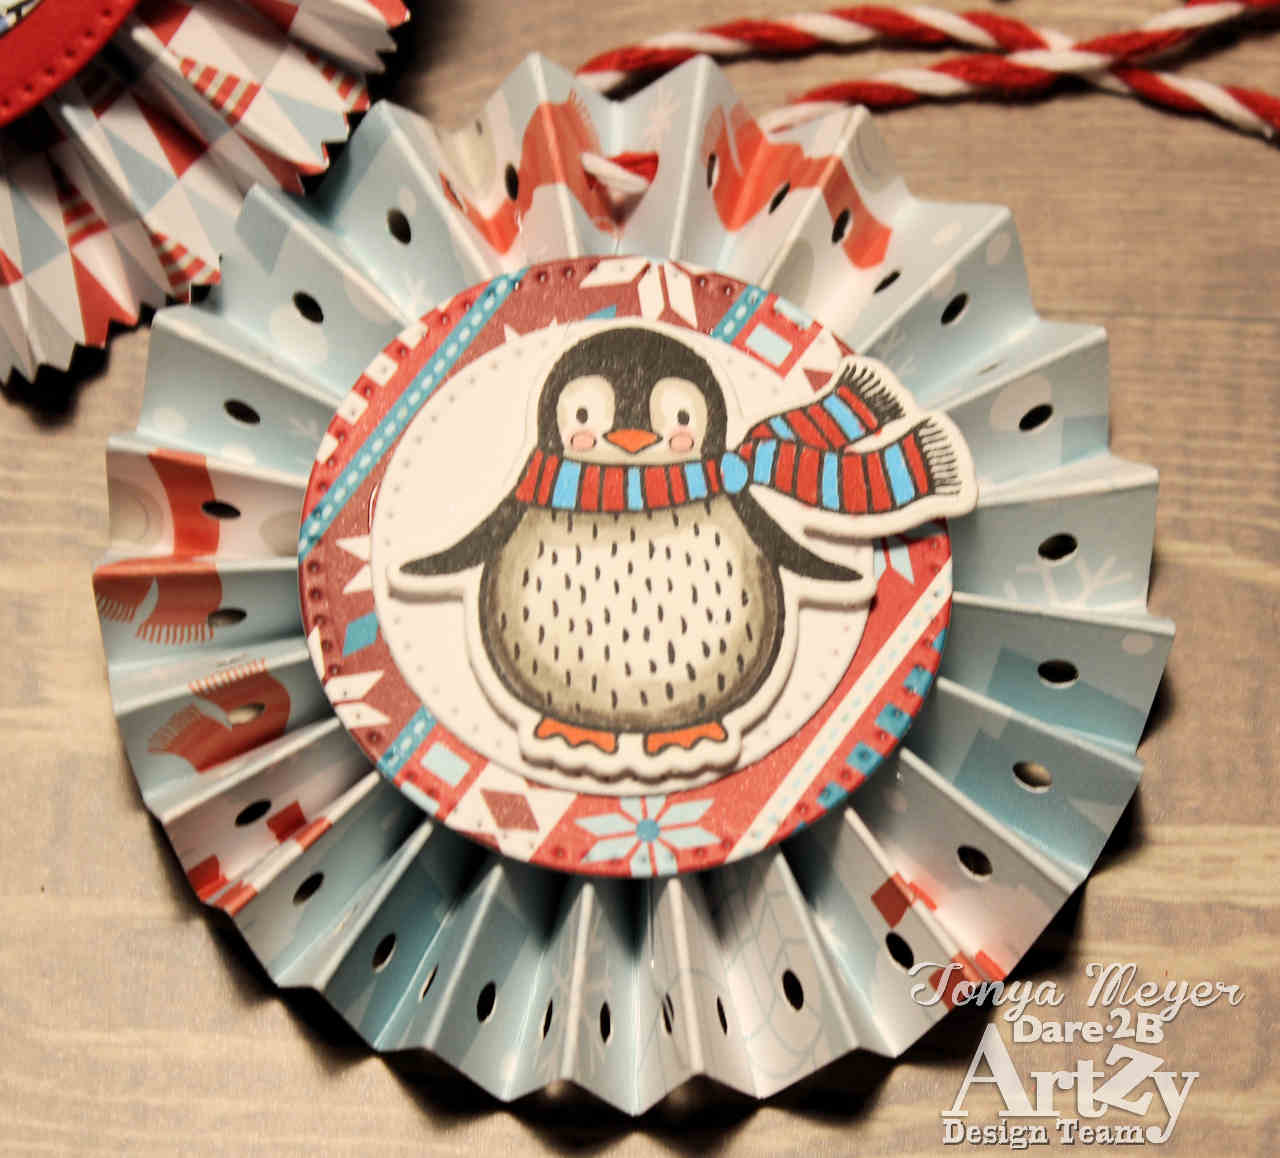
If you want to punch small holes or use decorative scissors or any edge dies to create a decorative edge to your strips of paper, you need to do that BEFORE you start folding. Trust me! It’s not easy to punch holes after the fact! Ask me how I know, LOL! At the very least, you can punch one hole to create a spot for your twine or ribbon to hang your ornament or add it to a package.
Once your strips are scored, you can start the folding on the scored lines of each strip. For the first strip, if you start with a mountain fold, you will need to start with a valley fold on the second strip or vice versa since you have to adhere the two strips together.
I folded each strip and used my bone folder to help keep my folded lines crisp.
When your strips are all completely folded on the scored lines, you’ll have two crinkled strips of paper.
To adhere the two strips together you will need to add the end of one strip (valley folded end) to the end of the other strip (mountain folded) and secure the two together with score tape, liquid glue or hot glue. I used score tape and liquid glue on mine to make sure they stayed together. Once you have one end adhered together with the other end, you’ll do the same on the other end of the strips and adhere them together. Essentially this will create a crinkly circle that won’t lay flat.
You can set your glued circle of strips aside for now while you work on the elements for the front and back of the rosettes.
Using the Double Dot Circle dies from Dare 2B Artzy, I cut out some circles of coordinating scrapbook paper and some circles of 110lb white cardstock. Keep in mind that you need to cut two of each as you’ll need one for the back and one for the front. You could absolutely use a decorative circle die for this, that would be so pretty, especially if you have cut a decorative edge for your rosette. They don’t necessarily have to be circles either, just something that you can use to cover the center of the rosette on the back and front of it.

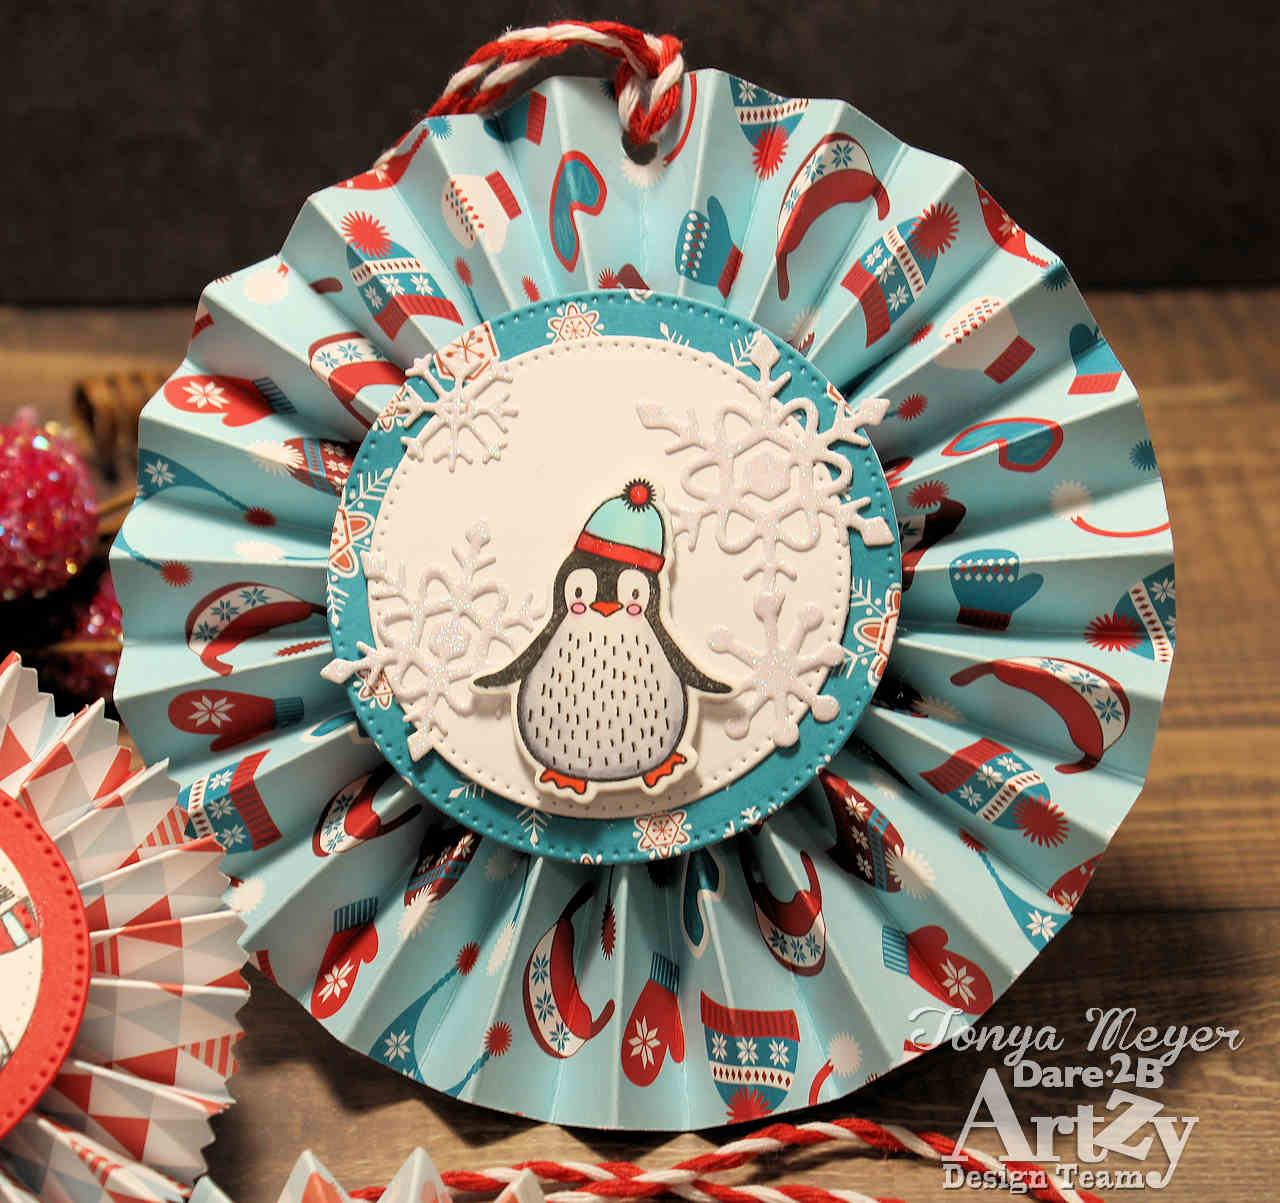
On the white cardstock I either stamped and colored the image, like the Yeti with the Gift package from Yeti 4 Winter stamp set or you can stamp, color and die cut your images as I did with the Penguin Plunge stamp set. If you’re going to color and die cut your images, you could use another piece of patterned paper for your 2nd circle as well. On my largest ornament, I die cut some snowflakes from some glittered cardstock and glued them onto the circles. The adorable penguins were added with some dimensional foam. I really love the pop of dimension added to the rosettes which are already dimensional. It’s so fun!
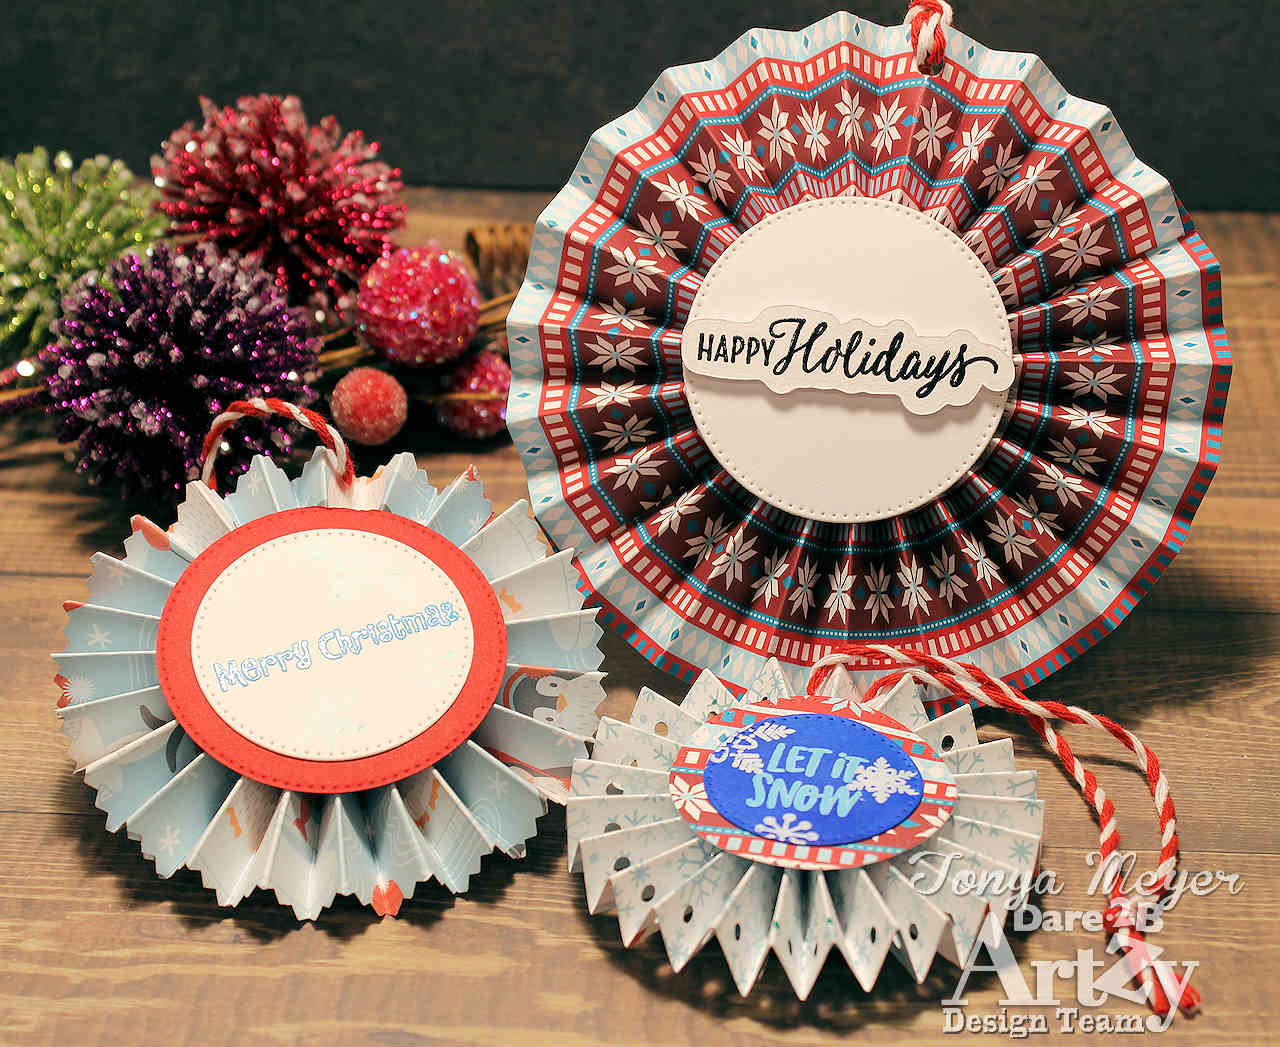
For the back of my rosettes, I used the white circles of cardstock to stamp the sentiments like Merry Christmas and Let it Snow. On the largest one, I had a leftover sentiment that I had stamped and heat embossed that I cut out using my Scan-n-cut. This would also be the perfect place to stamp the To and From if you are making these into 3-D Gift Tags.
Once my stamping, coloring and or die cutting was completed and my images were added to my white cardstock circles, I glued them onto the larger circles of patterned paper that I cut with the circle dies.
Now for the trickiest part, hot gluing the rosettes and adding the front and back panels. You’ll want to have your hot glue gun ready. I don’t know if this would work with liquid glue or not as I didn’t try that. The hot glue works well and dries quickly. For my project I used a Xyron glue pen and it was smaller so I found that it was easier to hold and control.
You’ll want to put some hot glue on the back of your completed circles. I put a generous amount all over the back of the circle and set it aside.
Quickly, figure out what side you want to be the front of your rosette and then flatten it to your work surface. It should flatten pretty easily. This next part is the most difficult part of the whole process (it would be good to have an extra set of hands to help). You’ll want to gather your flattened rosette into a tight circle by bringing it in so that the center of the rosette gets very small. If you’re doing this by yourself, use one hand to hold the rosette into the small gathered circle and place a good amount (dime size) amount of liquid glue in the center and then place the completed circle that you added hot glue to, on top of the center of your rosette and hold it in place for a minute while the glue sets. Again, an extra set of hands would be helpful to hold the rosette shape while you place the glue and center circle.
For the back of the rosette, you just need to add a dime size amount to the center of the rosette and then add some hot glue to the back of the circles to be placed on the back and that’s it.
I used some large stamping blocks to sit on top of the rosettes while the glue set.
The final step is adding the ribbon or twine to hang on the tree or on a package.
These were such a fun project to make and there’s lots of creative variations that you can make with decorative dies, stamps, paper. Again, I think this would be a great project for the family.
Thank you so much for stopping by today! I will link to all of the products I used in this project below for your reference.
Don’t forget to HOP on over to @dare2bartzy over on Instagram and check out all of the amazing 3D Projects our Artzy Team created for this HOP. So many fun ideas!
Have a great day!
HUGS!
Tonya
https://linkdeli.com/widget.js?id=f5e8378456858c916708

