Lighting up the 4th of July
Hi all! I’m a bit late getting this post up. Honestly, I had forgotten that I’d taken photos of my 4th of July cards (because most of the time I don’t have time to take photos before I give the card to the recipient).
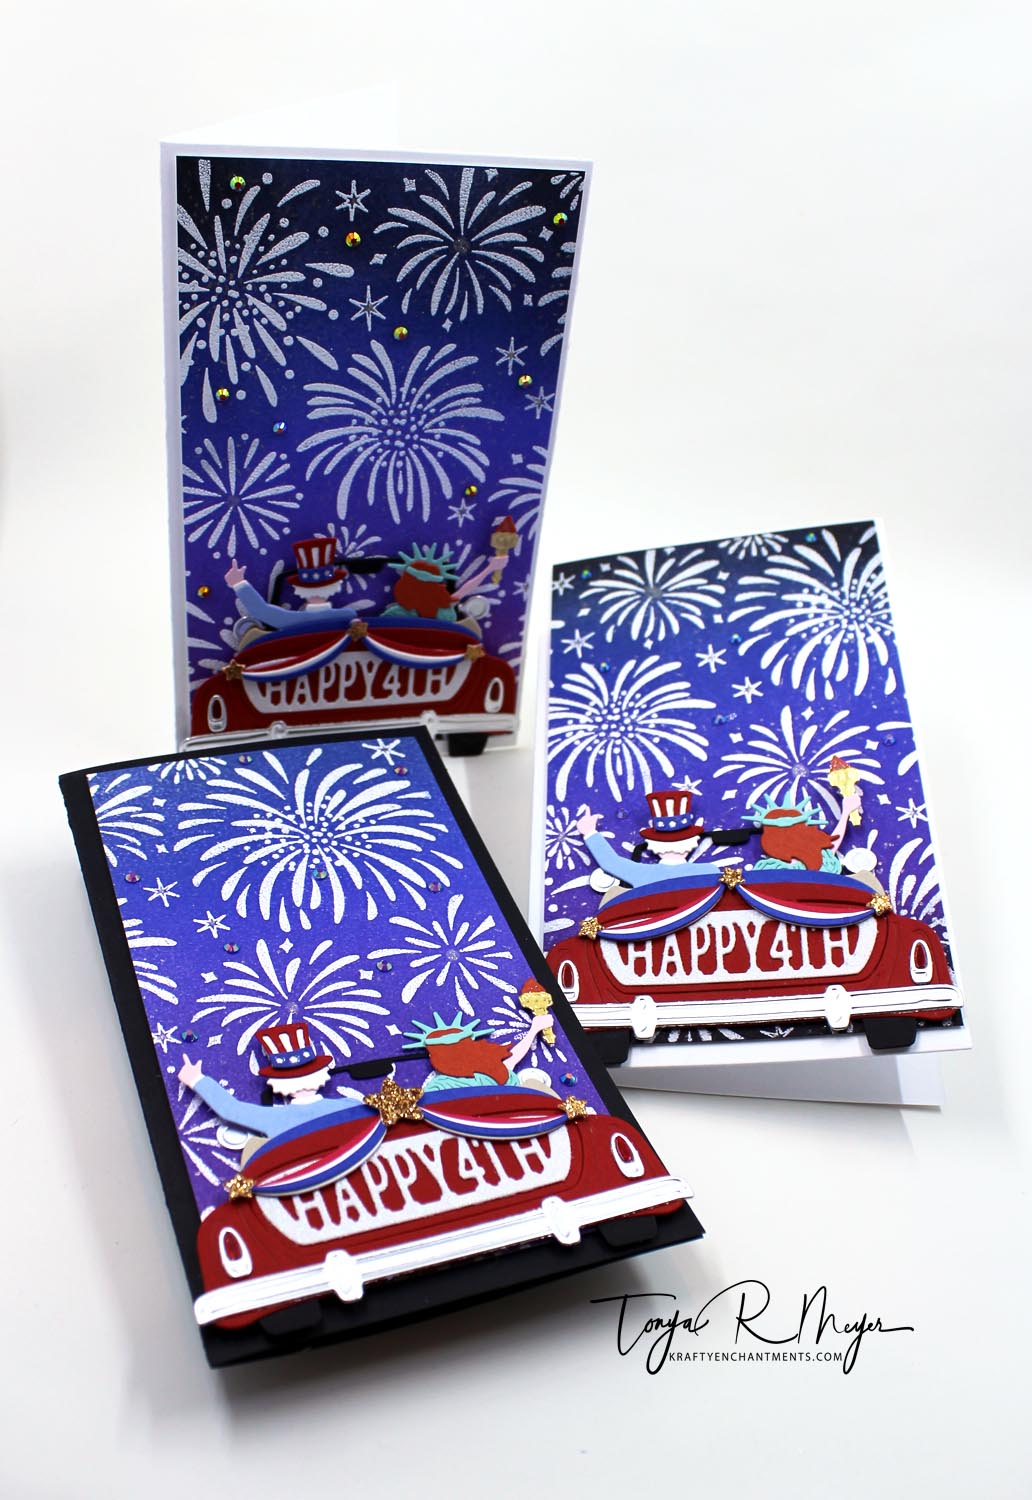
I had an extra day off for 4th of July and I wanted to take some time to play with the Spellbinders Sunday Drive Etched dies and the Liberty Sunday Drive add-on dies.
The process of die cutting and putting together the cars for the three cards took a bit of time, but I think it was worth the end result as they turned out so cool.
First, I pulled all of my card stock. I used up quite a bit of scraps for the cars. I die cut everything for the Sunday Drive set and the Liberty set three times. I used some of the little Oui glass yogurt containers to sort and store all of the little intricate die cut peices until I was ready to assemble them. I knew I was saving those glass containers for something, lol. They really came in handy.
Next, I started an assembly line of sorts; getting all of the pieces for the car ready and using some Bearly Art glue to adhere the peices together. A Crystal Katana and some fine tipped reverse tweezers will be your best friend for a card like this – trust me!!
Once the car was assembled, I moved on to assembling Uncle Sam and Lady Liberty.
After I had my cars completely assembled, I needed to figure out a 4th of July worthy background. I had recently watched a video on Hero Arts YouTube channel from Mindy Eggen and I loved what she had done with the Hero Arts Fireworks Bold Print cling background stamp. Here’s a link to that video on how she created the background for her cards using the same stamp: (1340) Gel Press Emboss Resist Technique – YouTube
I cased Mindy’s background because I just loved the results. My first step was heat embossing the Hero Arts Fireworks Bold Print background. I used white embossing powder on mine, but you could use any color that would show up well on darker backgrounds.
Next, I placed my Gelli plate directly into my Memory MISTI stamping tool and added some distress inks directly to the gel plate. The colors I chose were Blueprint Sketch, Broken China, Peacock Feathers and Wilted Violet. I also added a touch of Black Soot at the end on the top outer edge.
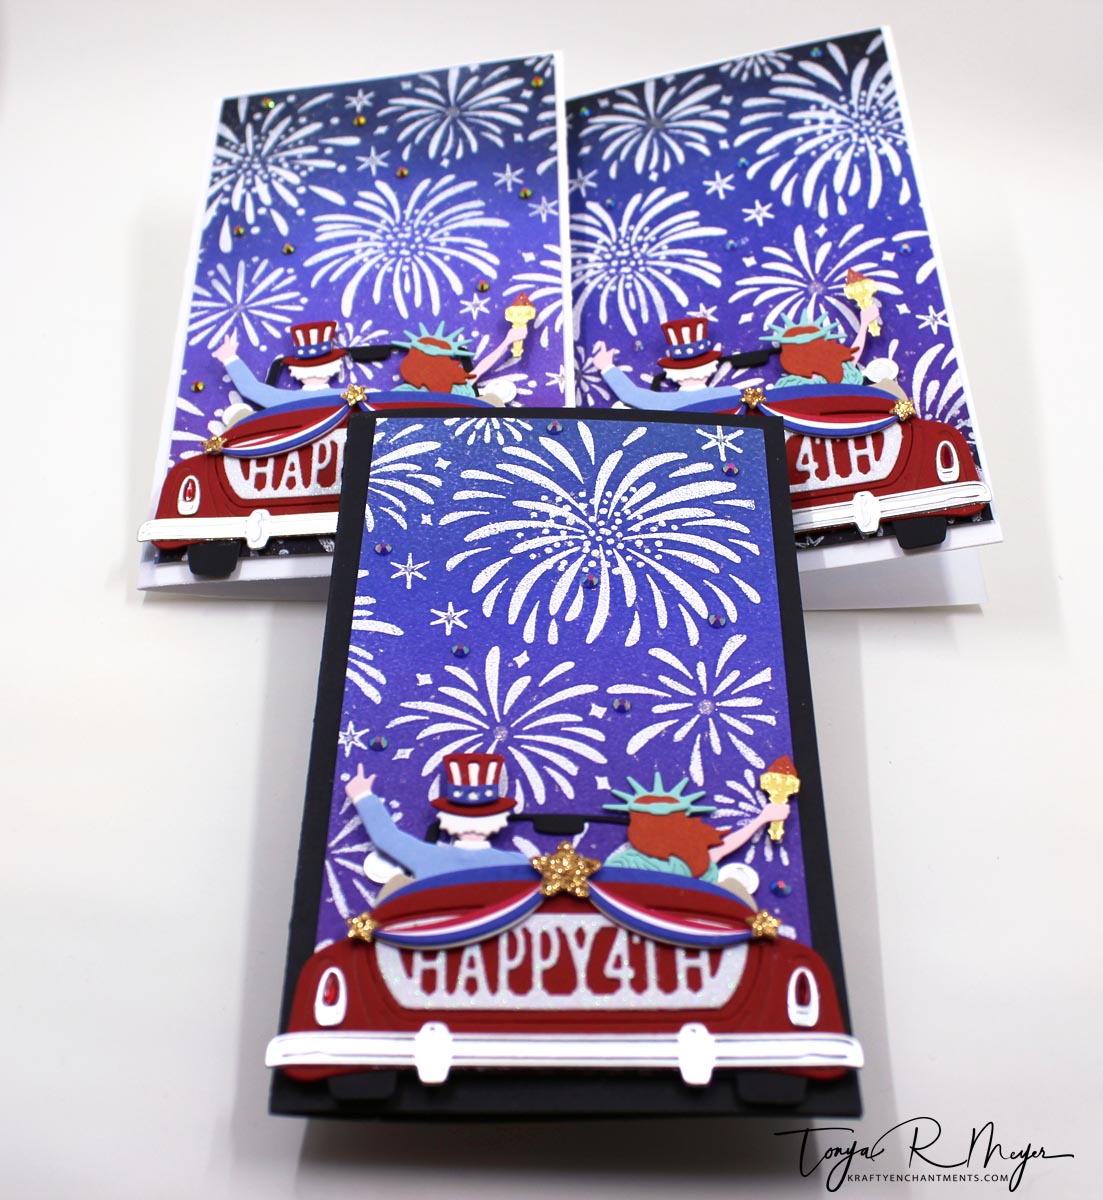
For each color I would add the ink to the gel plate and then used a brayer to smooth out any harsh lines and sort of blend the inks together. Once inked, I would close the door of my MISTI onto my heat embossed background. I had to repeat this step several times to get the depth and darkness I was looking for.
Once I’d finished inking the background, I used a clean cloth to wipe away the excess ink that was on the heat embossed fireworks. It’s so cool to see the background pop once you wipe away the excess ink.
I wanted to add a bit of sparkle to the sky so I used a Gelly Roll Pen in Stardust to add additional sparkle to the center of the fireworks and around the outer sections of them as well.
All of the backgrounds were cut down to mini slimline size and added to a black or white cardbase.

The assembled cars were added to the slimline background with some dimensional foam. I also added some gems to the sky as well for a bit more dimension and sparkle.
On the inside of the card, I stamped Cheers to the Red, White & Blue which is from the Colorado Craft Company stamp set from 2020 called Lovely Legs – Red, White & Blue.
Hope you enjoyed my cards today.
Hugs,
Tonya

