Hero Arts – Candy Cane Season Day 1
Hello and welcome!
I’m beyond excited to share a new card today as part of the Hero Circle for Hero Arts! It features a fantastic suite of products that I had so much fun playing with. Over the next few days, I’ll be sharing a trio of cards I created, and I can’t wait for you to see them.
The products from the Hero Arts Candy Cane Season release are perfect for creating festive holiday cards and tags. You can mix and match them or use them on their own for some truly delightful designs.

For today’s card, I’m spotlighting the Candy Cane Swag Stamp & Cut set. This holiday layering stamp set is packed with all the elements you need to craft cheerful, bright Christmas cards. It includes 14 image stamps, six of which are layering stamps, and coordinating dies to cut out every image.
What really caught my eye were the large layered candy cane stamp and the gorgeous bow. Plus, this set has an array of greenery that adds texture and interest when tucked in around the candy canes—perfect for adding depth or creating a wreath!
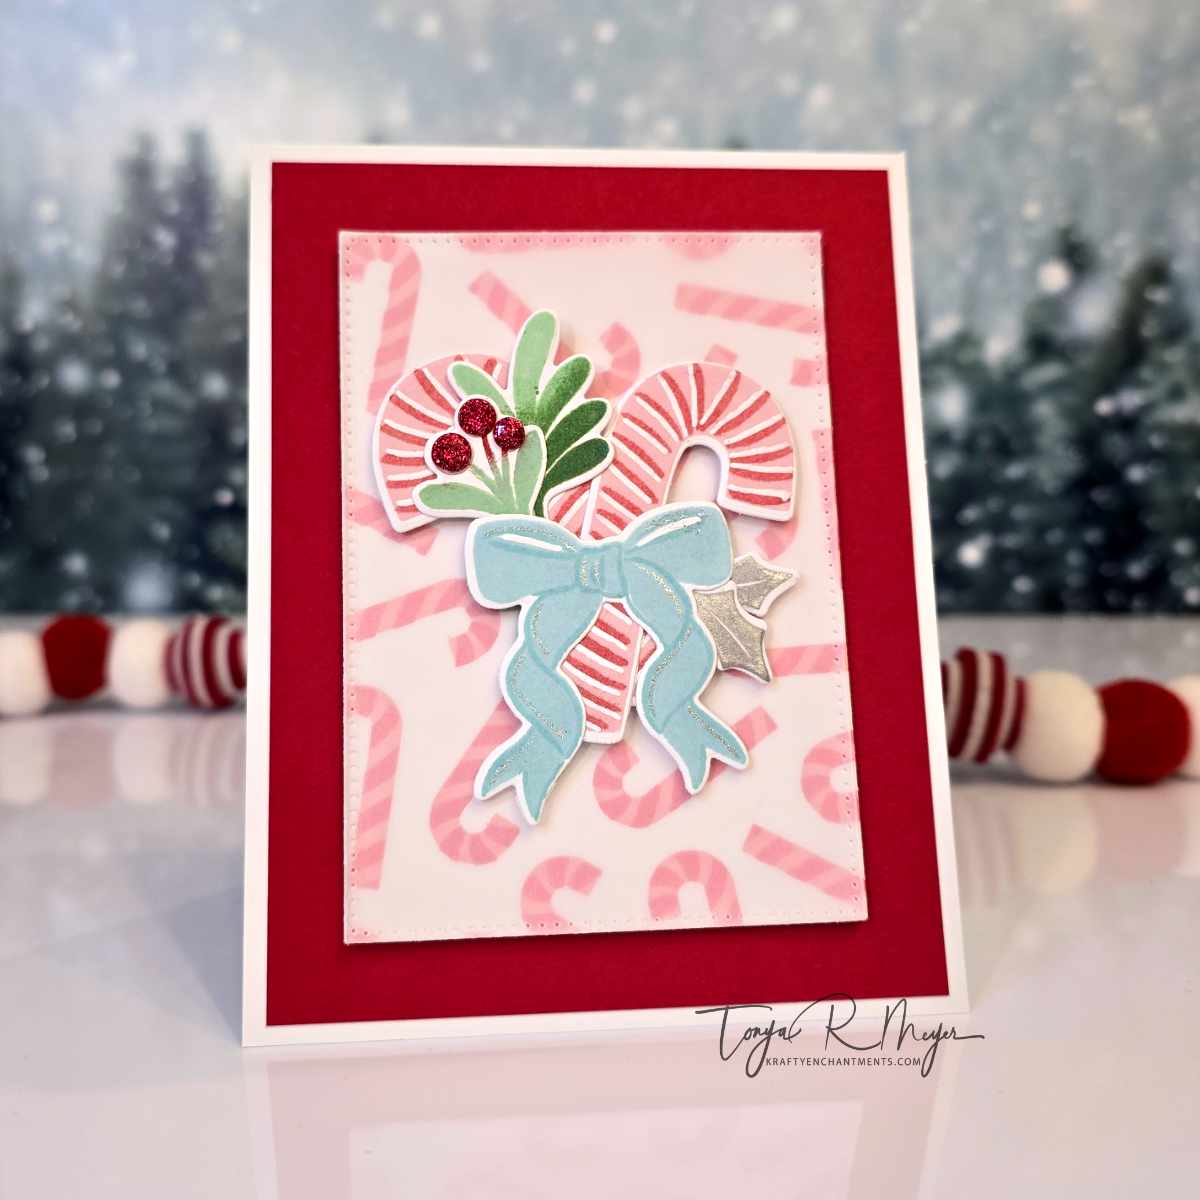
I wanted to design some bright, cheery Christmas cards using non-traditional colors. I stamped the solid base layer of the candy cane in light pink, then added the striped layer in red. After die-cutting the candy cane, I used a white gel pen to add extra white stripes for some fun detail.
The large bow was stamped in light blue, with a slightly darker blue for the outline layer. I also added a bit of glitter pen to the bow for some sparkle before die-cutting it.
A quick tip: While you can stamp the layers in any order, I found it easiest to start with the base (solid) layer and then add the detail layer. It made lining things up a lot simpler.
For the greenery, I stamped multiple pieces, sometimes using a lighter ink for the base layer, then darkening the edges for an ombre effect. I also stamped some of the leaves with silver pigment ink for added shine. I cut out more than I needed to ensure I had plenty for the three cards I’ll be sharing over the next few days.

To create a backdrop for the candy canes, I used the Candy Cane Toss Up layering stencil, which makes it super easy to create a seamless background of pink candy canes. The stencil features three layers that line up perfectly, giving you an effortless holiday design. I trimmed the background with a rectangle die to measure 4 3/8 x 3 1/8. I also cut a piece of vellum to the same size to soften the background, letting the stamped and die-cut candy canes stand out as the focal point.
I layered the stenciled background over red cardstock (5 3/8 x 4) and added a bit of foam tape between the layers for dimension.
I arranged the candy canes in an X shape and glued them together, then added the large blue bow on top. To finish it off, I tucked in a few pieces of greenery and added bright pink glitter drops where the berries would be for a touch of sparkle.
For this card, I skipped the sentiment. There’s a separate A Little Merri-ment Stamp and Cut set with great sentiments that would pair perfectly with this set, but since I didn’t have it on hand, I decided to leave the sentiment off for now. I can always add one later, or simply add it to the inside of the card.

That wraps up today’s card! Be sure to check back tomorrow for my Day 2 card featuring the Hero Arts Candy Cane Season collection.
Thanks so much for stopping by! I hope you’re inspired to explore the Candy Cane Season suite from Hero Arts and have fun creating your own holiday cards.
Hugs,
Tonya
Clicking on a thumbnail link and shopping provides me with a small commission (at no additional cost to you), which supports my website and allows me to continue bringing you new projects and content. I appreciate your support. All products were personally purchased except for products from the I Pick You Collection which were provided/sponsored by the company. I only use and recommend products I love.
 https://linkdeli.com/widget.js?id=f5e8378456858c916708

