Beach Life Fun Fold Card
Welcome back to my blog!
Today, I am excited to share a new fun fold card. This card was inspired by a video shared by Wendy Cranford. She created a video to share a card made with a side step fun fold card. I will link to her video here: https://www.youtube.com/watch?v=0Qy9wLbm1lk
I was so excited to see how her fun fold turned out I decided to try it for myself and it was very easy to make.
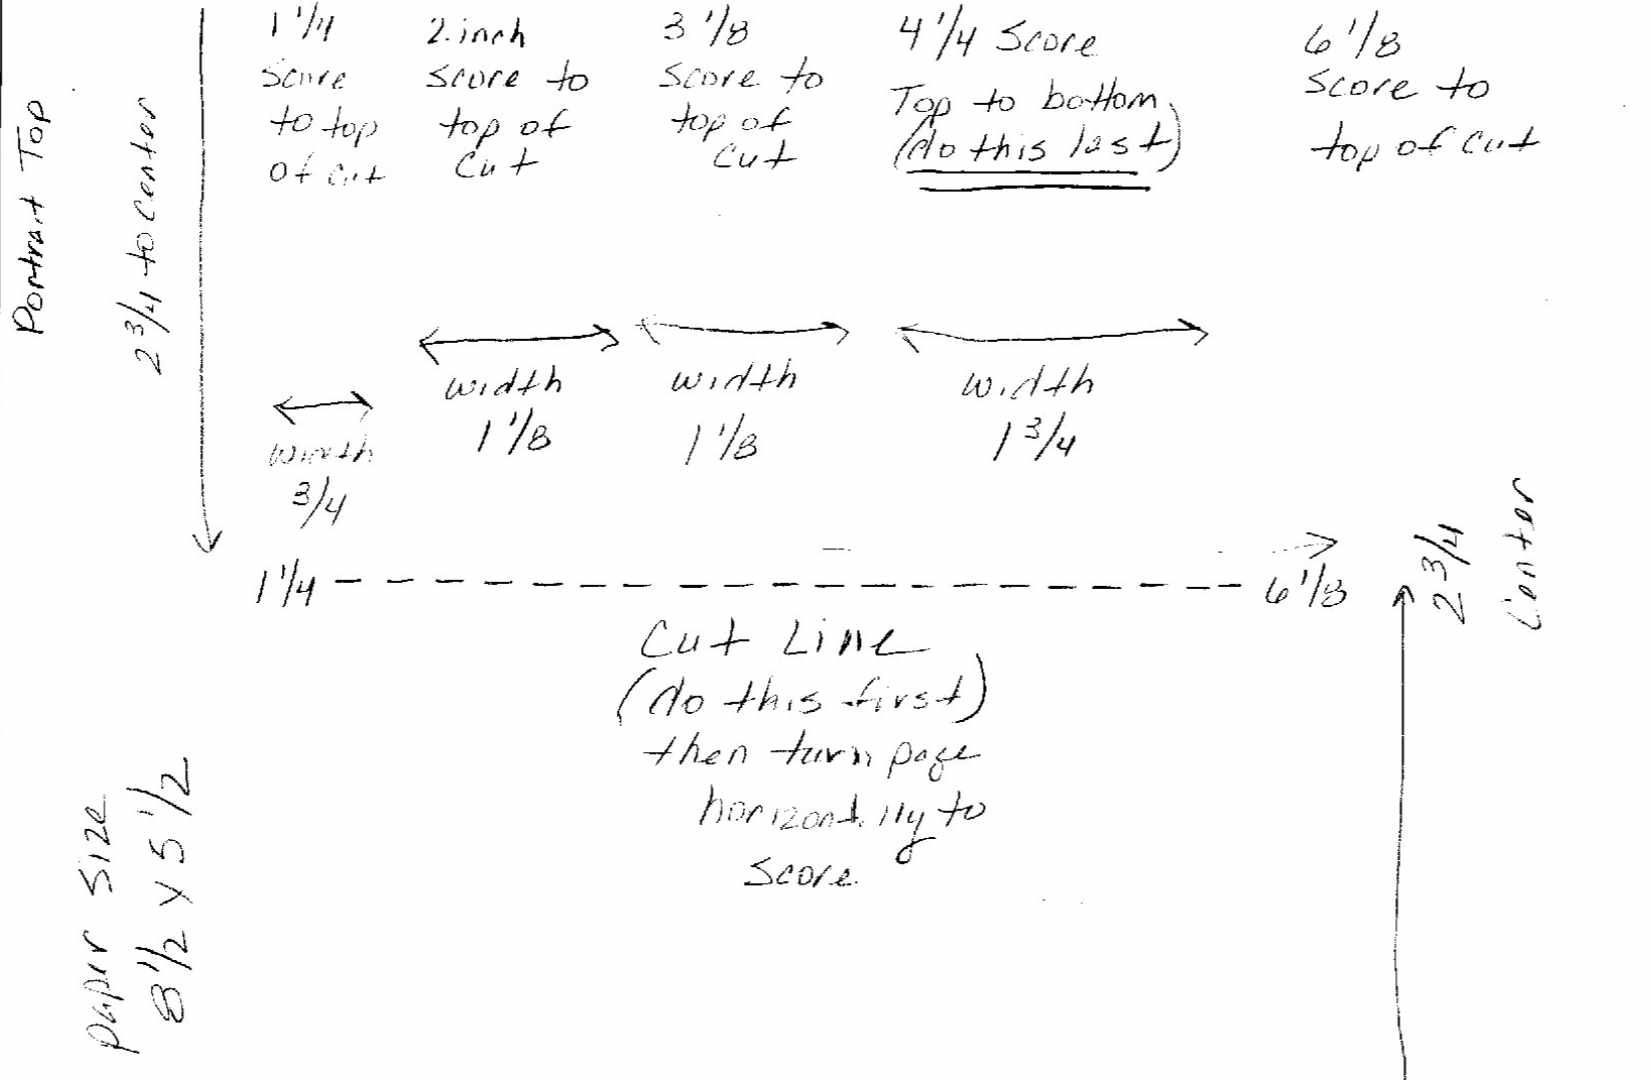
To start, you will need an 8 ½ x 11 piece of heavier weight cardstock. I used a kraft cardstock that is 100lb. The heavier your cardstock the better your card will fold and stand up. I have posted a picture of the template that I made with the measurements on it below so that you can also see the measurements and where to cut:
Side Step Fun Fold Instructions
Step 1 is to cut your cardstock in half on the long edge which will give you 2 pieces of 5 ½ x 8 ½ cardstock.
For the next step, you will need a slide trimmer like the Tim Holtz Precision Trimmer & Scorer or the Spellbinders Trimmer. These allow you to slide your paper and see the measurements on the clear guide.
Step 2 you will put your paper into a slide trimmer with a portrait orientation and position it at the center of the 5 ½ inch side so the sliding blade will be at 2 ¾ inches which is the center point.
Step 3 position the sliding blade so that it is 1 ¼ inches from the top edge of the paper. You may push the blade into the paper and begin to cut from 1 ¼ inches down to 6 1/8 inches. This will give you a slit cut into the center point of the paper. NOTE: that cut line will not be even at the top and bottom and that is OK.
Step 4 remove paper from the trimmer and swap out the cutting blade or get out a scoring board if you have one.
Step 5 place the paper on the scoring board so that the cut line is horizontal.
Step 6 you will score from the top of the paper down to the cut line only at the following measurements on your score board: 1 ¼ inch, 2 inch, 3 1/8 and 6 1/8. Note: if you choose to score from the center cut line downward, it will orient your steps on the right side of the card instead of the left.
Step 7 leaving your paper in the horizontal position on your score board, you will now score from the top of the paper to the bottom at the 4 ¼ inch measurement. This will give you the top fold for the right side of your card.
Step 8 reinforce your scoring with a bone folder.
Step 9 you can now fold the left-hand side starting with the first score line 1 ¼ which will be a mountain fold. 2-inch score line will be a valley fold. 3 1/8 inch will be a mountain fold. 4 ¼ will be a valley fold and finally the 6 1/8 score line will be a mountain fold.
Now you’re ready to stamp, color and decorate your stair step fun fold.
For my card, I stamped all of the images from Dare 2B Artzy’s Beach Life stamp set. A few of them I actually stamped a couple of times because I couldn’t decide on a color scheme for my card.

Once colored, I cut out all of the images using the coordinating dies.
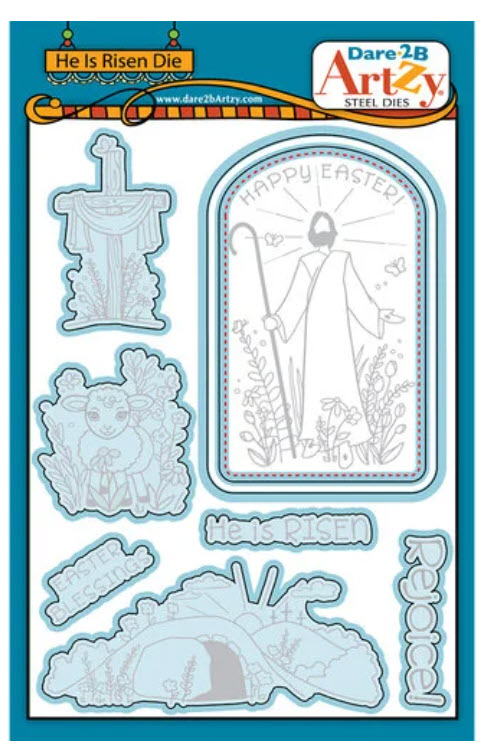
I also used a die that comes with the He is Risen set. A few of Dare 2B Artzy’s newer stamps are now available on Scrapbook.com. I ordered the He is Risen set from them because I liked the pair of arched dies that the set has to cut out the image of Jesus. I thought they would be useful for other things such as tags or bookmarks. I am unsure if the version of the die set that Cindy has in the online shop has the same die but I will add links for both sets in my links at the end of the post.
I cut the largest arch die using the pink polka dot paper called Beach Life from the Coastal Getaway’s paper collection.
The smaller arch was cut from Neenah 110lb Cardstock.
My next step was to make my side step fun fold card base look like beach sand. To do that, I used some Post-it notes to mask off the back side of the stairs and also the right side so I wouldn’t get any ink on them accidently.

I ink blended on some Brushed Corduroy and Vintage Photo Distress inks concentrating the heaviest amount of ink near the bottom of each outward facing stair. To add some extra interest, I used several colors of brown and tan alcohol markers and a white Gelly Roll pen to add dots to create texture or the look of sand on a beach.

I cut a second small arch from the kraft cardstock. For it, I used the Curved Slimline Border die and cut an arched piece to fit on the bottom to look like a hill of sand. I added texture with the same ink blending and alcohol ink markers.
Next, I cut an additional small arch from some light blue cardstock. I used the Wavy Slimline border die and cut a small edge to create the look of water along the edge of the beach. I added some depth by ink blending on some Peacock Feathers and some Prize Ribbon.
Using the same light blue cardstock, I cut another curvy piece of cardstock that was 5 ½ inches long to add water along the bottom of the entire card panel. I added a bit of depth by blending on the same Distress inks.

For the background on the small arch, I used the Clouds & Raindrops stencil to add a beautiful sunset to my background. To do that, I ink blended on some Squeezed Lemonade Distress Oxide ink along with some Saltwater Taffy Distress Oxide ink. The two colors blend beautifully and create a wonderful peach color that is perfect for creating sunset scenes. I used the Clouds and Raindrops stencil and some white pigment ink along with a ink pouncer to create a faint hint of clouds. Once the white pigment ink was added, I was careful not to touch it because the pigment ink takes a while to dry. I used my heat tool to set the pigment ink.
Finally, I was ready to assemble my card. I added the polka dot, Beach Life paper to the right in the tall section of the side step card.
The die cut waves piece was added next to cover the entire width of the card at the bottom.
I added the smaller arch with some dimensional foam to make it pop a bit. It also helped to set apart the two sections of water and it looks so dimensional which I love.

Next, I added in my stamped and colored images on the left side. I worked out the placement of the images before the background was finished by using some repositionable tape to cluster the images onto the different stair sections which then makes it easy to remember where everything will go on the finished card. The larger, colorful seashells were added in the back. I added the handbag from the Ciao Bella stamp set along with another seashell on the center step and finally in the front I added two seashells which are holding up a tasty glass of something (might be iced tea or might be Long Island Iced tea), along with a pair of sunglasses.

For the arched panel side, I added the beach umbrella with a bit of glue behind the arch of the sandy beach. I adhered the beach and umbrella to the ink blended sunset background with some liquid glue. The arched panel was added to the background with some dimensional foam. Finally, the beach chair was added with some dimensional foam as well.
This fun fold card has a lot going on, so I decided to have my sentiment float above the stair steps. I stamped the Relax & Unwind sentiment from the Beach Life stamp set in black ink and stamped a second time with embossing ink then heat embossed with clear embossing powder. I cut it out with the coordinating die and cut a second one to add a bit of dimension.
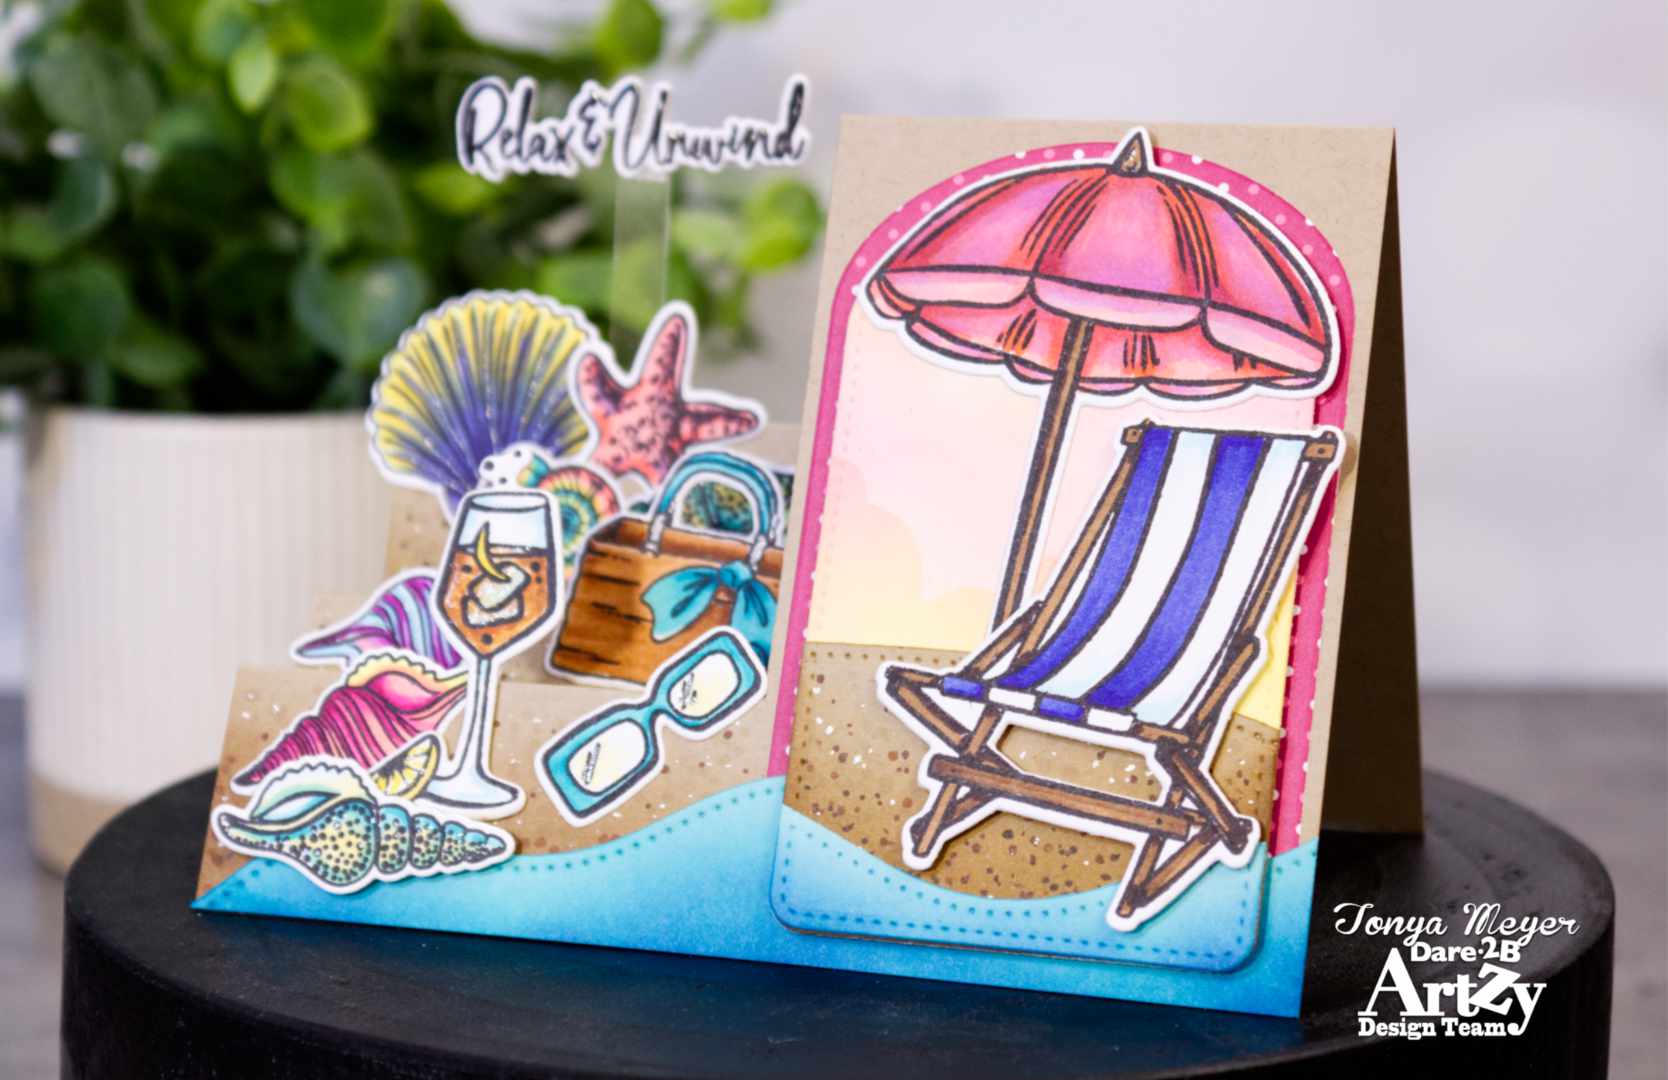
Next, I cut a strip of heavyweight acetate that was ¼ inch wide by 2 ½ inches long. I added a small piece of Score-tape to the front and placed the sentiment on it. I added a second piece of Scor-tape to the bottom on the front and then adhered it at the center of the very back stair. It gives the illusion that the sentiment is floating above the beach scene.
I know this post is a little longer, but I wanted to share the directions for the side step fun fold card as I think it is perfect for scene cards.

I hope you’ve enjoyed today’s card featuring the Beach Life stamp and Die set from Dare 2B Artzy.
As always, I will include a link below that contains all of the products used in today’s card below for your convenience.
Thank you so very much for stopping by!
Have a wonderful, crafty day!
Hugs,
Tonya

https://linkdeli.com/widget.js?id=f5e8378456858c916708

