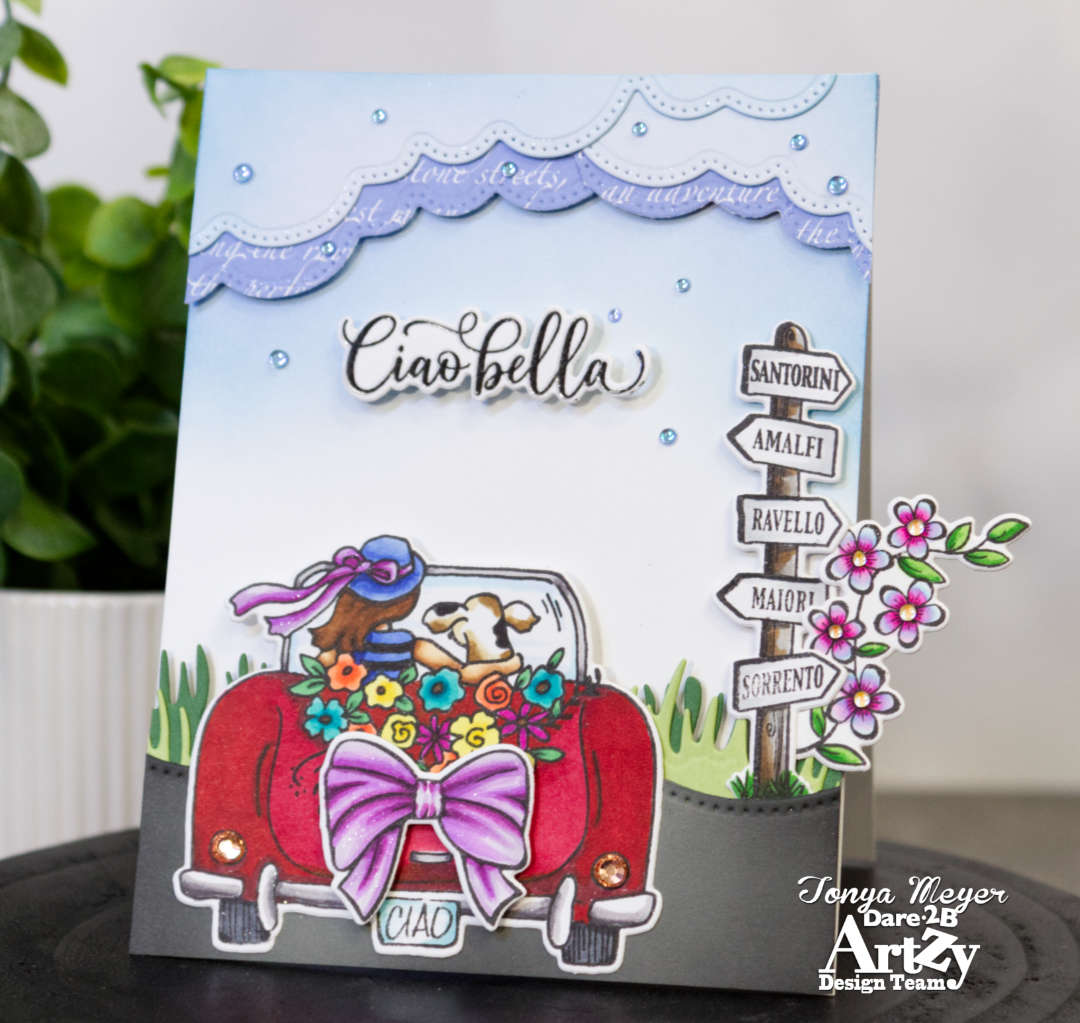
Ciao Bella
Hello and thank you for stopping by!
Today I am playing with another new Dare 2B Artzy stamp from the new Coastal Getaway Collection.
I cannot say enough good things about this release and the stamp set I created todays card with is my absolute favorite in in this release. My card features the Ciao Bella stamp and coordinating die set. I also pulled in a couple of stamps from the new Santorini Dreams stamp set and coordinating die.
When I first saw the Ciao Bella stamp set, I was so very excited to play with the fun, convertable car with the girl driving alongside her dog in the passenger seat. It is such a cute stamp set!

My card today features that stamp set and I have set them on a grand adventure in their little red car.
To start, I stamped and colored my images onto Neenah 110lb Classic Crest Solar White Cardstock using my Sketchmarker Brush Pro alcohol markers.
I die cut all of the images using my Anna Griffin Empress die cutting machine and set them aside while I worked on building my scene.
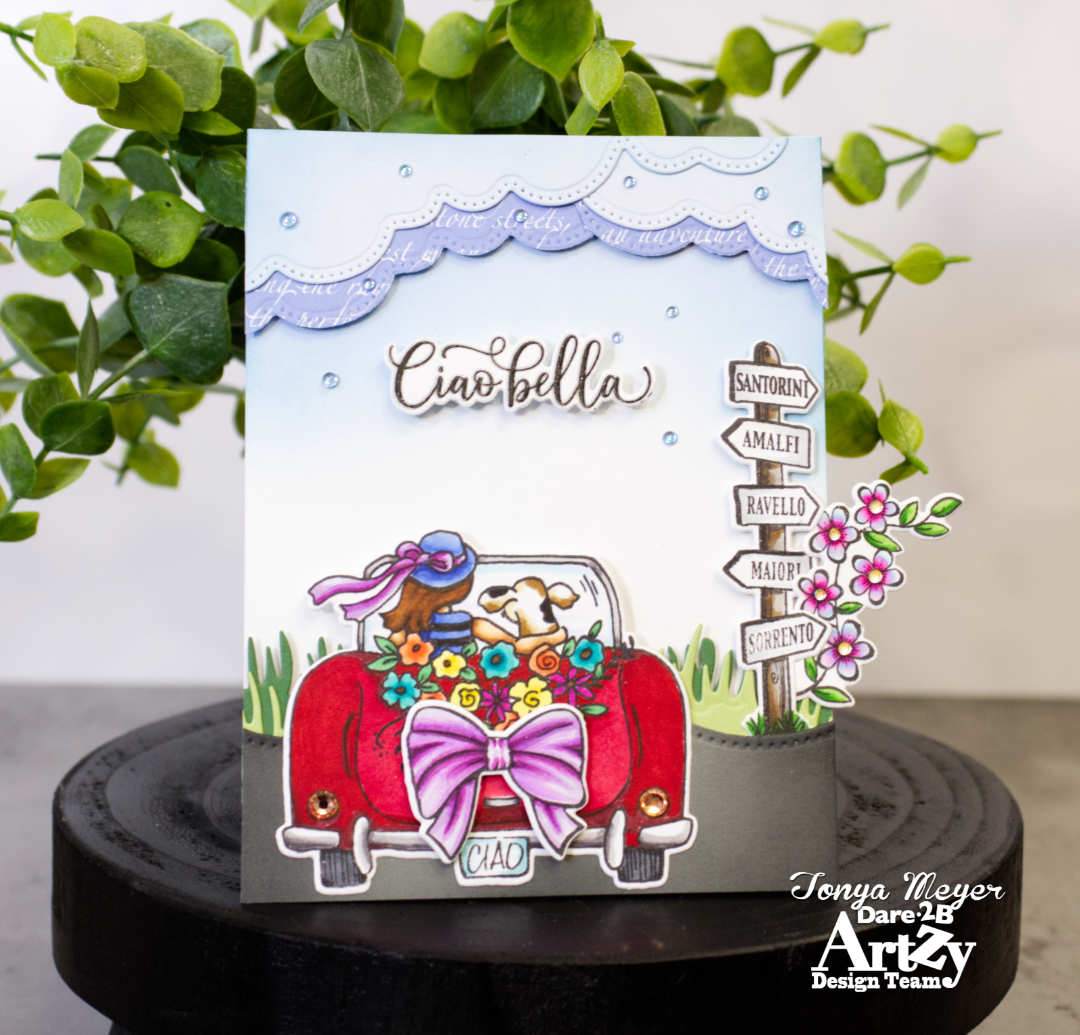
I cut two layers of clouds using the Dare 2B Artzy Slimline Land & Clouds Border Dies. The first layer was cut from some light blue cardstock and the second layer was cut from the Santorini Dreams paper. The 12×12 paper has the beautiful sail boat and images of Santorini and other ocean related items on the back of it and on the other side it has this beautiful script pattern on it.
I cut the exact same shape of clouds with the patterned paper and offset it from my original clouds by about 1/4 inch to give it more dimension and interest. Cutting the paper at an angle with the Slimline Cloud Border die gives me multiple layers to work with as well.
Next, I cut a piece of Neenah 110lb paper to 4 1/4 x 5 1/2 and ink blended on Prize Ribbon Distress ink and Broken China ink at the top. I blended down about 1/3 of the card panel so that there would be more blue in the background against my clouds.
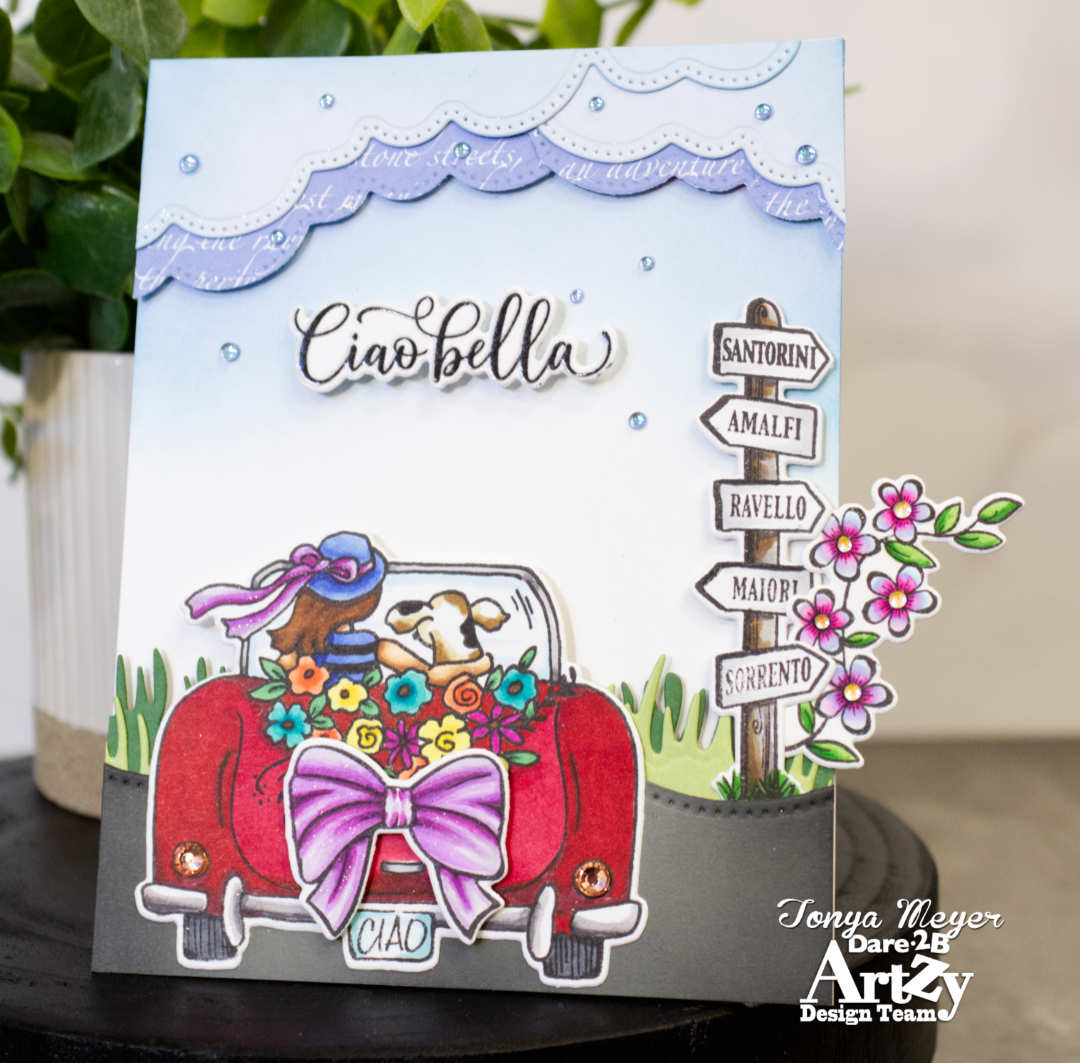
Using the Slimline Land die from Dare 2B Artzy, I cut some grass from two different shades of green. I layered them together with some liquid glue placing the darker green shade towards the back. I cut the glued together grass down to be 4 1/4 inches wide by about 1 1/2 inches tall.
I needed to create a road for my car to travel on so I used the Wavy Slimline Border die and cut a piece of grey cardstock. I also cut it so that it would be 4 1/4 inches wide by about 1 1/4 inches tall. I chose a section with a hill in the space that the car would cover so that either side would look like the rode was curving into the distance. I added a bit of Black Soot Distress ink to the sides of the grey cardstock to give it some more depth.
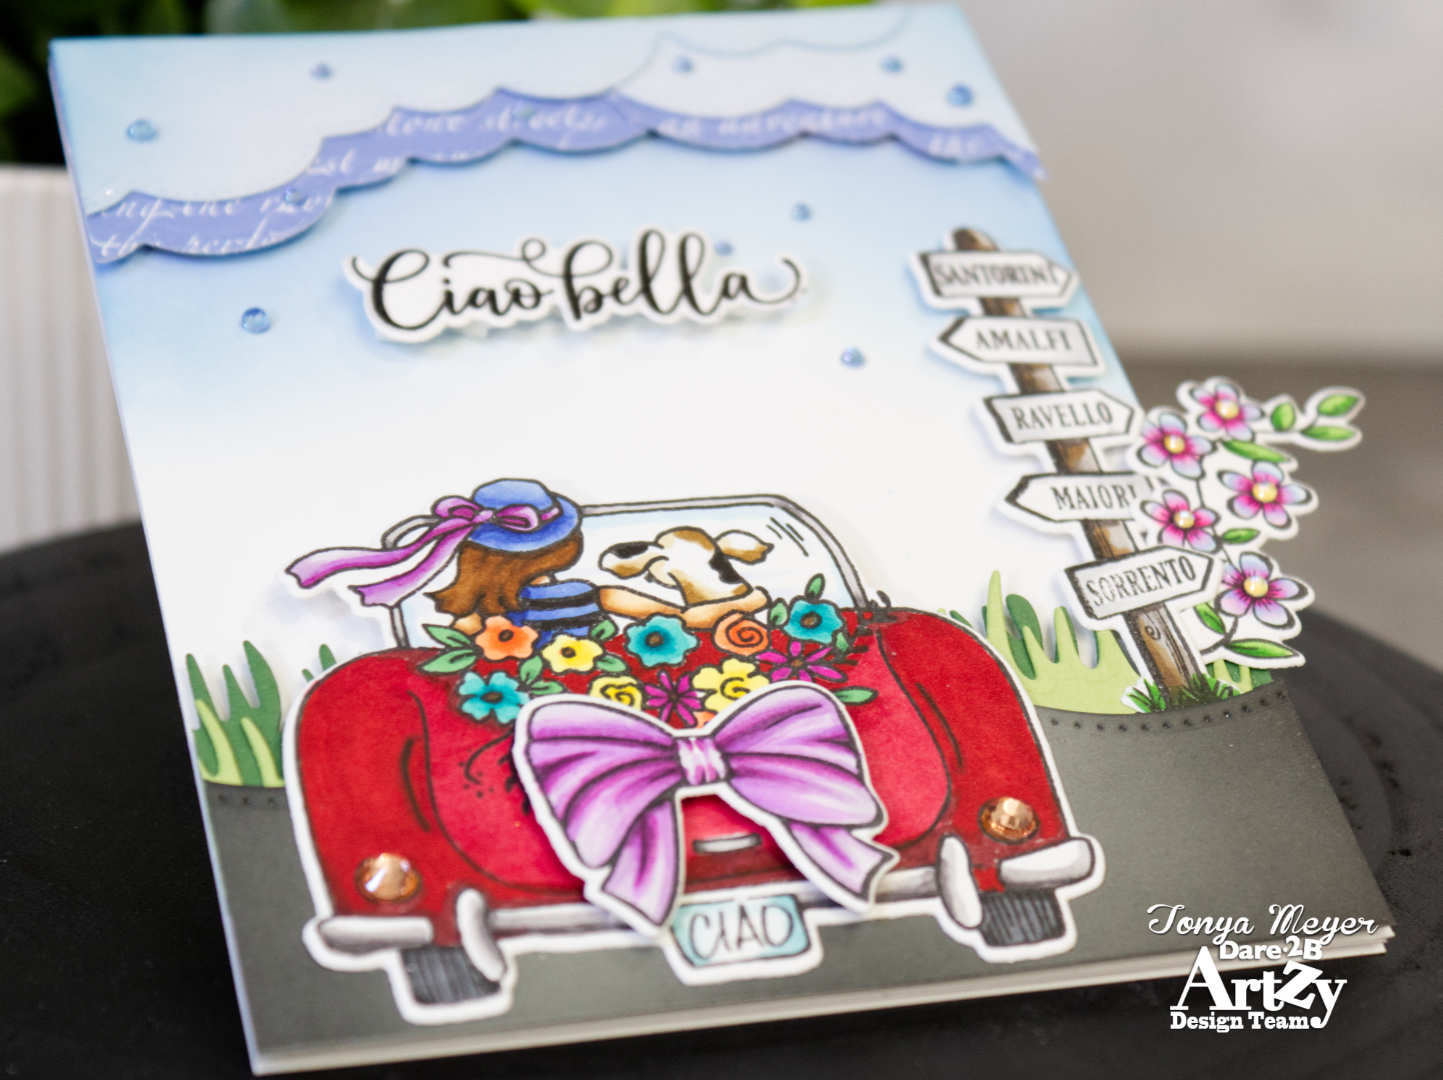
I glued the die cut grass layers behind the grey cardstock leaving a small area to the right near the top unglued which was the perfect spot to tuck in the sign post with the various cities on it from the Santorni Dreams stamp set. I added a touch of glue to the sign before tucking it in between the layers.
I also colored the flower vine from the same set and tucked in in behind the sign post. It hangs off my card quite a bit, but I was fine with that. I can put my card into a larger envelope to send or hand deliver to the recipient.
Next, I added some dimensional foam behind the grass and the sign post and added them to my ink blended panel at the bottom. I also added some dimensional foam to the clouds and added them to the top of the pane over the ink blending.
I added the car on top of the grey cardstock, gluing the bottom half of the car directly to the cardstock. At the top, I did add a couple of pieces of dimensional foam to make it level with the rest of the elements. I popped up the purple bow with dimensional foam on the back of the car. I really love this little detail for this stamp set.
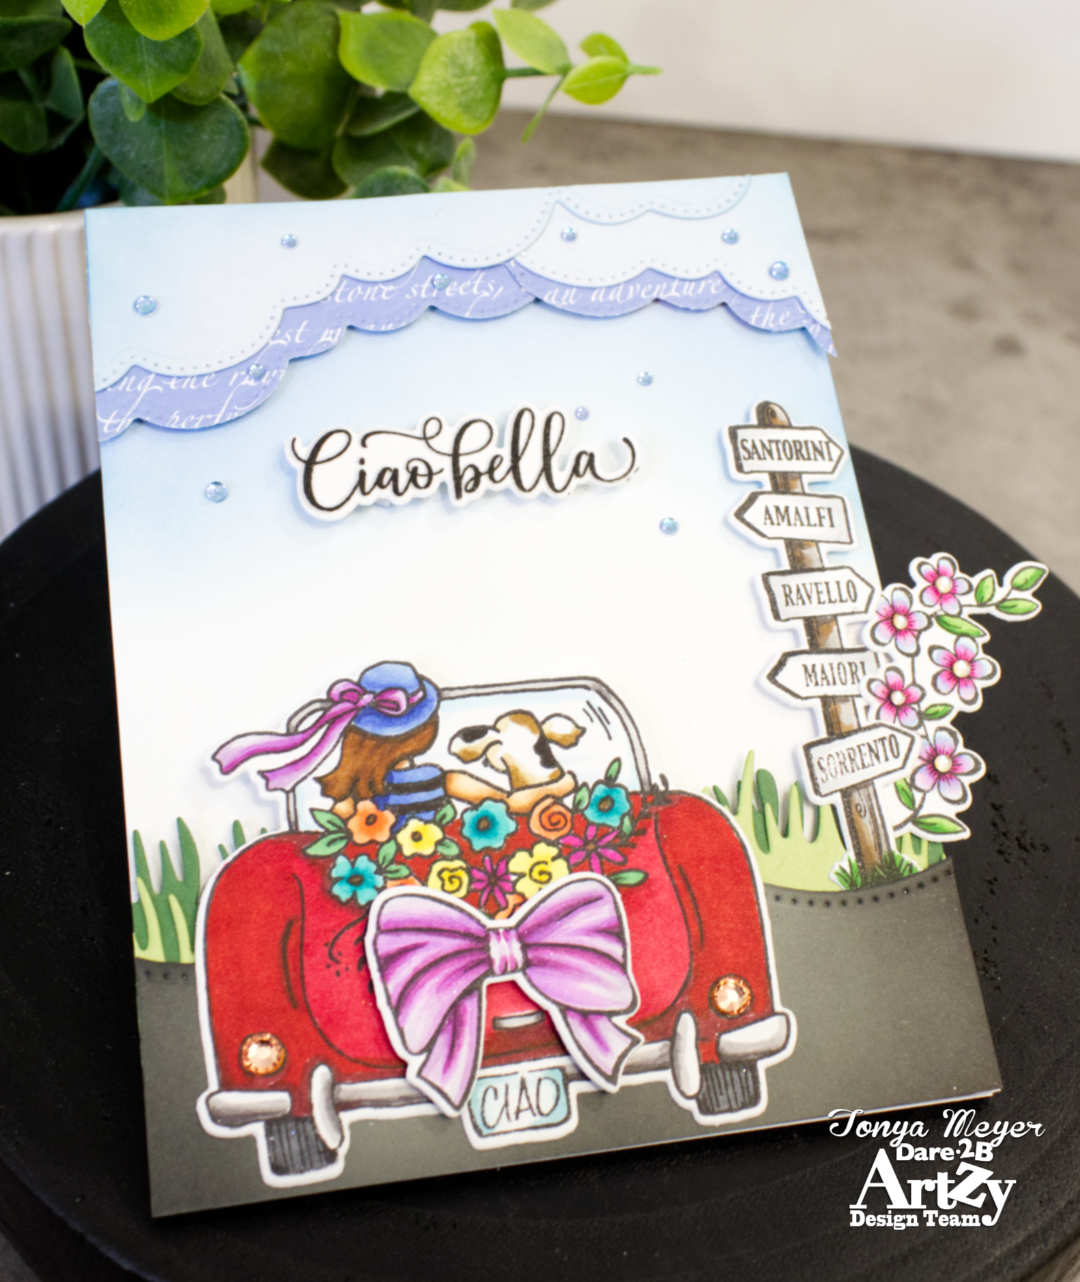
Finally, I stamped the Ciao Bella sentiment with Dare 2B Artzy Totally Black ink and then restamped it with embossing ink and heat set it with clear embossing powder to give it a nice shine. I cut out my sentiment using the coordinating die from the Ciao Bella set and added it to the ink blended panel with dimensional foam.
As a finishing touch, I glued on some small blue iridescent nail gems on the clouds and around the ink blending. It sort of looks like rain drops falling from the sky but I thought they were pretty. I also added some small yellow nail gems to the center of the flowers on the sign post.
Finally, I added some faceted orange gems to the tail lights on the car and some Spectrum Noir clear sparkle pen details to the edges of the clouds, the ribbon on the hat and the bow on the back of the car.
That finishes up my card for today. I hope you love the Ciao Bella stamp set and the whole Coastal Getaway release as much as I do and that you’ve found some inspiration today for your own projects.
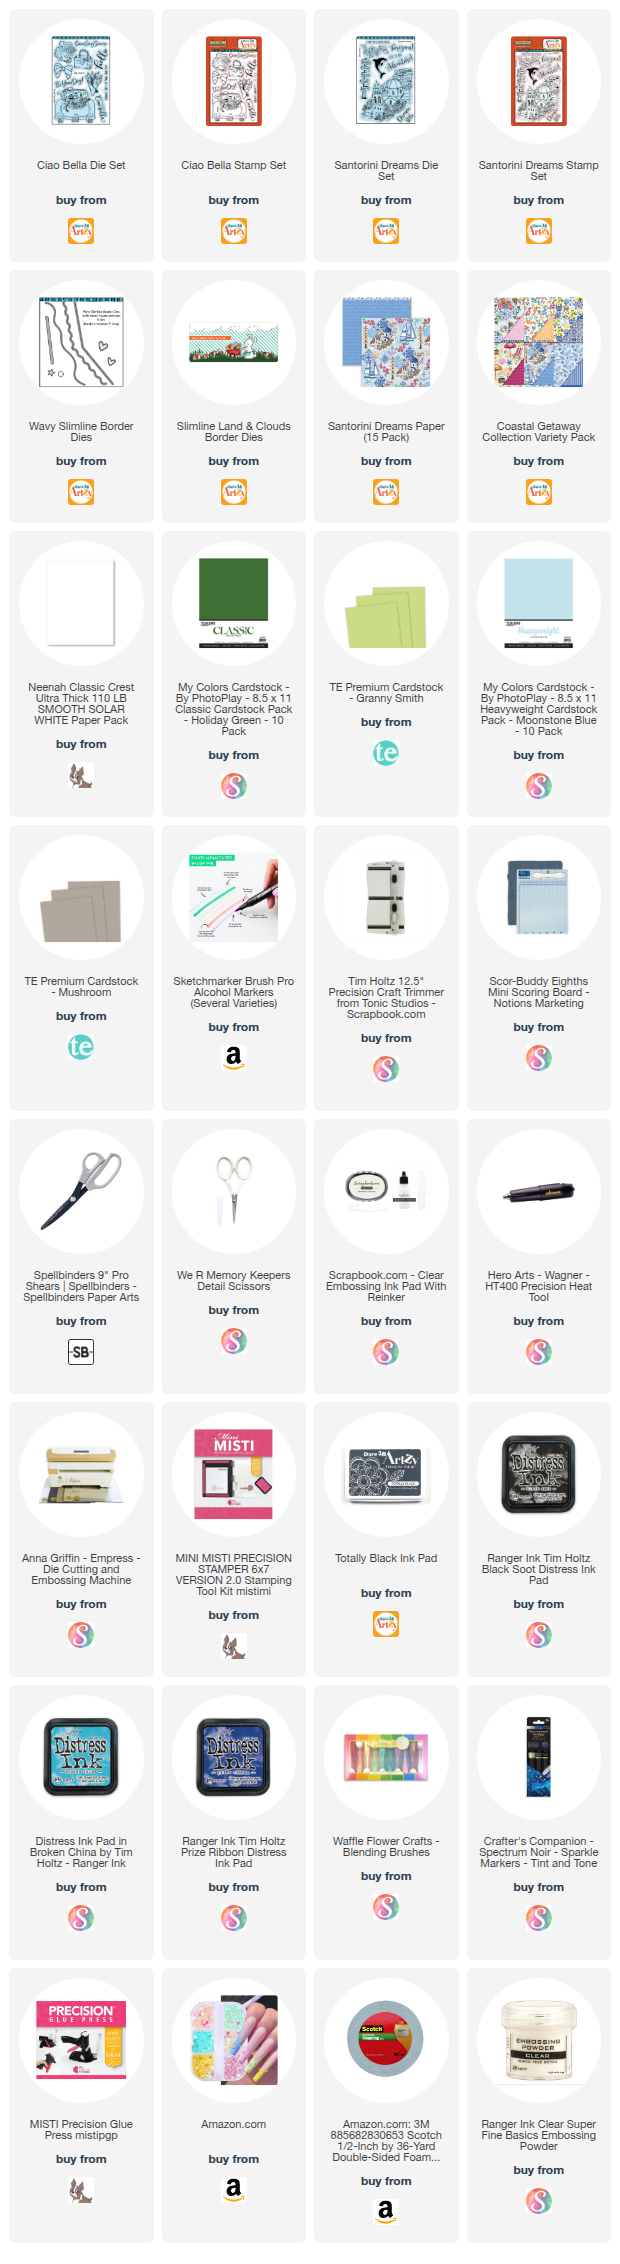
As always I have linked all of the products used in today’s card below for your convenience.
Thank you so very much for stopping by!
Hugs,
Tonya
https://linkdeli.com/widget.js?id=f5e8378456858c916708

