Thankful for You Flower Wreath
Hello Artzy friends! Thanks for stopping by today.
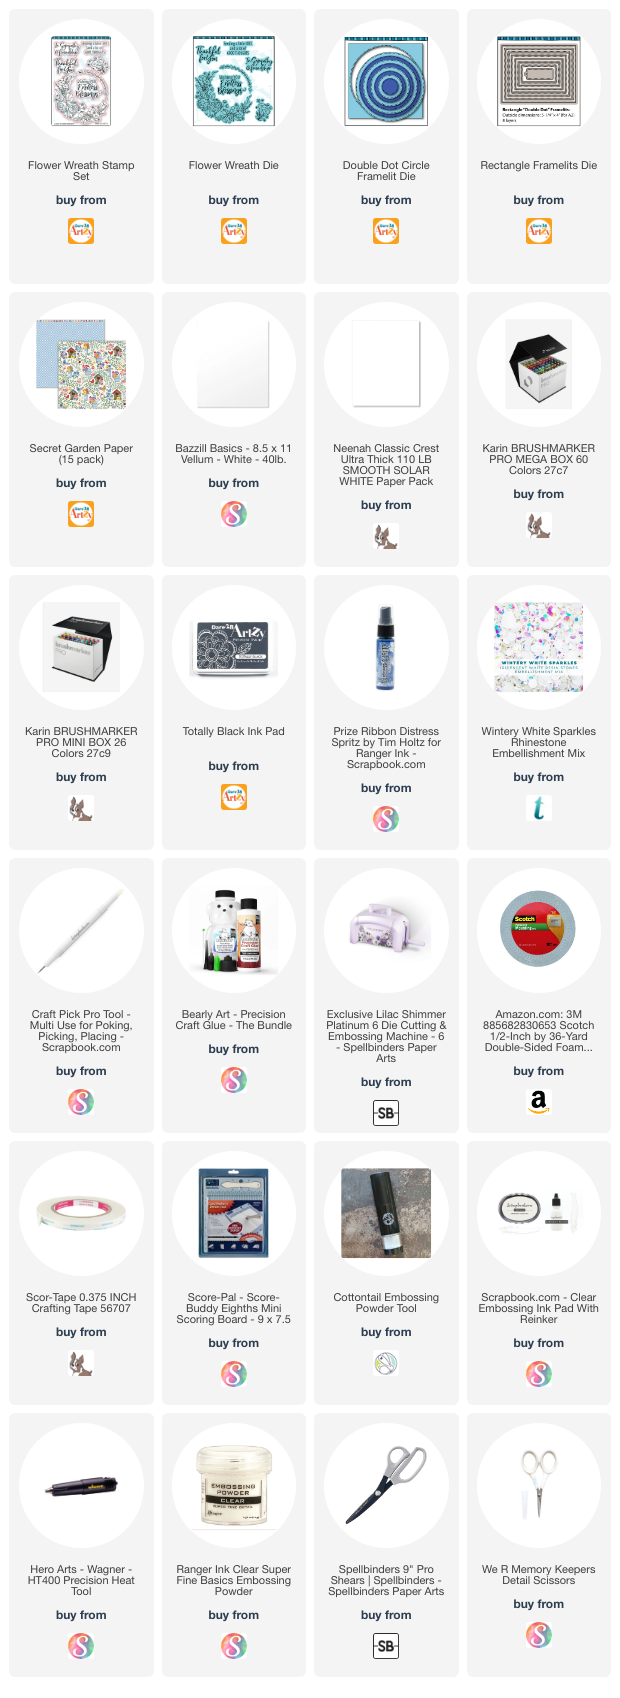
I have a new card for Dare 2B Artzy today. This one features the Flower Wreath stamp set. This stamp set was the July Clubhouse Set and I have not had a chance to play with it. I love the beautiful floral swag. It’s perfect for creating shaped cards and wreaths.
For my card today I decided to get out my Karin Brush Markers. I haven’t played with them for a long, long time and it was nice to break them out. They are water-based markers so they lend themselves to watercolor techniques.
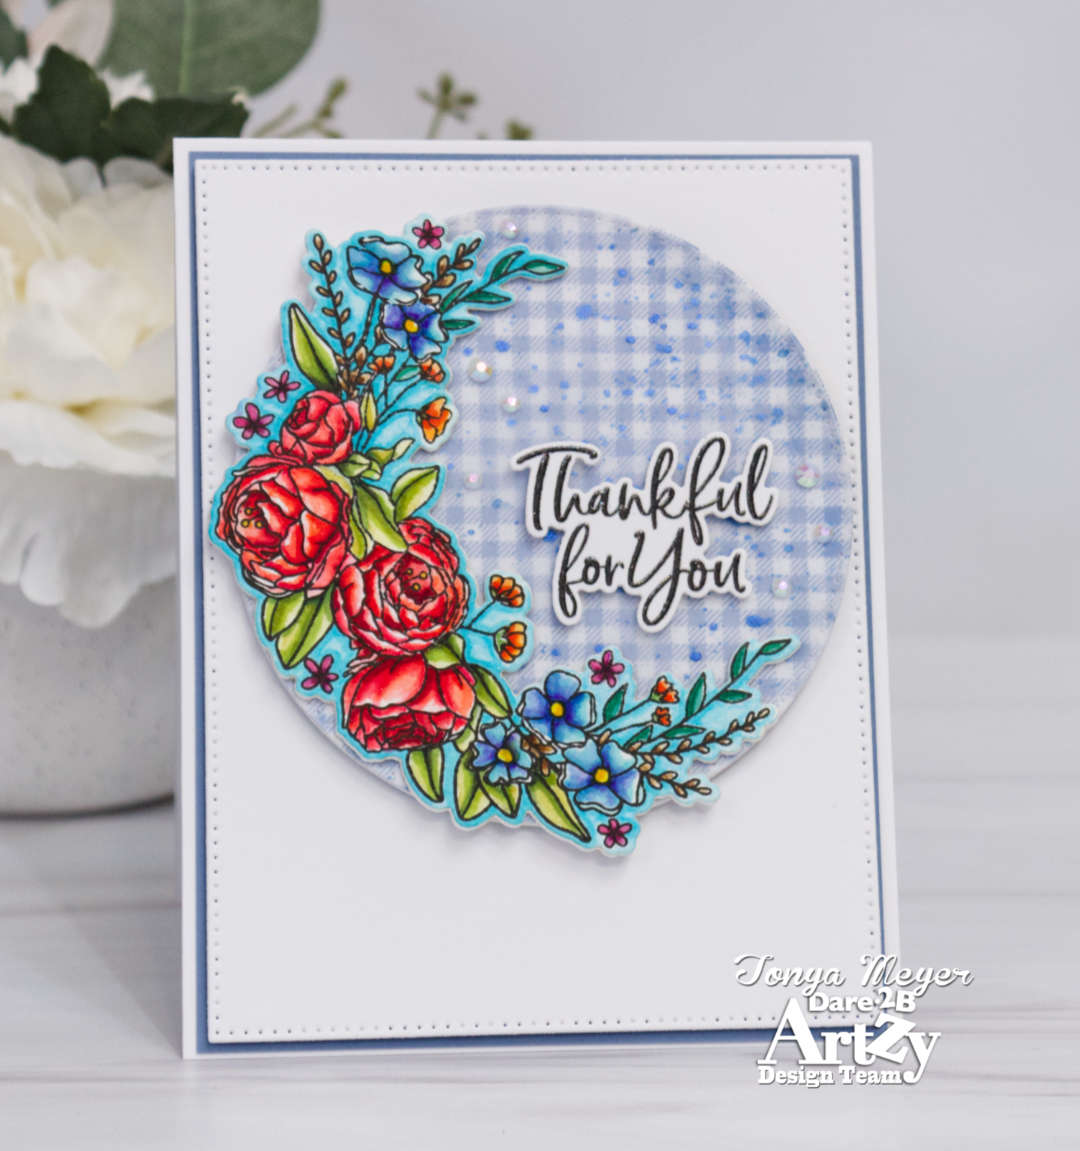
I stamped the large floral swag using Dare 2B Artzy’s Totally Black ink since it’s not only safe for Alcohol Markers but Water based markers as well. I stamped it onto some Fabriano Artistico Watercolor Paper.
There’s a couple of different ways to color with Karin Brush markers. I used a bit of both in coloring my image. There’s direct to paper where you color a thin area and take a small amount of water to draw the color out into the paper. Alternatively, you can scribble onto a glass mat or pallet and pull the color with a bit of water and a paint brush.

For the floral swag, I used the latter method of scribbling onto my glass mat and then picking up the color with a damp paint brush. This allows me to start light and build up the color. Since I’m working with just a small amount of water it helps keep the color from bleeding over into other areas of the image.
I let the first layer dry completely before adding additional layers of color.
Once all of the flowers and leaves were colored and were completely dry. I used a light blue Karin Brush marker and went around all of the areas of the image with a fine line direct to my watercolor paper. Next, I scribbled the same color on my glass mat and then used my damp paint brush and filled in the rest of the white areas around all of the flowers with the light blue color.
After the entire image was colored, I used the coordinating Flower Wreath die and cut out the image. I cut 2 additional blanks to glue behind the colored image. I layered them together with Bearly Arts liquid glue. I set the colored image aside and worked on the rest of my card.
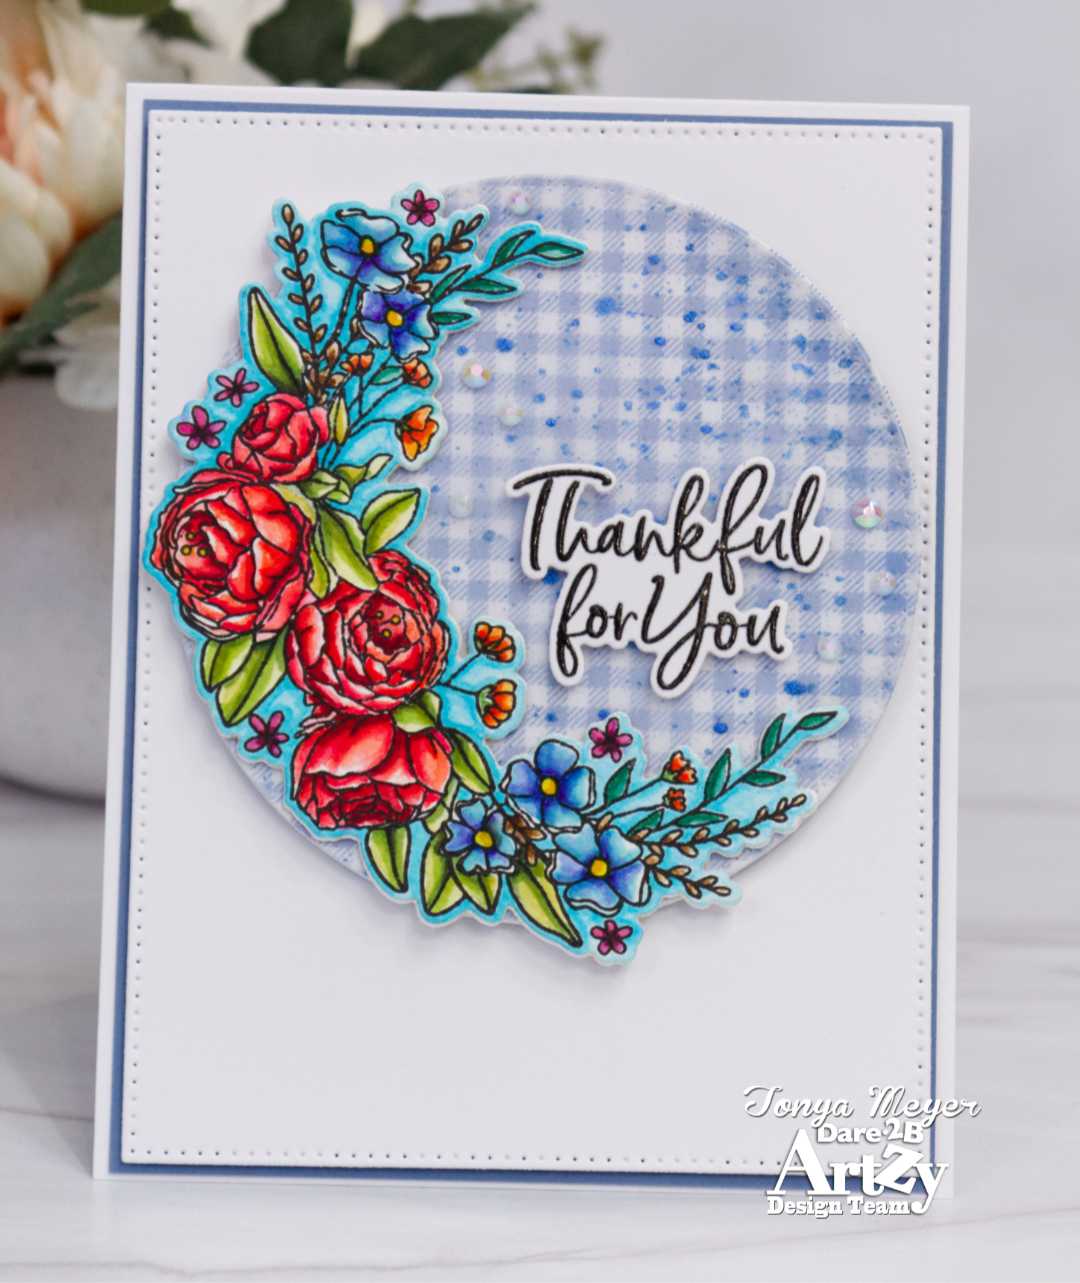
First, I used the 2nd largest Double Dot Circle die which measures about 3 ¾ inches wide. I cut 3 circles; one from Neenah 110lb White Cardstock, another from the blue Gingham pattern paper from the Secret Garden paper pack and finally a piece of vellum.
I adhered the blue Gingham paper to the circle cut from the Neenah 110lb cardstock and set it aside.
For the circle I cut from vellum; I put it into my box I used to spritz and splatter my projects. I grabbed some Prize Ribbon Distress Spritz and added a couple of sprays to the vellum. It has such a beautiful shimmer to it. I didn’t want to get too much because the vellum will roll up a bit if it gets too wet. I set the vellum aside and let it dry fully before moving forward.

While I was waiting for it to dry, I used an anti-static powder tool and prepped a scrap piece of Neena 110lb cardstock. I stamped the sentiment Thankful for You from the Floral Wreath stamp set using the Totally Black ink from Dare 2B Artzy. I stamped it a couple of times to get a good impression. I cleaned off the sentiment and stamped it again with clear embossing ink. Once again, I stamped it a couple of times to make sure the sentiment was fully covered with the embossing ink. Once it looked good, I sprinkled on clear embossing powder and heat set it. I used the coordinating die to cut out the sentiment. It is such a time saver to have a coordinating die to cut out my sentiments.
Since the Prize Ribbon Distress Spritz had dried, I was able to add some small pieces of score tape on the back side of the vellum and adhere it to the blue Gingham paper circle.
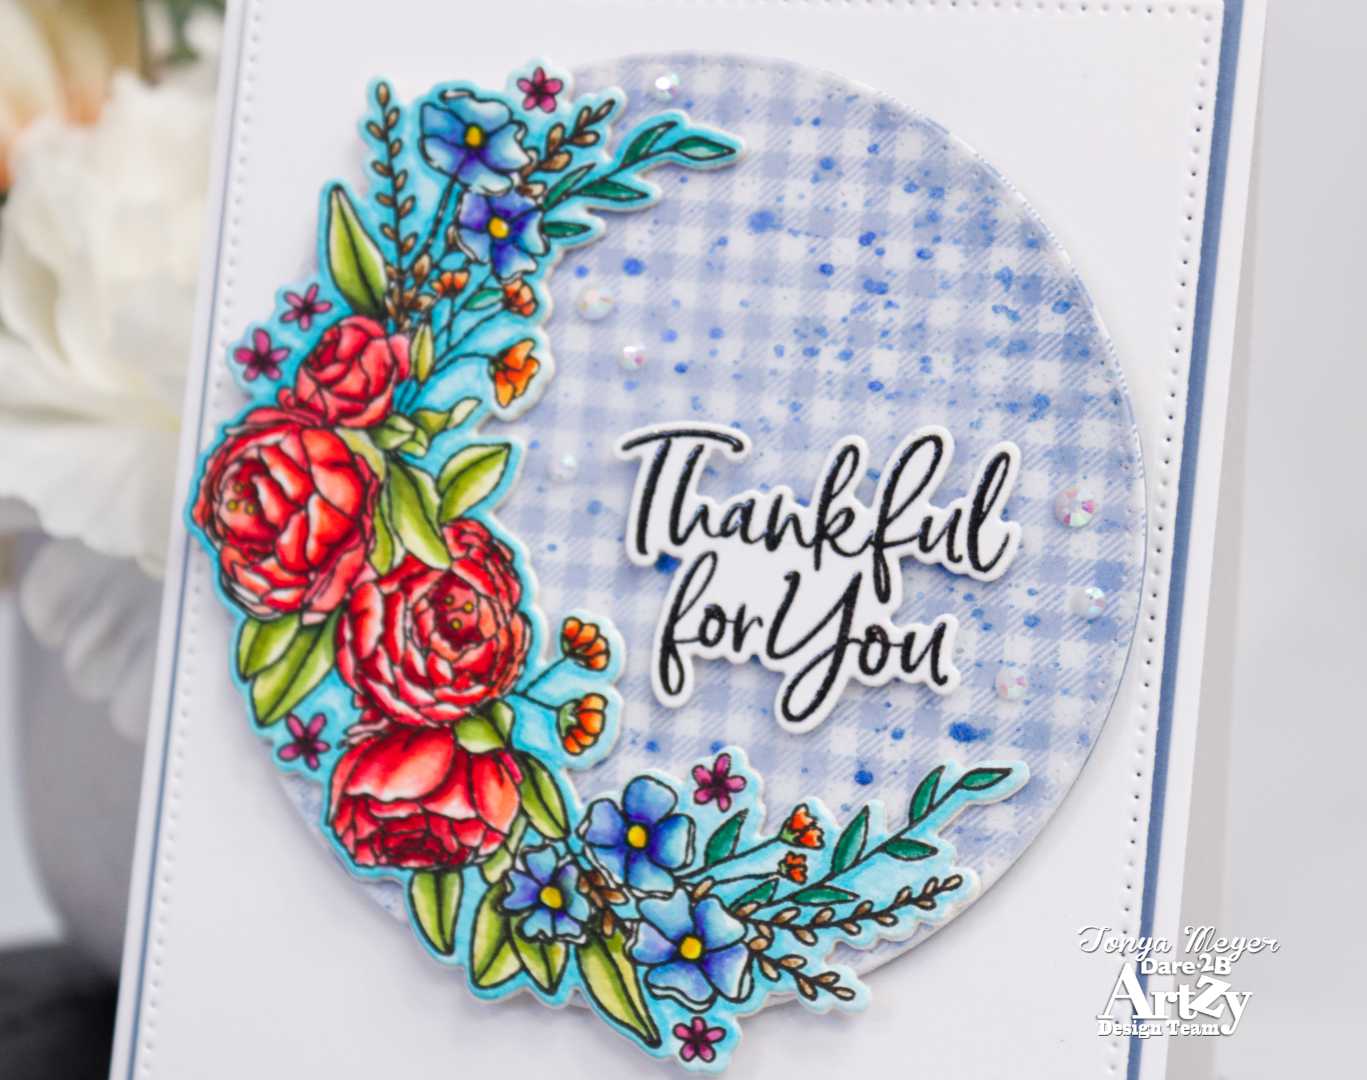
A little bit of liquid glue was added to the back of the floral image and then adhered to the front of the vellum.
I added a bit of dimensional foam to the die cut, Thankful for You sentiment and added it next to the floral image. I had some bigger splatters from the Distress Spritz and the sentiment was the perfect thing to hide the larger blobs.
Next, I used the largest Rectangle Framelet Die and cut a piece of Neenah 110lb cardstock.
Using my trimmer, I cut a piece of lighter blue cardstock from my stash and layered the Rectangle Framelet on top of it with some dimensional foam, leaving a 1/16-inch border all the way around it. I added this to a top folding A2 size card base cut from 110lb Neenah Solar White cardstock.
I added my floral wreath circle image onto the white cardstock with some additional dimensional foam. I love all of the dimension in this card.

For a finishing touch, I added some iridescent white gems to the vellum around the flower.
That finished up my Flower Wreath card from Dare 2B Artzy.
Thank you so very much for stopping by. I hope you enjoyed today’s card and are inspired to create something yourself with this beautiful Flower Wreath stamp and die set. If you like this stamp set, please be sure to check out the monthly Stamp & Die Club over at Dare 2B Artzy here: https://dare2bartzy.com/pages/artzy-clubhouse
Hugs,
Tonya
https://linkdeli.com/widget.js?id=f5e8378456858c916708

