All About Layering 2 with Altenew Crocus Flowers
Hello and welcome! I’m back today with another project from my classes on the Altenew Educator Certification Program.
My second class, All About Layering 2 went into more detail about using layering stamps and the various ways in which you can layer the stamps to create different looks whether through use of colors or turning the stamp in a bit of a different direction.
I really enjoyed these classes as it really gives you a chance to see how a variety of Altenew stamps come together to form beautiful flowers and arrangements for your cards.
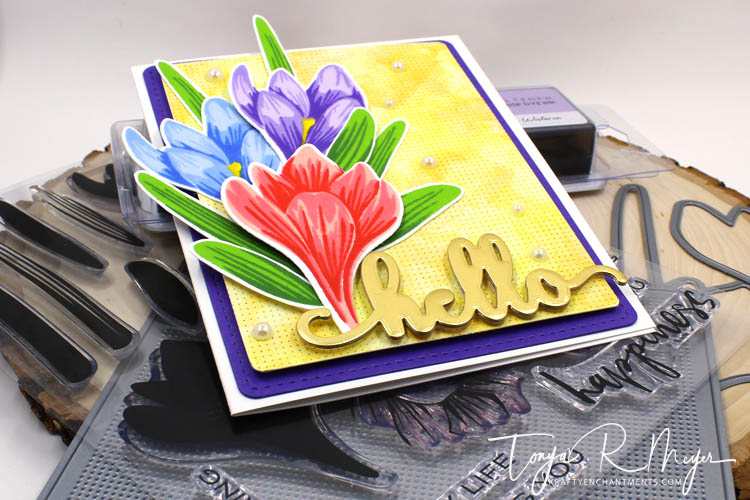
For my project I chose the Build-A-Flower Crocus set which is one of the newer sets at Altenew. I really like these stamps because they make these beautiful Crocus flowers when they’re all layered together. They remind me of the Crocus that bloom in my mom’s flower garden in the spring. They’re so beautiful. It’s too bad that they don’t last longer and into the summer.

To start my project I stamped and layered many different colors together trying out different colors of Crocus flowers to see which I liked best. I really didn’t have any idea of the range of colors that Crocus flowers come in. I’ve only seen the purple and white flowers, but I wanted to do some fun bold colors. I stamped a bunch of the flowers using the various Altenew inks. Finally I settled on the Cool Summer Night, Tea Party and Enchanted Garden sets of inks.
I found that this particular stamp set was amazingly easy to layer. All of the flowers in this set use a 3-step stamping process. There’s a nice valley to line up to create perfectly stamped images. It is a great set for all levels of stampers. The ease of lining of this stamp set made it easy to try out the variety of colors. Of course, you can also choose to just stamp a couple of layers of the stamp set for some varying looks. I really love the full detail you get from using all layers of the stamp.

Once I had settled on the final flower colors, I stamped some of the different leaves. Again they were very easy to line up and stamp these images as it’s just a 2-step stamping process for them. I stamped a bunch of the different sizes as I was unsure how many I’d need for my card. Always good to have extras just in case and I can save them for another card.
With everything stamped, I was ready to use the coordinating Crocus flower dies to cut the images out. I love that you can die cut the final layered images and have a complete flower ready to put on a project.
Next I was on to making my card front. I hadn’t played with my Altenew water colors in a while so I pulled them out. I tested out several colors to see what would look best as a background against my finished flowers. I actually took the time to make a swatch of all the colors so I’d have it for reference in the future. However the Altenew water color pans do have the color names listed on the bottom of them which is really helpful.
I ended up liking the yellows best, which is surprising because yellow is definitely not one of my go-to colors. I decided that yellow would pop against the flower colors I’d chosen. I really liked the Fresh Lemon and Warm Sunshine from the yellow shades.
I cut a piece of Canson 140lb watercolor paper down so that I could use the Altenew Cross Stitch Canvas die to cut out the watercolor paper.
Once my background was cut I was ready to watercolor it. Using a water brush, I created a clean puddle of water on my Altenew pallet and made sure my water brush was wet and picked up some of the color and began dropping it and spreading it around on the paper. I wanted to create a soft background with some darker areas. Originally I had planned to only add water color to a small portion of the background, but ended up coloring the entire panel of water color paper. Once it was dry I went back in and added a bit of gold shimmer to the background using some Gansai Tambi metallic water colors. I think that really helped add a little bit of reflective shimmer to the background (however a bit hard to pick up in photos) – it’s beautiful in person.
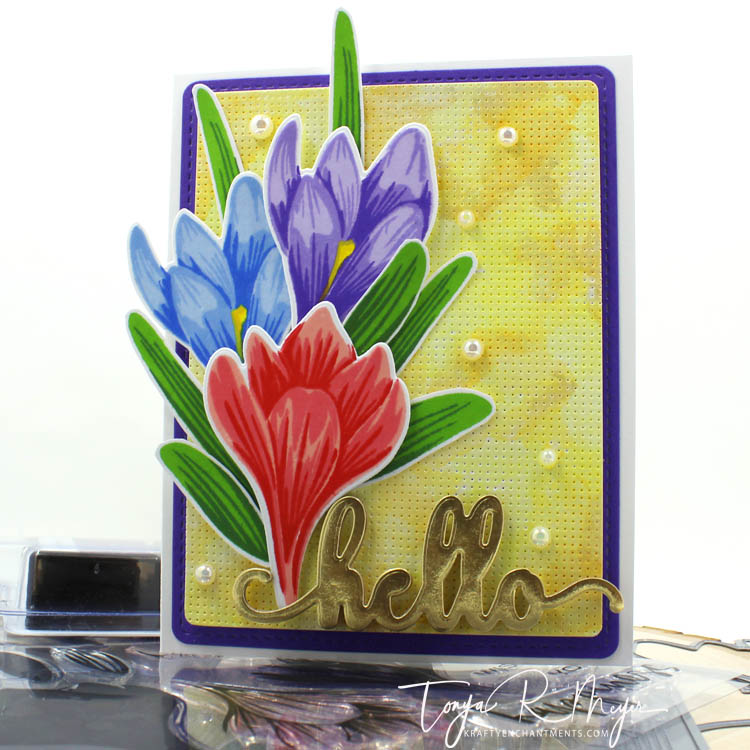
I rounded the corners of the background panel with a corner punch. I added the finished water color panel to a stitched purple cardstock panel.
Finally I was ready to arrange my crocus flowers on the background. I placed them off to the left and adhered them to the card front with so that my water colored background could somewhat been seen.
I die cut a simple hello sentiment from several pieces of gold cardstock and glued them together to create a little depth to my sentiment. I added it just below the flowers at the bottom of my card.

For a finishing touch I added several pearl accents to the panel with some glue. I realized after I added the pearls that this was the second card I used the pearls on, LOL! I think that their shimmer is so pretty, must be what I’m drawn to.
I set the panel aside to dry while a cut some Neenah Solar White 110lb cardstock to A2 size for my card base.
That finishes my 2nd Altenew Educator Certification Program class, All About Layering 2. I really enjoyed the additional instruction on layering. I think it’s very helpful to see all the layering options for different stamps, but also learning the focal points to reference in order to get a perfect match and line up with the different layers. All the practice is very helpful!
Did you know that you don’t have to be in the Altenew Educator Program to enjoy and learn from these classes? Altenew classes are available to everyone of all skills levels! Right now the All About Layering 1, 2 and 3 classes are all FREE!! I highly recommend that you check out the many different classes that are available. It’s a great way to learn a new technique and have fun at the same time!!
Thanks so much for stopping by, I hope you’ve enjoyed today’s card.
Hugs
Tonya


Beautiful card, Tonya! Love the bold colours that you chose for your project.
Thank you for entering your gorgeous work to the AECP assignment gallery. Well done!
LikeLike
Thanks so much Erum! The stamps are a joy to work and create with which makes it fun!
LikeLike
FABULOUS work!! I am loving the striking color combo and background! Your details and styling are awesome, Tonya! Thanks so much for entering your beautiful work in Altenew AECP assignment Gallery. I love your write-up and descriptions! Please keep up with your excellent work!
LikeLike
Thank you so much for the kind words Virginia!
LikeLike